

In this article
You are standing in the driveway with a hole saw in one hand and a kayak you paid real money for sitting on the grass in front of you. You have walked around it three times with a Sharpie. Twenty minutes have gone by and you still have not made a mark.
Every kayak rigging thread has that same guy in it, which is exactly why the flush mount rod holder deserves more than a spec sheet: the tube costs pocket change, and the hole is forever. This guide covers what a flush mount actually does to your boat, whether you should drill at all, the picks that hold under load, how to install one so it never leaks, and what a season of salt does to cheap hardware.
What a Flush Mount Rod Holder Actually Does to Your Kayak
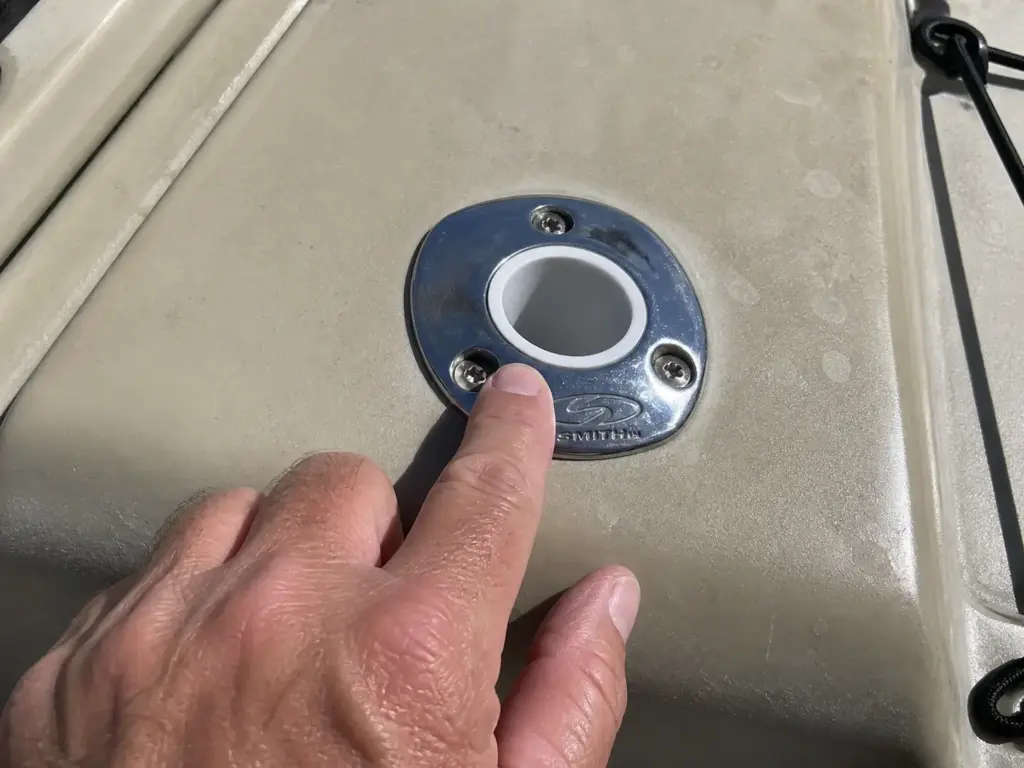
Everyone shopping this category thinks they are buying a plastic tube. What they are actually buying is a permanent opening in a hull they already paid for, and if you are still choosing that hull, the hull decisions come first in the fishing kayak buying guide. The tube is the cheap part of this transaction.
Here is the geometry that matters. A flush mount seats the rod tube below deck level, so the collar sits close to the reel and the load path runs straight down into the deck instead of out on a lever arm. That is why flush wins for trolling and bait-soaking: the harder something pulls, the more the deck absorbs. A rail mount rod holder or track mount elevates the rod above the deck, which buys you adjustability and a clean removal, but the connection point is weaker and the whole assembly sits right where your paddle stroke wants to be.
So the trade reads flat: flush is stronger and permanent, track is weaker and reversible. Neither is the right answer for everybody, and anyone who tells you otherwise is selling one of them.
Worth naming the rest of the family while we are here, because the category words get used loosely. A vertical rod holder stands a rod straight up for transport and paddling, a horizontal rod holder lays it flat along the gunwale out of the wind, and an adjustable rod holder is the track-mounted kind you can re-aim between drifts.
A flush mount is none of those. It is a fixed angle, decided once, at the moment you drill.
The install itself means cutting a hole somewhere between 2 inches and 2 3/8 inches, with some low-profile kayak units landing at 2 1/4 or 2.5 inches. There is no universal size in this category. You measure your holder’s stem, then you buy the hole saw, and never the other way around.
Now the part almost nobody surfaces before the sale. Pelican’s own installation notes state that drilling or cutting a new hole into the kayak voids the Limited Lifetime Warranty for the surrounding area. Read that again, because it changes the math on a boat that is two months old.
The manufacturer does not treat flush mounting as an upgrade. It treats it as a modification, and it says so on the product page of the rod holder it sells you.
The word to learn before you buy anything is dry-fit: setting the holder in position with no screws and no sealant, purely to check angle and reach. If that term is new to you, you are not ready to pick up the drill yet. Every rigging thread that ends well starts with it.
Should You Drill at All (The Honest Gut-Check)
Everything else in this article is recoverable. This part is not, and that is why people lose sleep over it.
The pattern in kayak rigging threads is remarkably consistent. Someone hesitates for weeks, finally commits, drills the hole half expecting the boat to take on water on the next trip, seals it, lets it cure overnight, and then nothing happens. It just holds. The anticlimax is the honest ending to that story, and it is worth knowing before you talk yourself out of the project entirely.
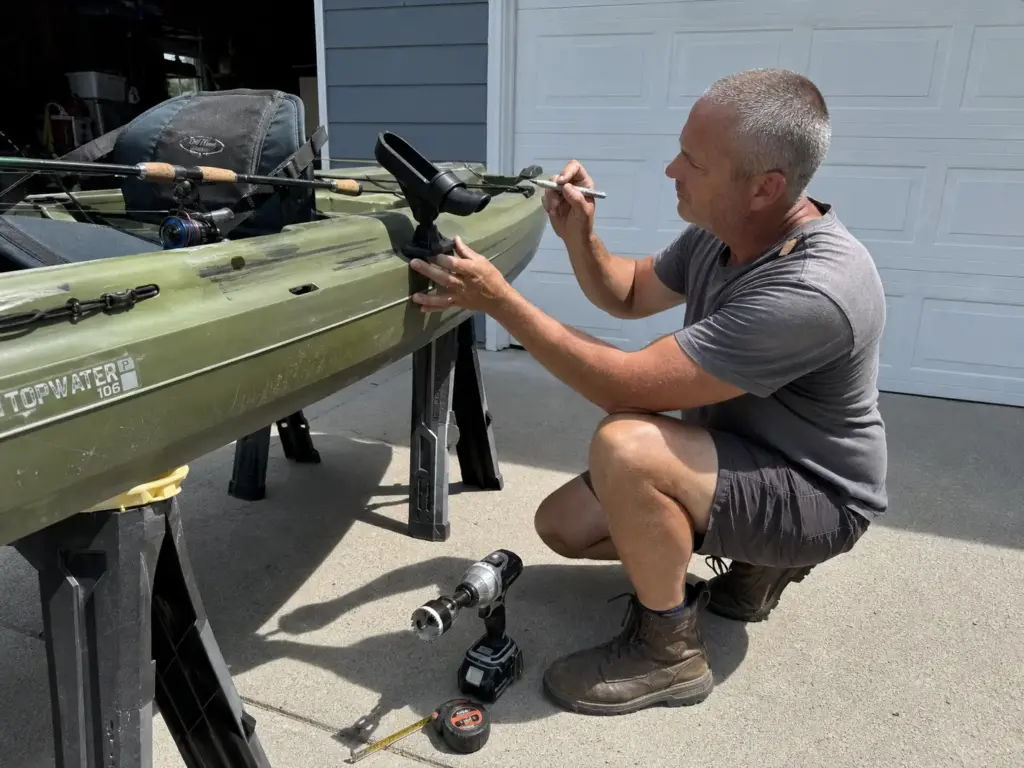
That said, the step people actually skip is not the drilling. It is the sitting. Get in the kayak on dry land with a rod in your hand and physically reach back toward the spot you had in mind. Not a glance at it, a reach.
The most common placement is directly behind the cockpit and angled so you can grab the rod without leaving the seated position. There is a real difference between a spot that looks reachable and one your shoulder still agrees with after four hours.
Two more things that spot has to clear. First, the paddle stroke path, because a holder that catches your blade once every twenty strokes will drive you off the water by noon. Second, the deck real estate you need for a wet exit and a deep-water re-entry. Re-entry means swinging a leg over a slippery hull while it tries to roll out from under you, and a rod tube mounted in that swing path is a hazard you installed yourself, on purpose, with a drill.
Then there is what is underneath. Avoid drilling near structural ribs, and understand how the hull is actually built before you commit to a spot. A paper drilling template traced from the holder’s base and taped to the deck costs nothing and settles the question of what sits under the mark.
Every hole gets sealed properly, not because a wet hatch is annoying, but because hull integrity on a small craft is the thing that keeps a bad day from becoming a rescue. The U.S. Coast Guard’s recreational boating safety data is a fair reminder that small-boat incidents are not rare events, and a modified hull is your responsibility, not the factory’s.
Best Kayak Rod Holders Flush Mount by Use Case
Every roundup in this category ranks holders as if one wins for everyone. They do not. A kayak angler trolling salt for stripers and one doing quiet bait fishing on a farm pond need different hardware, and one of them can spend a third as much and be perfectly happy about it.
Rod type matters here too, and almost nobody says so. A heavy conventional setup wants a deep tube and a real load path. A light spinning rod or a casting rod for finesse work is fine in anything. A fly rod holder is its own problem entirely, since a stripped fly line loves to find a flush tube’s rim, and most fly anglers end up on a horizontal solution instead.
| Model | Housing | Locking | Cap | Best Use Case |
|---|---|---|---|---|
| Borogo 2-Pack | Plastic | No | Yes | Freshwater bait-soaking |
| Pelican PS0649 | Polypropylene | No | Watertight bottom | Recreational OEM fit |
| YakGear Kit | Plastic + pad eye | No | Yes | Trolling with a leash |
| Scotty 244L-BK | Composite post | Push-button | Rain cap | Modular multi-rod rigs |
| C.E. Smith 0° / 15° | 100% stainless | No | Low-profile cap | Saltwater seasons |
| RAILBLAZA Rod Holder II | Composite + track base | Twist lock | No | No-drill track rigging |
One piece of community language explains why the gaps between these tiers cost more than they look like they should. Anglers call it strike-theft: a rod getting yanked clean out of a holder by a sudden hard hit. The locking posts and pad eyes further down this list exist because that happens often enough to have a name.
That is also the honest line between a budget rod holder and a premium rod holder in this category. You are not paying for a nicer tube. You are paying for the mechanism that keeps a rod in the tube on the one hit that matters, which is why this is the rare tackle accessory where the upgrade is a function and not a finish.
The Budget Pick That Actually Holds a Rod
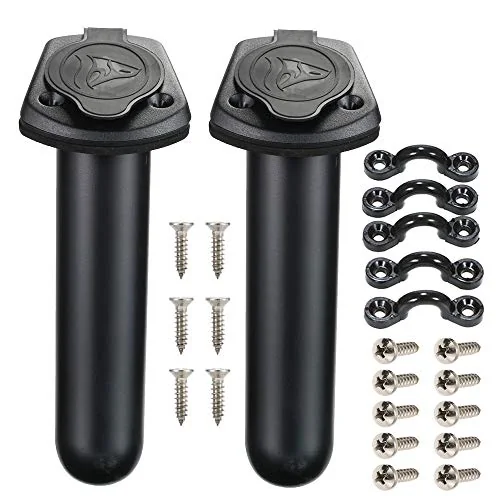
The reader this pick is built for is usually the same person who bought a fishing kayak under $1,000 and would rather put the difference toward a paddle. That is a defensible call. For freshwater bait-soaking, a plastic flush mount rod holder with the stock tube does the job all season.
Here is the anti-sell, though. Plastic housings are exactly what cracked in the failure case covered further down this page, and the screws in the bag are minimum spec. Buy the cheap holder if that is your water, then spend a few dollars upgrading the hardware anyway. That combination beats a mid-tier holder installed with its stock screws.
The Mid-Tier Kits Worth the Extra Money
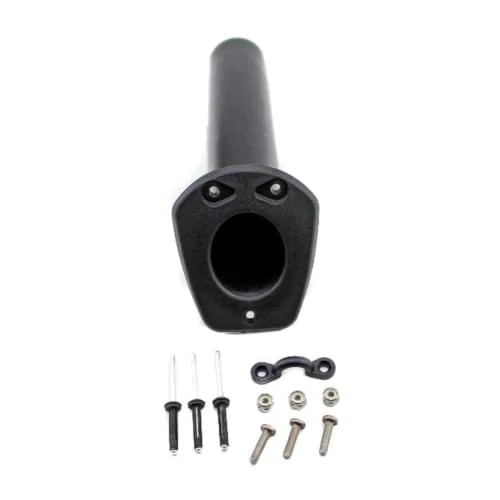
Step up a rung and you start paying for one specific problem being solved rather than a generic tube. The Pelican Kayak Flush Mount Rod Holder PS0649 solves the leak fear directly with a watertight bottom, runs a 2.5-inch hole, and drops into Pelican hulls as an OEM-fit part. If the boat under you is a Pelican, this is the least dramatic install in the category.
While you have the drill out and the deck cleared, this is the moment most anglers look around and notice everything else they meant to fix. A rod holder is one piece of a deck rigging plan, not the plan itself, and the seat you spend eight hours in usually deserves attention before a third rod tube does.
Locking and Stainless — When the Upgrade Earns It
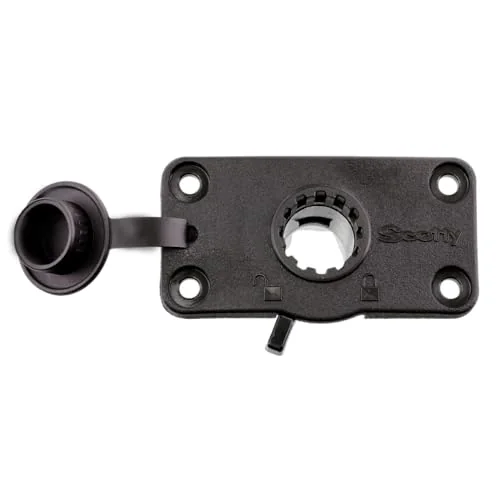
For salt, the argument shifts from mechanism to material. The C.E. Smith Flush Mount Rod Holder in 0 degree is 100% stainless construction, not a plastic housing with stainless screws, so there is nothing to UV-crack after a summer of sun and spray. That is what corrosion resistant actually means once you stop reading it as a marketing line.
Its sibling, the C.E. Smith 15 degree, is the same build with the tube angled into the position trolling rods actually want, which is the whole reason most people are reading this page. Both are genuine overkill on a farm pond, and both are the correct answer if your boat smells like salt at the end of the day.
How to Install a Flush Mount Rod Holder Without Wrecking Your Deck
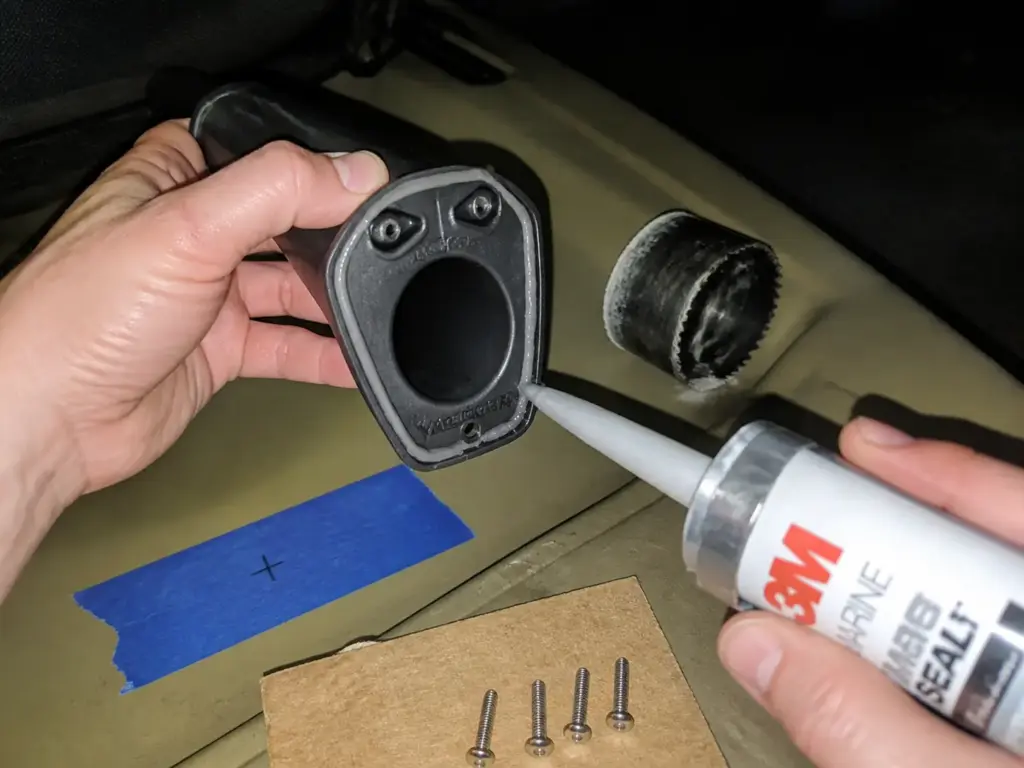
The install is simple. It is also completely unforgiving, and almost every step that decides the outcome happens before the drill ever spins. The person who rushes the first three minutes is the one living with a crooked hole.
Dry-Fit and Mark Before You Touch the Drill
Sit in the kayak with a rod. Reach for the spot. Rotate the holder until the tube points exactly where you want the rod pointing, not approximately where you want it. Mark it with a Sharpie, then get out and walk around the boat and look at it from the side, because a mark that looks square from directly above is often not.
Only then do you drill anything, and the screw holes come last. You get exactly one shot at screw-hole placement per mounting hole, and drilling pilot holes before the dry-fit confirms the angle locks in a mistake you cannot back out of. That single sequence error is the most common one in this whole category.
Cutting the Hole (Tape, Reverse, Then Forward)
Mask the drill area with tape before the hole saw touches anything. It keeps the pilot from wandering across slick plastic and gives you a clean visual reference to line up against.
Then run the drill in reverse for the first few seconds. Backward, on purpose. Scoring the surface that way turns it to powder instead of ripping a jagged edge, and it is a five-second habit that separates a clean hole from a permanent ragged ring you look at every trip.
Match the saw to your holder’s actual stem diameter, anywhere from 2 inches to 2 3/8 inches with some low profile kayak units at 2 1/4 or 2.5. Measure the holder, not the article.
Sealant and Hardware — The Part That Decides If It Leaks
Marine adhesive goes under the flange before the screws go in. Not caulked around the visible edge afterward, which is the fix people attempt after the first wet hatch and which almost never works. A bead of 3M 4200 or 3M 5200 spread under the flange is structural to keeping water out of the hull cavity below the deck.
Plain silicone sealant from the hardware aisle is the substitution to avoid. It skins over, looks right, and lets go at the edges after a season of flex. If your holder shipped with a gasket or an o-ring, that seats under the sealant rather than replacing it.
Installers call it squeeze-out, and it is the only seal test you get without water: tighten the screws until sealant oozes out from under the flange all the way around. A gap in that ring of ooze is a gap in the seal. Wipe the excess after it skins over, not while it is wet, or you drag it into the hole.
Use stainless steel bolts and screws everywhere, with no exceptions and no “it is just freshwater” reasoning, and follow marine-grade 316 stainless fastener guidance when you buy them. Where the deck feels thin under thumb pressure, add a backing plate so the load spreads across the plastic instead of concentrating on four screw threads. That is a two-dollar part that decides whether the holder is still tight in three seasons.
While the drill is out and you have already accepted one permanent hole, it is worth thinking through setting up an anchor trolley at the same time. Same hardware logic, same sealant, one afternoon instead of two.
What Happens When a Big Fish Hits a Cheap Rod Holder
Nobody buys a rod holder thinking about the day it fails. The day it fails is the day you finally hook the fish you have been trolling for, and you get to watch your rod go over the side while it is still connected to it.
That is not a hypothetical. There is a documented forum case of a large fish hitting a trolled rod and stripping the screws clean out of a plastic flush mount, cracking the top plate on the way. The holder did not tear a hole in the deck. The screws simply pulled out of the plastic they were threaded into, which is exactly how this fails when it fails.
The fix the community landed on is specific enough to act on: 5200 sealant plus #10 stainless wood screws, replacing whatever came in the bag. And that is the flat truth about self-tapping screws in these kits. Stock hardware is minimum spec, not strong spec.
Where you can reach the underside of the deck, through-bolting with lock nuts beats threading into plastic at all, and pop rivets are a distant third that you should reserve for a spot no hand fits into. Longer, thicker stainless screws bedded in 5200 cost almost nothing and are the entire difference between a holder that holds and a holder that becomes a story you tell at the ramp.
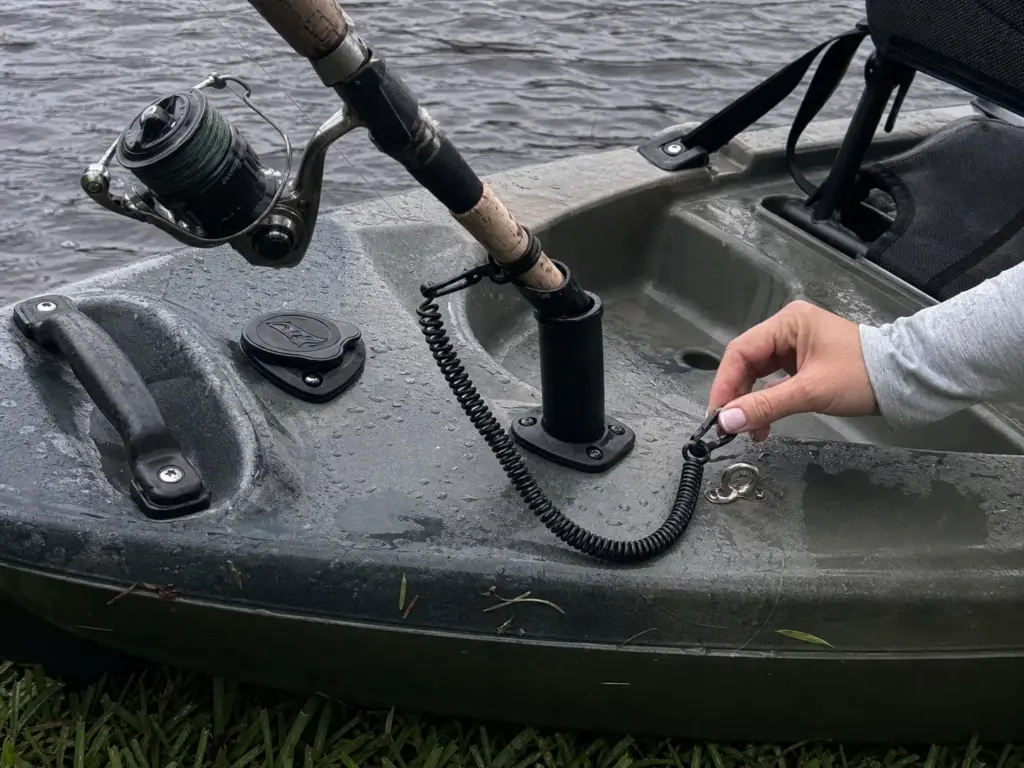
Tether the rod. Multiple independent forum threads land on the same conclusion from different directions: better hardware lowers the odds of a pull-out, but a rod leash clipped to a pad eye decides what a failure costs you. With a leash, you lose the fight. Without one, you lose the rod, the reel, and the lure that was working.
This is exactly where the ladder earns its price gaps. The YakGear kit’s integrated pad eye and the Scotty locking post are not styling features, they are answers to this specific failure. And a hardware failure on a kayak is never only about gear, since a rod snatched over the side takes your balance with it. That is worth reading alongside the real risks of fishing from a kayak before you assume the worst case is a shopping expense.
Saltwater, Corrosion and the No-Drill Alternative
Freshwater forgives almost any hardware choice you make. Salt forgives nothing, and it works slowly enough that you do not notice until a screw head rounds off under a driver in your hand.
Why 316 Stainless Is Not the Same as “Stainless”
Grade 316 is the standard for direct saltwater exposure because it resists the pitting and crevice corrosion that chloride causes. Grade 304, often sold as 18-8, does not, and it is what most bins of generic “stainless” hardware at a home center actually contain. Ask for 316 by number. If the person behind the counter cannot tell you the grade, you are buying 304.
The all-stainless housing argument follows from the same logic. A plastic holder in salt has UV degradation stacked on top of the corrosion question, and the C.E. Smith picks remove both variables at once by not having a plastic housing to begin with.
Season-end maintenance is short, and it is the whole difference between saltwater fishing eating your deck rigging and just aging it. Rinse fresh water over the hardware, check the flange for lifted sealant at the edges, and replace any screw showing pitting rather than waiting for it to fail on a fish. Ten minutes in the driveway in October, or a rebuild in March.
Freshwater fishing buys you a much longer leash on all of this. You still rinse, you still check the flange, but a missed season is not the same sentence it is in salt.
Track Mounts — Most of the Function, None of the Holes
A track-mount holder slides into a factory gear track and locks with a cam or twist mechanism. No drill, no sealant, no warranty conversation. It is worth knowing what factory kayak tracks get wrong before you assume the track itself is bulletproof.
For rod holders specifically, though, the tradeoff is easy to state: a slightly weaker hold at maximum load versus a true permanent installation. That is the whole cost. There is no hidden second downside.
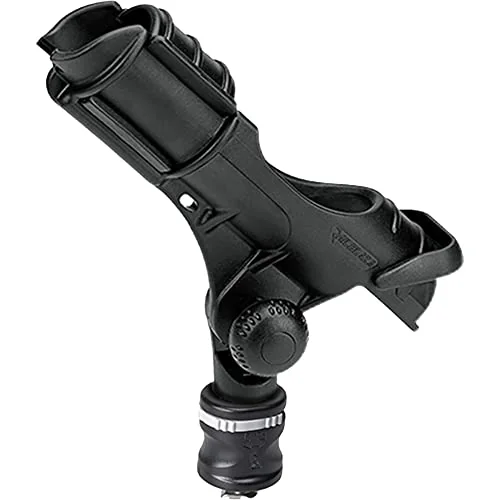
Search demand for a no drilling rod holder mount is real and mostly unanswered, and this is the answer: a track base, not a workaround. Skip the DIY rod holder mount builds you will find on video, too. PVC pipe and a hose clamp is a fun afternoon and a bad idea on a hull you paddle in moving water.
If you are not sure yet whether you want permanent holes in your boat, a track mount is a legitimate first step and not a consolation prize. It moves, it removes, and it does not touch resale value. Run it a full season, learn where you actually reach for a rod instead of where you think you will, and then drill if you still want to. The same reasoning applies to the same drill-or-track decision for a fish finder, which is usually the next hole an angler is talking themselves into.
The Bottom Line
Dry-fit before you drill. Everything after that first hole is fixable, and the hole itself is not.
Upgrade the screws no matter which holder you buy. Stock hardware is minimum spec across this entire category, and 316 stainless in salt is not a preference.
If you are not sure yet, a track mount buys you the function without the commitment. That is a real answer, not a fallback.
Before you order anything, go sit in your kayak with a rod in your hand and reach for the spot you had in mind. Five minutes in the driveway will tell you more about where that holder belongs than any article can.
Frequently Asked Questions
01Flush mount or rail mount rod holder — which is better for a kayak?
Flush mount wins for trolling and bait-soaking because the tube sits below deck and carries load straight down. Rail mount wins if you need to adjust the angle or remove the holder. Flush is permanent, rail is not.
02Can you install flush mount rod holders without drilling?
Not a true flush mount, since flush mounting requires a hole through the deck by definition. A track mount holder in a factory accessory track gets you most of the function with zero holes and full reversibility.
03What size hole saw do you need for a kayak rod holder?
Between 2 and 2 3/8 inches for most models, with some low-profile kayak units at 2 1/4 or 2.5 inches. There is no universal size, so measure your specific holder’s stem before you buy the bit.
04Does drilling a rod holder void a kayak warranty?
On some brands, yes. Pelican’s own installation notes state that drilling or cutting a new hole voids the Limited Lifetime Warranty for the surrounding area. Check your manufacturer’s language before the drill comes out, not after.
05What is the best brand of flush mount rod holders?
Scotty for the locking post and modular ecosystem, C.E. Smith for all-stainless saltwater builds. The honest answer is that best depends on your water and use case more than on the badge.
Risk Disclaimer: Fishing, boating, and all related outdoor activities involve inherent risks that
can lead to injury. The information provided on Master Fishing Mag is for educational and informational purposes
only. While we strive for accuracy, the information, techniques, and advice on gear and safety are not a substitute
for your own best judgment, local knowledge, and adherence to official regulations. Fishing regulations, including
seasons, size limits, and species restrictions, change frequently and vary by location. Always consult the latest
official regulations from your local fish and wildlife agency before heading out. Proper handling of hooks, knives,
and other sharp equipment is essential for safety. Furthermore, be aware of local fish consumption advisories. By
using this website, you agree that you are solely responsible for your own safety and for complying with all
applicable laws. Any reliance you place on our content is strictly at your own risk. Master Fishing Mag and its
authors will not be held liable for any injury, damage, or loss sustained in connection with the use of the
information herein.
Affiliate Disclosure: We are a participant in the Amazon Services LLC Associates Program, an
affiliate advertising program designed to provide a means for us to earn advertising fees by advertising and linking
to Amazon.com. As an Amazon Associate, we earn from qualifying purchases. We also participate in other affiliate
programs and may receive a commission on products purchased through our links, at no extra cost to you. Additional
terms are found in the terms of service.