
In this article
You’re three hours deep into a browser full of tabs, and every fishing kayak on the screen claims the same three things: rock-solid stability, fishing-ready rigging, best value in its class. None of that tells you which one you’ll still be happy with in year three. Spend any time in kayak angler forums and the same regrets cycle through every spring: the free paddle, the anchor setup nobody explained, the return trip that took three times as long, the boat that felt planted in the driveway and squirrelly with a crate on it. Those regrets are the actual buying guide.
This one walks propulsion, hull, length, rigging, price tier and water type, then covers what the spec sheets leave out.
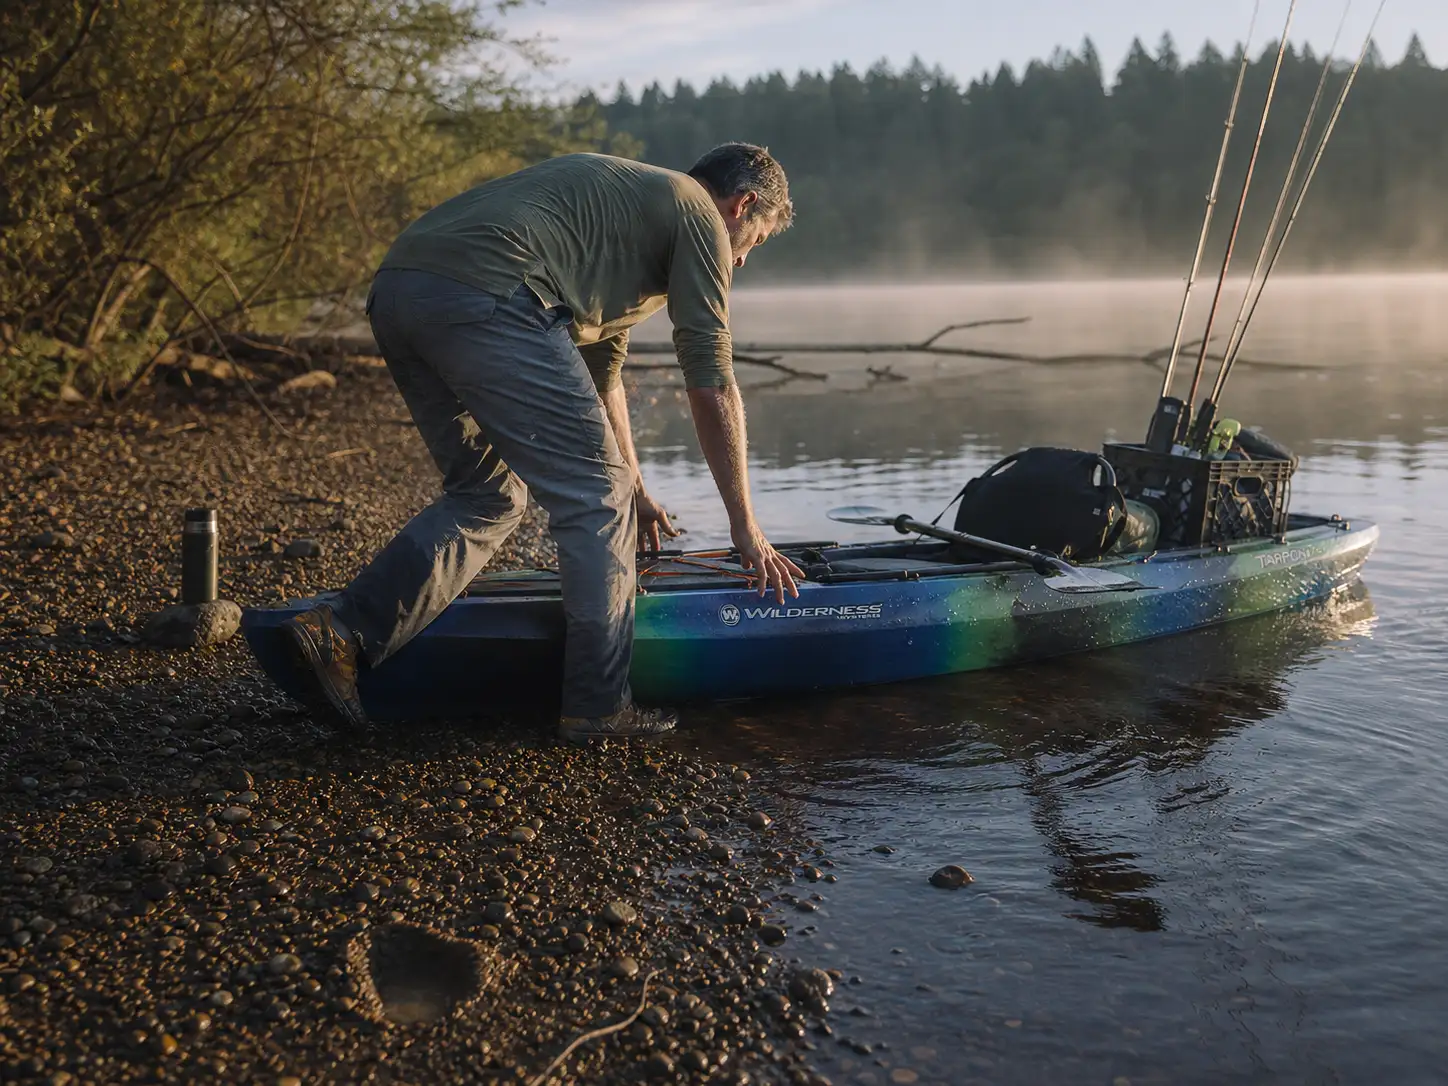
Paddle, Pedal, or Motor and How You Move Decides Everything Else
Propulsion is where most buyers start, and they start with the wrong question. It isn’t about speed. It’s about what your hands are doing when a fish shows up thirty feet off the bow. Answer that and the rest of the boat mostly picks itself.
Paddle Kayaks Are Still the Right Call for Most People
A paddle kayak is the lightest, cheapest version of this sport, with the fewest things that can break. No drive well, no gears, no cable to fray. It also floats in water too skinny for anything else, which matters the first time you follow a creek past where a prop would stop.
The tradeoff is exactly one thing, and it’s the thing: you can’t cast and move at the same time. On a calm pond that’s nothing. On a windy flat where you’re getting blown off the fish every ninety seconds, that’s the whole day.
Pedal Drives, Fin vs. Prop, and What Each One Hates
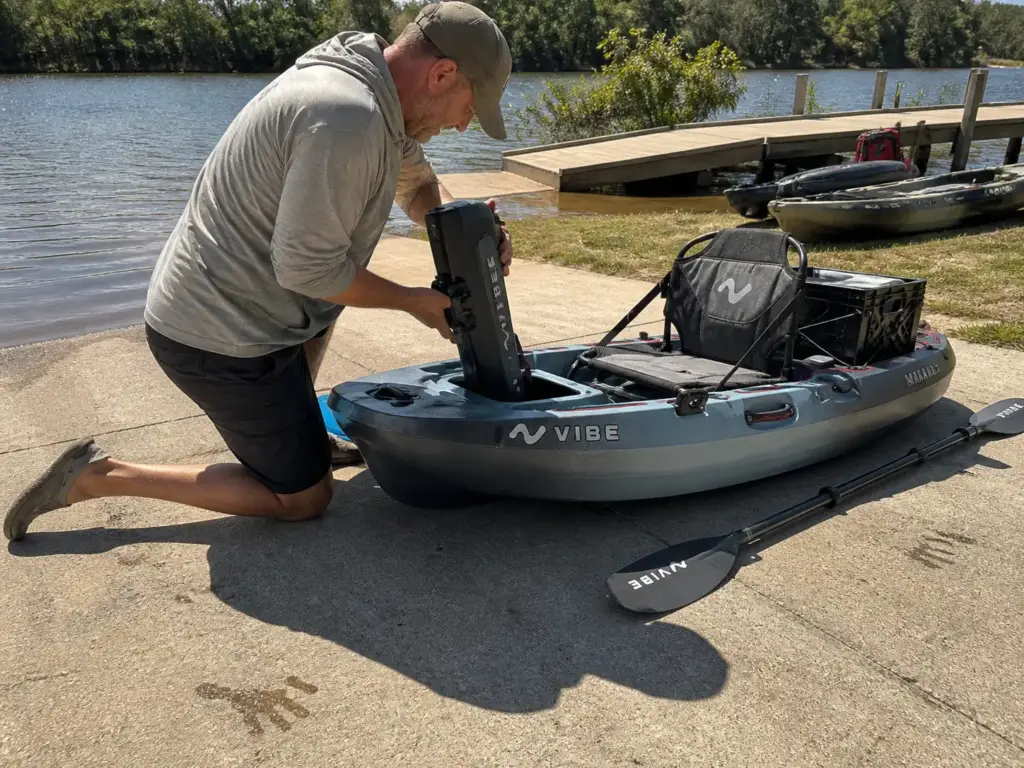
Pedal drives split into two families that fail in opposite directions. The fin-style pedal drive (the Hobie Mirage pattern) sweeps side to side under the hull, efficient and quiet, and older designs reverse badly or not at all. They need a few inches of clearance before the fins move freely. Propeller drives like the Vibe Impulse or Pelican’s HyDryve spin, so reverse is free, but a prop in a weed bed is a stop-and-clear situation.
What settles it is whether your water is weedy or rocky, and how often you back off structure without turning around. Then the cost nobody prints: a drive adds 20 to 40 pounds to what you carry from the car, plus an assembly that needs service. For the long version, what nobody mentions about pedal drive kayak fishing covers the maintenance side demos never surface.
Motorized and Electric-Assist Buy Range at a Cost
Electric-assist and motorized kayaks buy you range, and range is real: three miles of shoreline fished properly, with legs left for the trip home. What you pay is weight, a battery to manage, and a wiring job that has to survive years of getting splashed. Motors with spot-lock or GPS anchor mode hold position electronically, which is a genuine alternative to an anchor on deep or snaggy bottom. Anyone stepping up to a bigger power system should see how wiring a 24-volt trolling motor system is done properly, because a corroded connection at the ramp is a wasted morning.
The other cost is administrative. Adding a motor pushes you into kayak registration territory in a lot of states, and the rules vary enough that no article should tell you what yours says. Check before you buy, not after.
One pattern holds on every propulsion path: a fully rigged boat with a battery, a finder and four rods handles nothing like the empty demo hull. Propulsion weight is where that difference shows up first.
Hull Width, Stability, and Whether You’ll Ever Actually Stand Up
Everybody asks whether a kayak is stable. Every manufacturer answers yes. The honest answer is a number and a hull shape, and the second honest answer is that stability comes in two flavors that fail in completely different ways.
Primary vs. Secondary Stability and When You Feel Each One
Primary stability is how tippy the boat feels sitting flat. Secondary stability is what it does once leaned over, which is the moment that decides whether you swim. Wide flat hulls have terrific primary and abrupt secondary: they feel like a dock right up until they don’t, and then they go fast. Rounder hulls feel livelier and hold a lean much longer, which unnerves beginners and reassures anyone who’s been leaned over on purpose. You feel that difference exactly once, usually while reaching sideways for a net with a fish already on.
Flat, Tri-Hull, and Pontoon Hulls in Plain Language
A flat-bottom hull is a plank: maximum initial steadiness, poor glide, and it slaps in chop. A tri-hull, pontoon or catamaran hull puts two outer sponsons in the water with a channel between them, spreading the footprint wide without going full plank, which is why so many standing platforms use that shape. A shallow-V cuts water better, tracks better, and asks more of you when you lean. That’s the trade, and how hull design trades stability against speed goes through it hull by hull.
Worth knowing in community language: oil-canning is a soft spot in a rotomolded hull that flexes in and stays in. It runs through every used-boat thread, and it comes back in the used-buying section below.
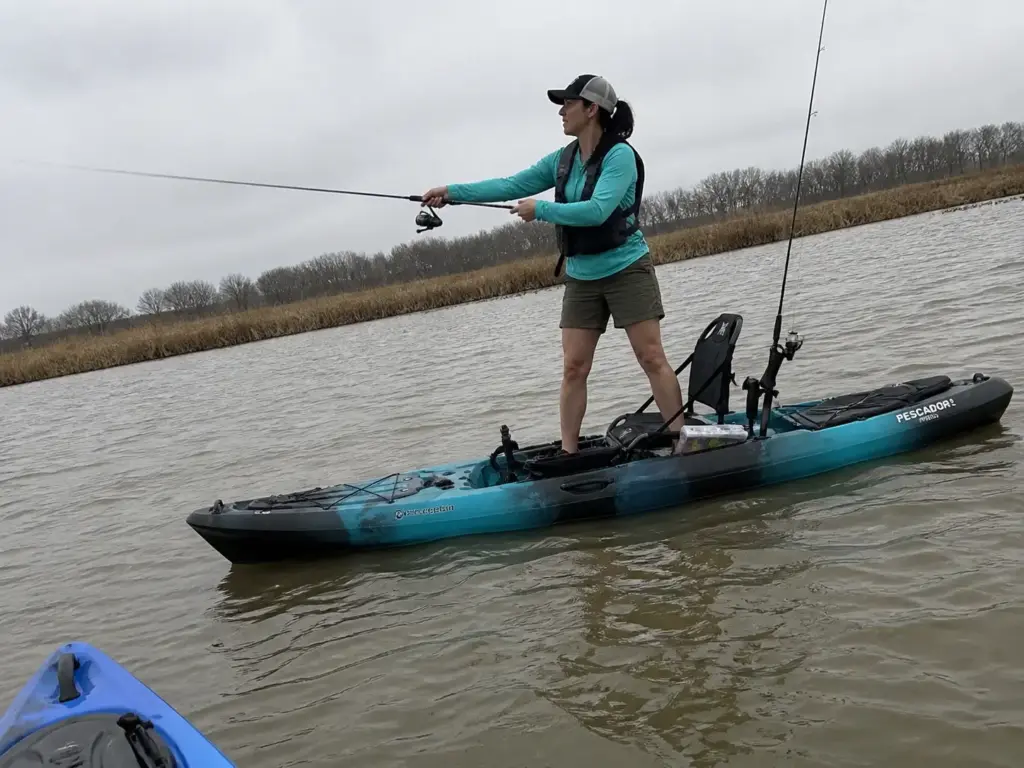
Standing to Sight-Cast and Who Actually Needs It
If standing matters, the number is beam width of roughly 30 inches or more. Length has almost nothing to do with it. A counterintuitive fact from head-to-head comparisons: 10-foot kayaks often beat 12-footers on stability, because a 12-foot hull is narrower relative to its length and a rigged load sits on a proportionally smaller platform. Width-to-length ratio beats raw length for standing and casting.
Every inch of beam costs paddling speed, which is why a standup platform is a poor default for someone who covers water. For sight-casting shallow flats, standup fishing earns its beam. Trolling a big lake three miles a trip, that beam is a tax on every stroke for a capability you use twice a season.
If a dealer lets you demo, don’t paddle it flat and call it stable. Sit still, then deliberately lean it to one side until you feel it start to load up. Where that point sits, and whether it arrives gradually or all at once, tells you more in ten seconds than any review.
The 10 vs. 12 Foot Question and What Length Really Buys You
The length question is really a capacity question and a car question wearing a trench coat. Twelve feet is the right answer for a lot of people and the wrong answer for anyone whose kayak has to go up on a roof rack alone, on gravel, at 5 a.m.
Capacity Math and Why Your Weight Is Not the Number
Hull length sets the ceiling here. A 10-foot fishing kayak typically caps out around 250 to 300 pounds of weight capacity. A 12-footer often runs 350 to 400 pounds or more. That extra two feet isn’t legroom, it’s headroom for everything you bring.
Do the math honestly: what you weigh, plus gear, cooler, battery, and whatever you land. Then stay well under the rated number, because a hull sitting at its rating floats low, paddles wet and gives up freeboard. Rated capacity is a flotation limit, not a handling recommendation. If your number keeps creeping past what a kayak carries, it’s worth knowing how a canoe compares for fishing before forcing the issue.
Speed, Tracking, and Turning in Tight Water
Longer hulls track straighter and glide farther per stroke, which is what you want on open water where you’re covering distance between spots. Shorter hulls turn inside creek bends and pivot around laydowns without a three-point turn. Match the number to the water you actually fish, not to the video that sold you on the sport.
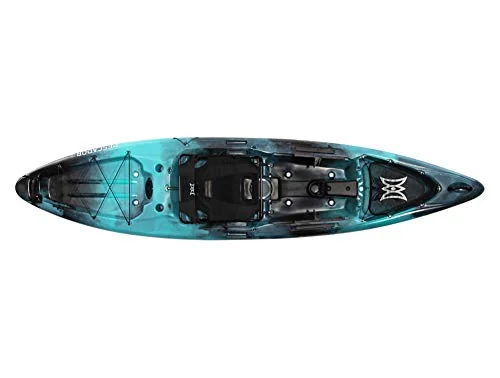
The Perception Pescador Pro 12 is a useful reference point because it does the twelve-foot thing without pretending to be a standup platform. What you don’t get is a boat you sling onto a roof rack one-handed. That’s physics, not a flaw, and it leads into the part of the purchase most people skip.
What It Weighs Loaded and How It Gets to the Water
A rigged 12-footer lands around 70 to 80 pounds before you add anything. That’s a two-person carry, a cart job or a kayak trailer, and portability belongs in the conversation before the purchase, not in the parking lot after. Measure the walk from parking to launch at your two most common spots. If either is over a hundred yards or involves sand, you need wheels.
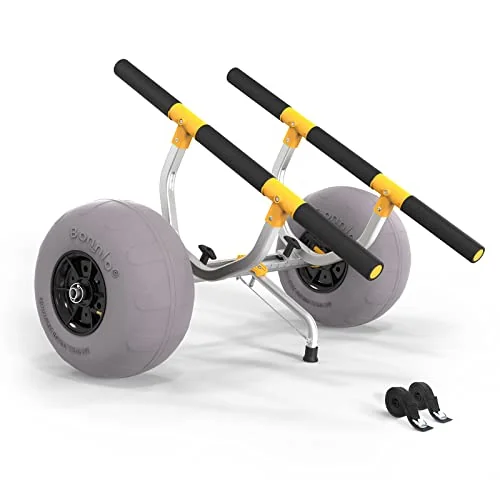
A kayak cart is the accessory buyers most reliably forget to budget for and most reliably buy within the first month anyway. The failure mode isn’t dramatic: you just fish closer to the parking lot than you meant to, forever, and never quite notice why.
Rigging and What a Fishing-Ready Kayak Actually Needs
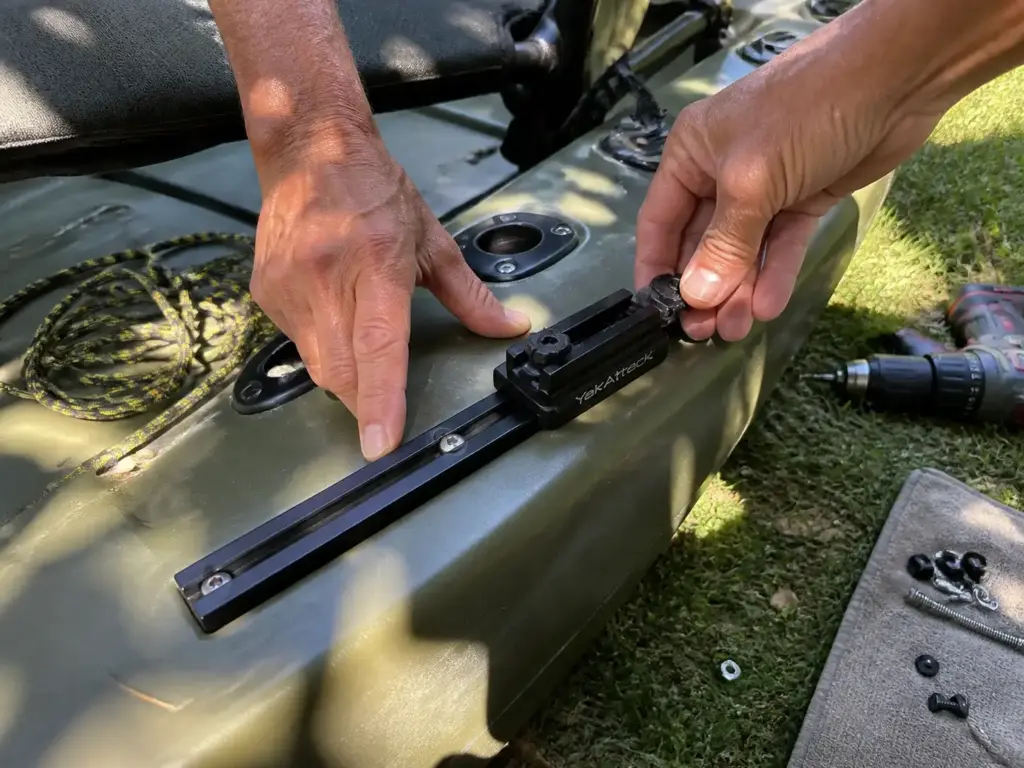
“Fishing-ready” on a listing means the factory drilled some holes. Whether they’re where you need them is a different question, and it decides whether you’re drilling your own next spring. In community usage, kayak fishing rigging means the whole process of outfitting a bare hull, not the parts you bolt on. Set that expectation and spec sheets read differently.
Rod Holders, Flush-Mount vs. Vertical, and How Many You Use
The working setup for most anglers is two flush-mount rod holders behind the seat plus one within arm’s reach. Behind-the-seat holders are storage and trolling positions; the one you reach without turning around is the one you actually use, and most factory layouts get that backward. Four molded holders you have to twist to reach is a number on a box, not a feature.
The vertical rod holder sits higher and keeps reels out of the water, which matters on a wet ride, and they catch line when you cast past them, which matters constantly. Pick based on whether you troll or cast. If your factory holders sit wrong, flush-mount rod holders worth adding is a cheap fix next to living with a bad layout for five seasons.
Gear Tracks and Rails, the Feature That Ages Best
Gear tracks (the rail system a hull ships with) are the highest-value factory feature on a fishing kayak, and it’s not close. Rod holders are a decision; tracks are the ability to change your mind, because mounts slide and holes don’t. A kayak with two feet of track per side and mediocre holders serves you better in year three than one with excellent holders and no rails, though what factory kayak tracks get wrong is worth reading before assuming every track system shares a standard.
Tracks are also how electronics get aboard without a drill: a track-mounted arm or electronics pod holds the display, the transducer runs through a scupper, nothing gets permanently modified. That’s the approach behind mounting a fish finder without drilling the hull, and it’s why a used kayak with tracks is worth more than one without.
Storage, Tank Well, Hatches, and Where the Crate Goes
The tank well behind the seat is where the crate lives, and crates come in standard sizes while tank wells do not. Measure the well against the crate you already own before you buy the boat. It sounds fussy until you’re on the water with a crate sitting proud of the deck, sliding every time you lean.
Sealed hatches leak eventually on every brand, bow hatch and stern hatch alike. Not badly, but the gasket compresses, the bolt-through hardware weeps, and one day your spare clothes are damp. Plan for a dry bag inside the hatch rather than instead of it.
Price Tiers and What Another Thousand Dollars Gets You
The jump from entry level to mid-range buys real things you can feel in the first hour. The jump from mid-range to premium buys fewer things than the marketing suggests, and most of what it does buy lives in the seat and the drive system.
Entry Level, Where the Money Goes and What It Costs
An entry-level kayak gives you heavier plastic, a basic seat, and fewer factory mounts. That’s it. The hull shape is often reasonable and the boat catches fish as well as anything above it. What you’ll replace first is the seat, because a pad on the deck is comfortable for ninety minutes and punishing at hour four.
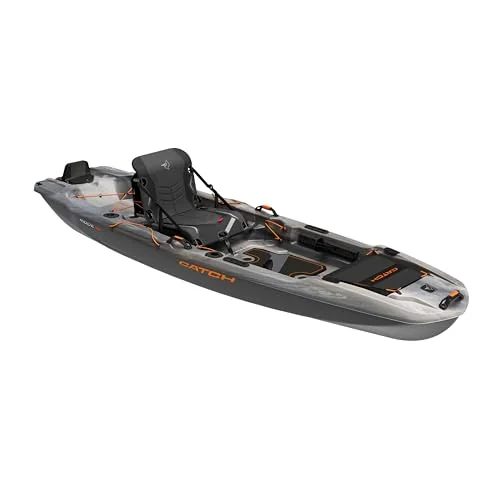
The Pelican Catch Mode 110 shows what the entry band looks like done right: enough capacity to matter, tracks so the boat can grow with you, and a seat you’ll upgrade eventually. If this is your band, fishing kayaks under $1,000 rated by how well they take mods sorts the field by what matters down here, which is whether a hull accepts upgrades or fights them.
Mid-Range, the Seat, the Hull, and the Real Upgrade
The genuine upgrade in the middle band is the seat. Not a thicker pad, a frame seat: elevated off the deck, a breathable mesh seat with an adjustable seat back angle and real lumbar support. That’s where comfort stops limiting trip length, and it changes the sport more than any hull refinement at the same price. The layup improves too, meaning better stiffness and less flex under load.
If your current boat is otherwise fine, upgrading the seat gets you most of a tier’s improvement without buying a new kayak.
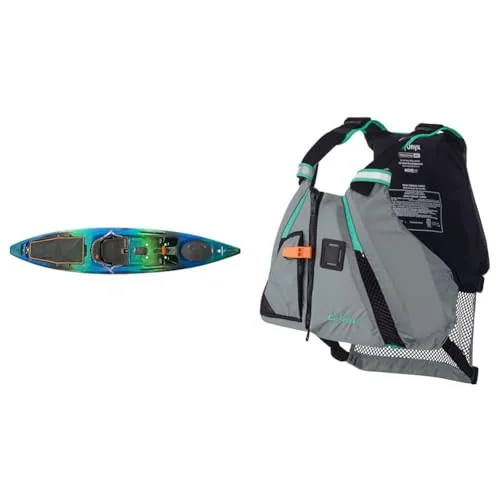
The Wilderness Systems Tarpon 120 bundle solves a problem specific to first-time buyers: the paddle and the life jacket get pushed to “next paycheck” and then quietly skipped. Buying them attached to the boat removes that decision. The seat is what owners still talk about years later, which is the mid-range pattern exactly.
Premium Drive Systems and Diminishing Returns
Premium money buys a drive system, better hardware, and refinement. It does not buy fish. A premium hull and a mid-range hull in the same water, fished by the same angler, catch the same fish. What premium genuinely delivers is hands-free propulsion, better seats, and hardware that survives salt longer.
Two features deserve the anti-sell treatment. “Motor-ready pre-rigging” usually means a transom plate and a wire chase, both of which a competent owner can add. And “premium seat foam” is marketing where the frame, mesh and adjustment range do the work. Judge a seat by whether it lifts you off the deck and lets air move.
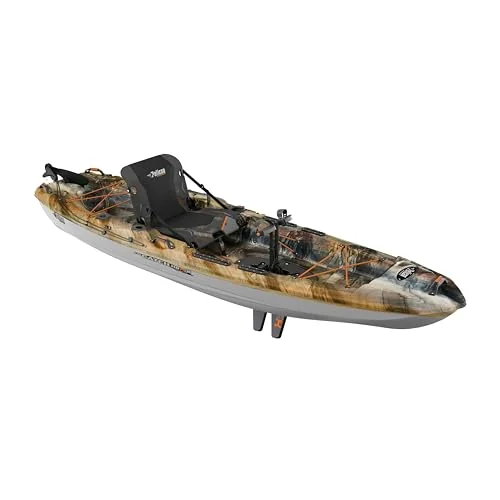
The Pelican Catch 110HDII is where the pedal question gets affordable enough to take seriously. The Perception Pescador Pilot 12 is the other pedal boat people ask about at this level, a longer hull with more glide if you can find one.
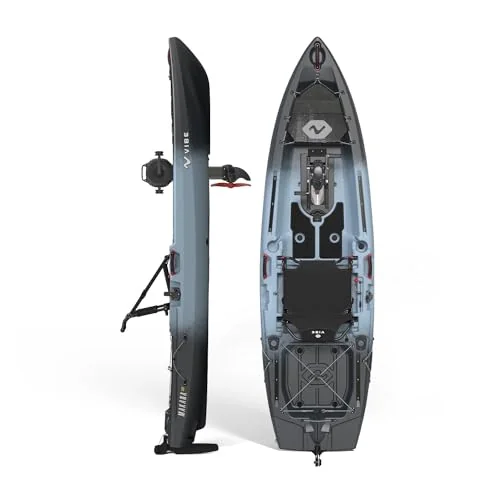
The Vibe Makana 100 answers the question a lot of buyers are actually asking, which is “what if I’m not sure yet.” Running it as a paddle boat on Saturday and a pedal boat on Sunday beats a marginal efficiency gain for anyone still figuring out their water.
One rule to carry out of this section: budget the hull, the paddle and the PFD as a single number, not the hull and then whatever’s left. That’s the difference between a good first season and a frustrating one.
Matching the Kayak to the Water You Actually Fish
This is the most useful filter in the entire buying process and almost nobody applies it first. Half the kayaks people regret were bought for the water in the video, not the water twenty minutes from their house.
Ponds, Small Lakes, and Backwater Where Short and Light Wins
Small still water rewards a short, light hull you’ll actually drag down a bank by yourself on a Tuesday evening. There’s no glide advantage to exploit on a forty-acre pond and no chop worth having freeboard for. What matters is whether the boat is easy enough that you go out on a whim.
The boat you use beats the boat you admire, which is also the honest argument against buying a tandem kayak you will paddle solo most weekends. A 10-footer you launch twice a week outfishes a rigged flagship that needs a helper and a plan.
Rivers and Current Reward Maneuverability Over Glide
A river kayak for fishing wants a shorter hull with some rocker so it pivots off eddy lines instead of plowing through them. Long tracking hulls fight you in current: they want to go straight when the river wants you sideways, and every correction stroke is one you didn’t spend fishing. Hull material matters more here too, because gravel bars sand the bottom of a boat dragged over them all season. Scupper placement earns attention as well, since shallow water means bottom contact and scupper holes are where a hull is thinnest.
Big Water and Salt Demand Freeboard and Rinse Discipline
Big open water asks for length, freeboard and tracking, in that order: a hull that holds a line in a beam wind and keeps chop outside the boat over a two-mile crossing. A saltwater kayak adds a requirement that isn’t about the hull at all. Salt eats hardware, tracks and drive assemblies long before it touches polyethylene, so a fresh-water rinse after every trip is the difference between hardware that lasts a decade and hardware that seizes in year two.
Inflatable kayaks solve a problem hardshells can’t: the reader in an apartment with no rack and no garage. Drop-stitch construction has gotten genuinely stiff, and the tradeoff is setup time on both ends plus more caution around oyster bars and submerged timber.
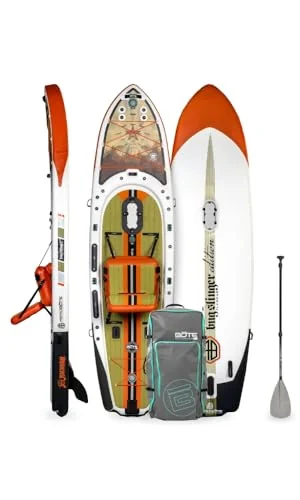
The BOTE Rackham Aero makes the case for inflatables as well as anything on the market. One more variable rarely discussed: launch method changes the boat. A surf launch and a boat ramp ask for different hulls and different rigging discipline, because everything loose on your deck becomes a projectile in the second wave. And if your water genuinely demands freeboard and range most of the time, be honest about when a fishing boat makes more sense than a kayak rather than buying a kayak that spends its life outmatched.
The Safety Setup Nobody Sells You
Every kayak review ends with a paragraph about wearing a life jacket and moves on. Kayak fishing safety comes down to failure modes that are specific, cheap to prevent, and absent from every spec sheet. This is the section competitors skip, so it’s the one worth reading twice.
The Anchor Line Is the One That Gets People
Never tie an anchor line directly to a cleat, a handle, or the seat frame. That’s the single most repeated piece of advice in kayak angler communities, and the mechanism behind it is simple enough to see in your head. A kayak anchored from a mid-ship point sits broadside to current and wind. Broadside means the flow pushes on the entire length of the hull while the anchor holds one point, and that geometry turns moving water into a lever arm working against your stability.
Add a wake or a gust and the boat rolls toward the anchor side.
Run the line through an anchor trolley instead: a loop of line running bow to stern along the gunwale with a ring you slide fore or aft. Put the ring at the extreme bow or extreme stern and the hull weathervanes, swinging to point into the flow like a windsock. Now the current pushes against the narrowest part of the boat and it holds you in place instead of trying to roll you.
The second half is the release. A quick-release anchor built on a jam cleat beats a locking retractable reel every time, because a jammed reel leaves you tethered to the bottom with nothing to cut and no way to detach. You want a setup where one hand flicks the line free without looking.
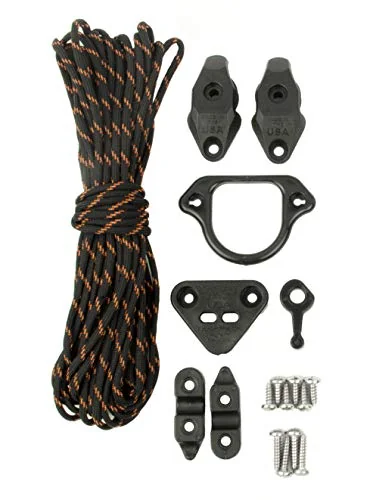
The YakAttack LeverLoc trolley kit is the version most people end up with, and the YakGear AK1 Deluxe covers the same ground for less if the budget is tight. Either way, the field advice that makes the whole system work is to run a three-point anchor rig that releases under load rather than improvising with whatever line is in the hatch.
Clip a small float to the anchor rope right at the carabiner. If you ever have to cut and run, the float marks the rig and keeps it on the surface, so an emergency release costs you five minutes instead of an anchor, a rope and a trip back with a grapple.
Wearing the PFD, Not Owning It
The numbers here are worth sitting with. Kayaks accounted for 16% of paddlecraft fatalities in 2024, more than canoes and paddleboards combined. Of paddlers who drowned while kayaking, 48% were not wearing a life jacket, and roughly 70% of canoe, kayak and rafting fatalities are estimated to have been preventable had the victim worn one.
Meanwhile the U.S. Coast Guard’s national life jacket wear rate study put the 2024 national adult wear rate on boats at 9.4%, still below the 10.6% peak recorded in 2014.
Read those together and the picture is clear: most of these people owned a personal flotation device. It was on the boat. The gap between owning one and wearing one is where the harm happens, and it isn’t a knowledge problem. It’s a comfort problem.
A life jacket that rides up your neck, blocks your casting stroke or fights the kayak seat back comes off within an hour, every time.
That’s why kayak-fishing PFDs use a high-back cut. It’s not a marketing feature, it’s the design decision that keeps the flotation above your seat back instead of wedged behind your spine, and it’s the difference between a jacket you wear all day and one you take off at the first cast.
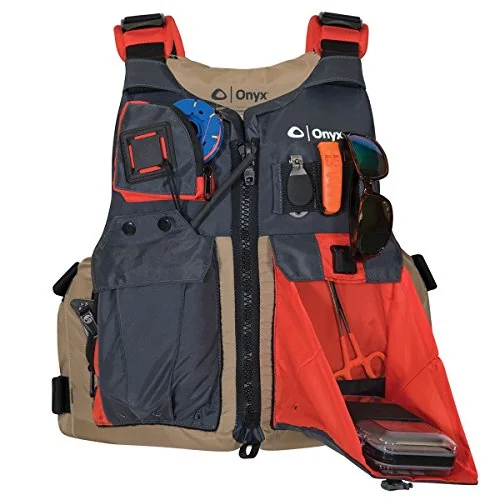
A foam Type III like the Onyx kayak fishing jacket is the default recommendation because it works whether or not you’re conscious. Inflatable belt packs and suspender models are the other path, and the tradeoffs there run deep enough to be worth understanding before you choose: auto versus manual inflatable life jackets behave very differently in a cold-water capsize.
Cold Water Doesn’t Care What the Air Says
Cold-water immersion was a factor in at least 87 paddling fatalities in a single Coast Guard reporting year, and that number gets misread constantly. People assume it means winter. It mostly means spring: 70-degree air over 45-degree water, a t-shirt, and a boat ramp full of people who checked the forecast and not the water temperature. Seasonal fishing patterns pull anglers onto the water exactly when that gap is widest.
In 32 to 40°F water, survival time without flotation can be as short as 15 to 45 minutes, and the first two minutes are the worst of it. Cold shock hits the moment you go under: an involuntary gasp, then hyperventilation, then your hands stop working well enough to do anything about it. That’s the part that matters for gear decisions.
If you go in without the PFD already strapped on, there is no putting it on afterward. Your fingers won’t do buckles.
Which is why the wear rule gets stated flatly around here: on the water, buckled on. Not on the crate, not clipped to the tank well, not “I’ll put it on if it gets rough.”
The Paddle Is the Engine, So Budget Like It
Nobody’s first regret is the kayak. It’s the aluminum paddle that came free with it, discovered somewhere around hour three of the first real trip, when your shoulders start telling you something your brain hasn’t figured out yet.
Why a Cheap Paddle Costs You the Day
Paddle quality is the line item people cut first, and the trade convention says the opposite: set aside roughly 20 to 30% of your total kayak fishing budget for the paddle. Not a footnote at the bottom of the receipt, a line item next to the hull. That ratio sounds absurd until you do the arithmetic on strokes.
You lift a kayak paddle thousands of times over a day of steady paddling, so a few extra ounces of blade weight stops being a spec and starts being a workload. It compounds too: heavier blades mean slower recovery, which means shorter strokes, which means more of them. This is why skimping on the paddle to stretch the hull budget is one of the most repeated regrets in kayak angler forums. The kayak decides where you can go; the paddle decides how long you’re willing to stay.
A flexy shaft costs you the same way, wasting part of every stroke as bend instead of forward motion. You never notice it directly. You just get tired sooner and blame yourself.
Length, Blade, and Shaft Are the Three That Matter
Paddle length is set by two numbers: your kayak’s beam width and your torso height. Not your total height, which is what most sizing charts ask for and why so many anglers end up short. Wide fishing kayaks put the water farther from your hands than a recreational kayak does, so a 12- or 13-inch difference in beam can move you a full size up. If your knuckles hit the gunwale or you’re reaching down to get the blade buried, the paddle is too short.
Shaft material sorts into three honest tiers. Aluminum flexes, conducts cold straight into your hands on a spring morning, and is what shows up in bundles. Fiberglass is the value tier and where most people should land: light enough to matter, stiff enough to transfer power, tough enough to survive being used as a push pole. Carbon is the light tier and the one most likely to be over-bought by someone who fishes four times a year.
Blade design matters less than the marketing suggests, with one exception: a narrower blade is easier on your shoulders over a long day, a wider one accelerates a loaded boat faster from a dead stop. Fishing kayaks are heavy, so a middle-of-the-road blade is the safe pick.
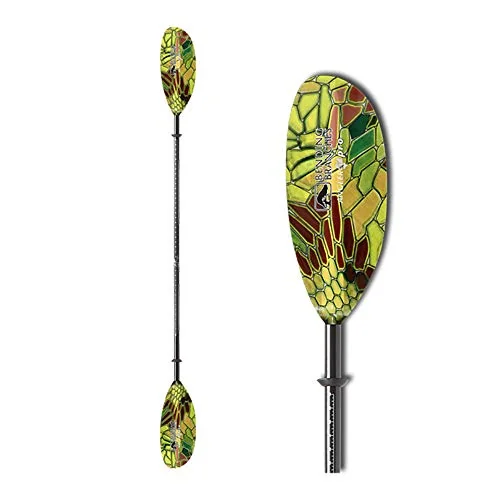
The Bending Branches Angler Pro is the paddle most people upgrade to after their first season, which is a polite way of saying it’s the paddle most people should have bought first.
The Trip Home Is the Hard One
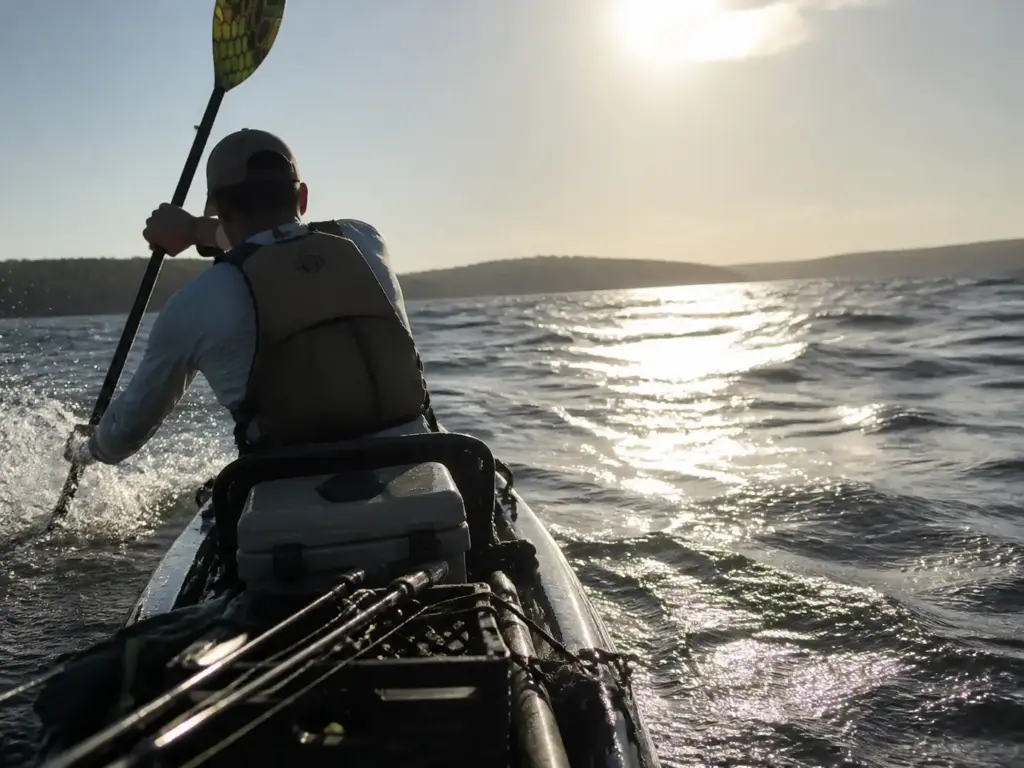
Here’s the scenario that catches nearly every kayak angler once. You launch, the fish are working downwind, you chase them all morning feeling strong and fast, and then you turn around. Wind and current were doing half your work for four hours and you never once noticed.
Wind and Current Are Not Symmetrical
Drift is invisible while you’re fishing. You’re watching a bobber or working a bank, and the boat is quietly covering distance you never paddled. It always adds to the return leg and it never subtracts, because the same forces that gave you free travel out now charge you interest on the way back.
The asymmetry is worse than most people estimate. A 10 mph headwind on a wide fishing kayak isn’t a percentage penalty, it’s a different sport. The high seat and wide beam that make these boats great fishing platforms also make them exceptional wind catchers, and the effort curve is not linear: doubling wind speed roughly quadruples the force you’re pushing against. That’s why the trip that took forty minutes out can take two hours back on a tide that turned.
Tidal water compounds it. A falling tide and a building afternoon sea breeze both push the same direction on a lot of coastlines, which is precisely the combination in every “I barely made it back” story on the forums.
A Simple Rule for the Return Leg
The working rule is short enough to remember at the launch: paddle out against the wind or current, drift back with it. Fight it while you’re fresh, ride it while you’re tired.
Most people do the opposite by accident, because the fish are downwind and following bait beats planning. Which is why the rule needs a second half: set a clock, not a landmark. “I’ll turn around at the point” fails because the point keeps looking reachable and fatigue arrives before it does. A hard turn-around time doesn’t negotiate with you.
Pedal drives change this arithmetic a lot. Legs outlast arms, and a pedal boat into a headwind is far more manageable than a paddle boat in the same conditions.
But a drive introduces a failure mode paddles don’t have: if it fouls or breaks two miles out, you’re paddling home in a boat heavier than the paddle kayak you decided against. Carry the paddle anyway. Every experienced pedal angler does.
On your first few trips in new water, paddle hard for exactly ten minutes at the start and note how far you got. That’s your honest speed with today’s load in today’s wind conditions. Everything you plan for the rest of the day scales off that one number, and it’s a lot more useful than a distance you read in a trip report.
Buying Used Without Buying Someone Else’s Problem
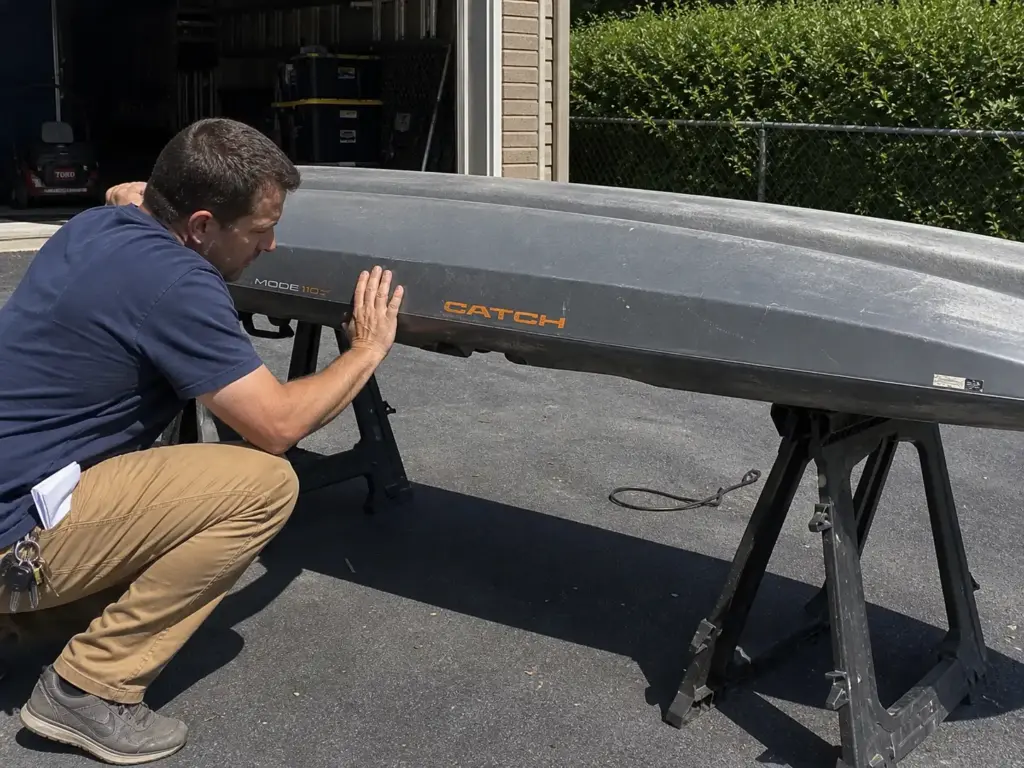
A used kayak is the best value in this entire sport and the easiest way to inherit a hull that’s already failing. The difference between those two outcomes is about five minutes and your hands, and almost nobody spends the five minutes.
The Five-Minute Hull Check
Start by pressing. Push firmly on the hull near the seams, beside the grab handles, and on the stern behind the seat. Good rotomolded polyethylene gives a little and pops right back.
What you’re hunting for is a soft spot that flexes in and stays in, which anglers call oil-canning, and it means the plastic has been UV-cooked or repeatedly impacted until it lost its memory. A hull with those spots is on a countdown.
Then run the crack push-test, which is the whole inspection compressed into one move. Find any visible crack, put your thumbs beside it, and press.
If the crack visibly grows, walk away. That plastic has gone brittle, it can’t be plastic-welded reliably, and there is no repair worth your money. A crack that stays exactly the same length under pressure is a cosmetic scratch. A crack that travels is a hull failure that hasn’t finished happening yet.
Look at the color while you’re down there. Heavy whitening or chalky fading isn’t cosmetic on polyethylene: UV exposure has broken down the surface and the material has lost elasticity, the same thing the press test measures from the other direction. A boat that lived under a tarp looks different from one that spent six summers on a dock, and you can see it before you touch it.
Hardware, Seat, and Scuppers
Salt shows up in the hardware first, always. Check every screw, pad eye, rudder cable and track end for green corrosion or a rusty bloom, because that tells you what kind of life the boat had regardless of what the seller says. Surface corrosion on a few screws is a $15 fix. Seized rudder hardware and a corroded drive well are a different conversation.
Work the seat frame through its full range and look hard at the webbing where it wraps the frame tubes, because cracked or sun-rotted mesh is common and a replacement seat costs real money on a used-boat budget. Check the scupper holes from both sides for cracks radiating outward: scuppers are thin, they take impact when the boat is dragged, and a crack there sits in an awkward spot to repair. Last, look under the grab handles, where a boat dragged across parking lots shows wear the seller’s photos never include.
What a Fair Price Looks Like
The used market prices by brand reputation, drive system, and how far the model has drifted from its original MSRP, and it moves seasonally: listings in February go cheap and listings in May don’t. A clean paddle kayak from a known brand with tracks and a frame seat holds value because those are the parts people want. A boat with a soft hull spot is worth the price of the accessories on it.
The useful comparison to run in your head is against new. Check what a new kayak in that price range gets you before you agree to a used price, because a used boat at 70% of new money with three seasons of UV on it is not a bargain. Used works when it’s a genuinely better hull than you could afford new, or when it’s a mid-range boat at an entry-level number. Below that, the warranty and the fresh plastic are worth the difference.
Loaded Boats Handle Differently Than Demo Boats
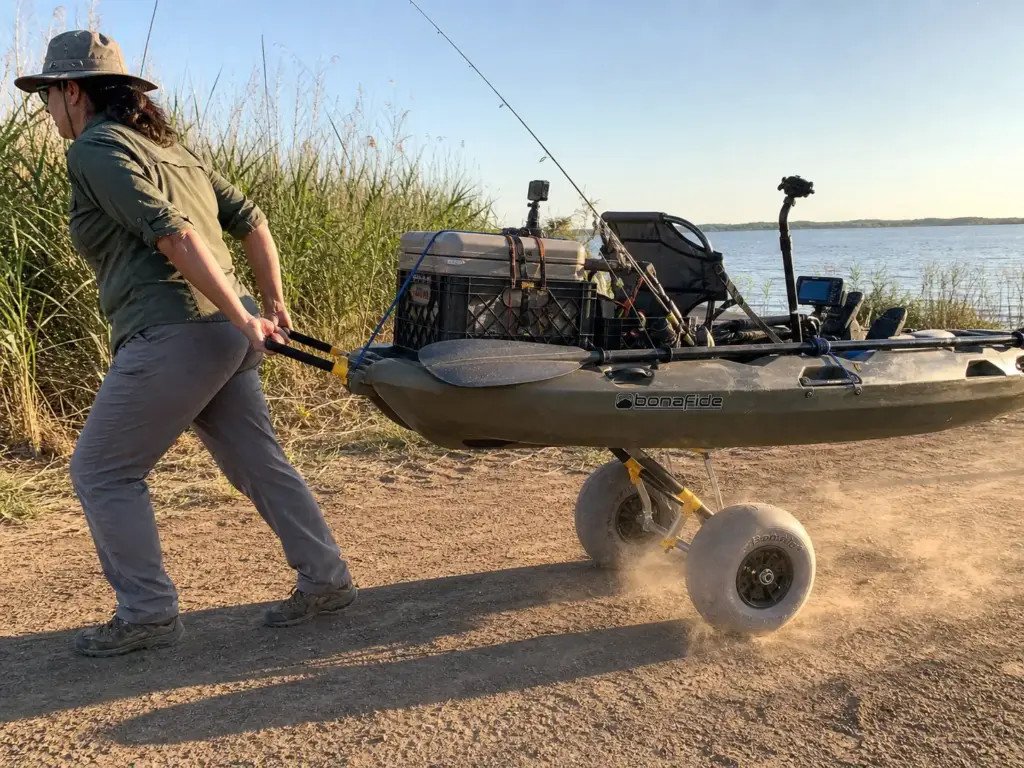
The kayak that felt planted in the driveway is a different boat with a cooler, a crate, a battery and four rods on it. Nobody demos a loaded kayak, which is exactly why the surprise lands on the water instead of at the shop.
Where the Weight Goes Changes What the Hull Does
Manufacturers publish empty-hull specs, and rated weight capacity is a flotation number, not a handling recommendation. A hull loaded near its rating floats, which is all the number promises. How it behaves while floating is a separate question nobody prints.
The variable that matters most is height, not weight. A crate on the tank well, a battery strapped to the deck, a tall finder arm: each raises your center of gravity, and that eats secondary stability specifically, which is the reserve you were counting on for the lean-over moment. Low and centered is the whole rule. Heavy things go in the hull or flat near the seat, never stacked on the crate.
A battery is the densest single item most kayak anglers add, so sizing it right and mounting it low is half the job. Fish finder and battery setups sized for a kayak covers the tradeoff between capacity and the weight you carry all day.
Freeboard, Scuppers, and Wet Seats
Here’s the surprise that lands on almost every first fully-rigged trip: your scuppers start running wet. A loaded hull sits deeper, and scupper holes that stayed dry on the empty demo now sit at or below the waterline. Water rises through them into the seat well, which is exactly what they’re designed to allow, and it feels like the boat is leaking.
It isn’t, but you’ll sit in an inch of water all day unless you plug the ones you can spare. Keep the transducer and drain scuppers open, plug the rest, and carry the plugs so you can pull them if you take on real water. Lost freeboard is the other half: less hull above the waterline means chop that used to slide past now comes aboard.
Test It Somewhere Boring First
The fix for all of this is one hour, and it is the single best hour you will spend on a new kayak. Load the boat exactly the way you’d fish it, with everything, then take it to warm shallow water within swimming distance of shore.
Paddle it. Turn it hard. Then lean it over on purpose, further than you’d ever mean to, until you feel where it starts to let go.
Now you know. Not from a review, not from a spec sheet, but from the boat you own with the load you carry. That’s a piece of information you can’t get any other way, and everyone who skips it learns it later at a worse moment.
Practice the Flip Before It Practices on You
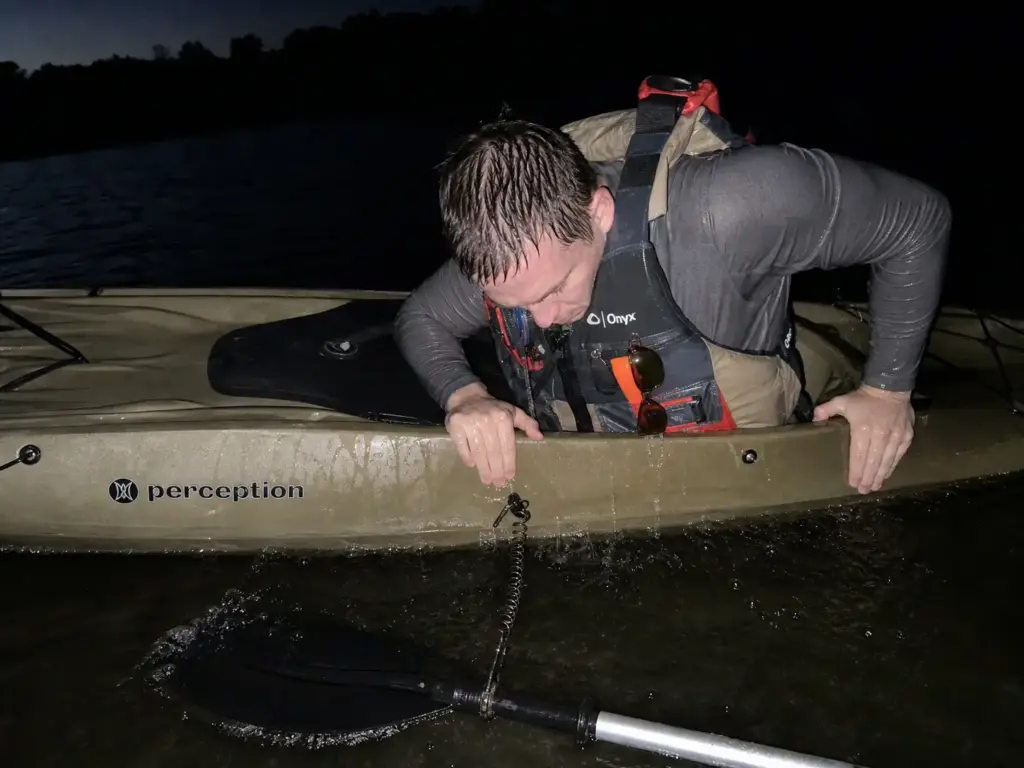
Everyone capsizes eventually. The only variable is whether the first time happens in warm shallow water on purpose, or in cold water with a rod in one hand and two miles between you and the truck.
Rehearse It Warm, Shallow, and on Purpose
The advice veteran kayak anglers repeat most to beginners is the least glamorous one available: practice getting back in before you need to. Capsize recovery drills the same way every time: roll the boat deliberately in chest-deep warm water, swim out from under it, right it, get back aboard. Do it three times. The technique for getting back into a flipped kayak in deep water is learnable in an afternoon, and it stops being an emergency skill the moment it becomes a rehearsed one.
What you learn in that hour isn’t just the movement. It’s how hard the boat wants to roll back over as you climb, how the seat back catches your leg, how much slower everything happens than you pictured. Panic is mostly the gap between what you expected and what’s happening. Rehearsal closes it.
Self-rescue isn’t an advanced skill. It’s the entry fee. Anyone who fishes from a kayak should be able to do it once, cleanly, with gear on.
What Changes When the Kayak Is Rigged
A rigged kayak flips differently and re-enters differently, and this is the part almost nobody practices. A crate raises the center of gravity, so it goes over easier. A finder arm, rod holders and an anchor trolley line become obstacles right where your hands want to grip the deck. And loose gear becomes lost gear in about four seconds.
Leash the things you can’t afford to lose: rods, the paddle, the fish finder. But keep those leashes short and clear of your arms and legs, because a long tether in moving water is a problem of its own, the same logic behind why a wading belt matters for the same reason. Anything that can wrap around a limb while you’re in the water is working against you.
Cold water compresses this entire timeline. Those 15 to 45 minute survival figures assume you’re doing something useful with the time, and re-entry that takes ninety seconds in July can take five minutes in April with hands that have stopped cooperating. Practice is what buys those seconds back, and it’s free. Building the safety habits worth building on your first few trips is the difference between a story you tell at the ramp and one somebody else tells about you.
Buying the One You’ll Still Be Fishing in Year Three
Match the hull to your water and your car before you match it to any review. Propulsion and length follow from those two facts, not the other way around, and the boat that fits your Tuesday evening pond beats the one that photographs well in Florida.
Budget the paddle and the PFD as part of the boat. Not as accessories bought later out of whatever’s left, because whatever’s left is always less than you planned and those two items decide how long you stay out and whether you come back.
Rig the safety setup and rehearse the flip before the first real trip. An anchor trolley with a quick release, a life jacket you’ll actually keep on, and one afternoon of practiced re-entry cost less than a mid-range rod and cover the failure modes that actually hurt kayak anglers.
Then take whatever kayak you end up with to a warm, boring stretch of shallow water, load it exactly the way you’d fish it, and spend an hour finding out how it behaves.
Lean it. Stand up if you plan to stand. Fall in on purpose. That hour teaches you more about your boat than every spec sheet you read to choose it.
Frequently Asked Questions
01What kind of kayak is best for fishing?
A sit-on-top kayak between 10 and 12 feet with at least 30 inches of beam covers the widest range of fishing water for most anglers. The honest qualifier: your water type and how you transport it change that answer more than any feature list does.
02Are fishing kayaks worth it?
Yes for anglers who fish water that shore access cannot reach, and less so for anyone who mostly fishes from a bank or already owns a boat. Budget honestly: the real number is hull plus paddle plus PFD plus a way to transport it.
03Which is better for fishing, a 10-foot or 12-foot kayak?
A 12-footer buys capacity and glide; a 10-footer buys maneuverability, easier transport, and often better stability for its width. Pick by water and car: open lakes and salt favor 12 feet, creeks and solo roof-rack loading favor 10.
04Is a pedal or paddle kayak better for fishing?
Pedal drives win when you want your hands free to fish while moving; paddle kayaks win on weight, price, shallow water and simplicity. The tradeoff nobody mentions is 20 to 40 extra pounds to carry plus a drive assembly that needs maintenance.
05Is buying a used fishing kayak a good idea?
Yes, if you run the hull press test and the crack push-test before money changes hands. A soft spot that stays dented or a crack that grows under thumb pressure is a walk-away, no matter how good the price looks.
Risk Disclaimer: Fishing, boating, and all related outdoor activities involve inherent risks that
can lead to injury. The information provided on Master Fishing Mag is for educational and informational purposes
only. While we strive for accuracy, the information, techniques, and advice on gear and safety are not a substitute
for your own best judgment, local knowledge, and adherence to official regulations. Fishing regulations, including
seasons, size limits, and species restrictions, change frequently and vary by location. Always consult the latest
official regulations from your local fish and wildlife agency before heading out. Proper handling of hooks, knives,
and other sharp equipment is essential for safety. Furthermore, be aware of local fish consumption advisories. By
using this website, you agree that you are solely responsible for your own safety and for complying with all
applicable laws. Any reliance you place on our content is strictly at your own risk. Master Fishing Mag and its
authors will not be held liable for any injury, damage, or loss sustained in connection with the use of the
information herein.
Affiliate Disclosure: We are a participant in the Amazon Services LLC Associates Program, an
affiliate advertising program designed to provide a means for us to earn advertising fees by advertising and linking
to Amazon.com. As an Amazon Associate, we earn from qualifying purchases. We also participate in other affiliate
programs and may receive a commission on products purchased through our links, at no extra cost to you. Additional
terms are found in the terms of service.