
In this article
The reel screamed. Thirty seconds ago, I’d set the hook on something that bent my 7-weight double. Now I was watching backing disappear at an alarming rate while my arms burned and my brain scrambled to remember everything I’d learned about fighting big fish. Forty-five minutes later, I slid a chrome steelhead onto the gravel—not because I was strong, but because I finally understood the physics.
After two decades of guiding anglers through these exact moments, I’ve watched the same mistakes cost people the fish of a lifetime. The good news? The fixes are simple once you understand what’s actually happening between you and that trophy at the end of your line.
This playbook breaks down the big fish fight into five distinct phases—from hookset through landing—with specific techniques and timing cues for each. You’ll learn to fight smarter, not harder, and dramatically increase your landing ratio on trophy fish.
⚡ Quick Answer: Fighting big fish successfully comes down to physics, not muscle. Set your strike drag at one-third of your line’s rated strength, use side pressure to keep fish low in the water column, and employ the rhythmic pump and reel method with your legs doing the lifting. The fish that beat you aren’t stronger—they’re exploiting mistakes you don’t know you’re making.
The Physics of Fish Fighting: Why Technique Beats Strength
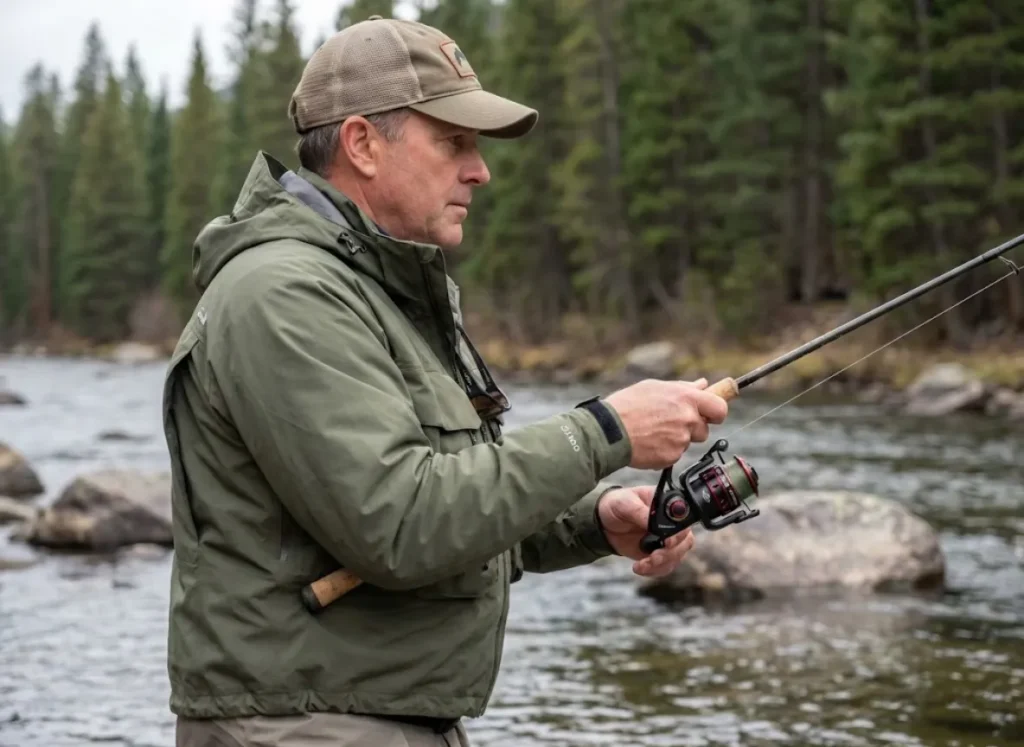
Here’s something that will change how you fight every fish from this day forward: rod angle has no effect on drag pressure. Jake Jordan proved this with a simple scale demonstration—attach a scale to your line, have someone hold it, and pull at any angle you want. The number stays exactly the same.
That’s right. Whether your rod tip is pointed at the sky or held low at 45 degrees, your reel’s drag system is putting identical pounds of pressure on the fish. The only thing that changes is how hard you work.
Why Rod Angle Doesn’t Increase Pressure
When you hold your rod tip high, you load only the thin, flexible tip section. Your arms burn, your back screams, and you feel like you’re in an epic battle. Meanwhile, the fish feels exactly what it would feel if you’d kept your rod low—the drag settings you dialed in before the fight started.
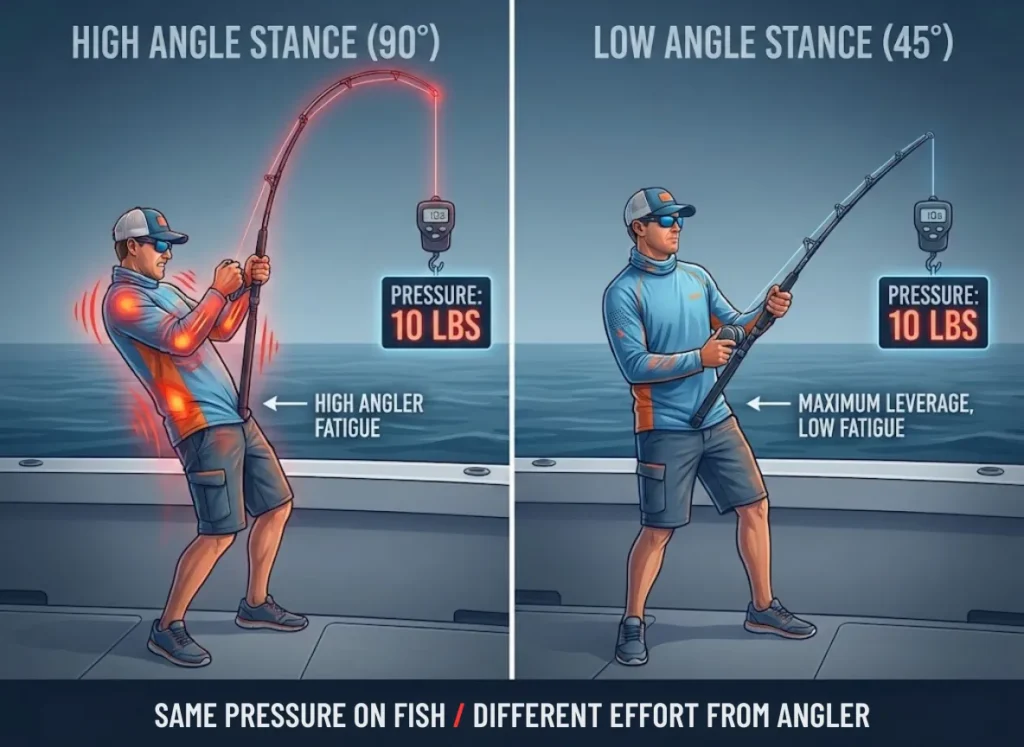
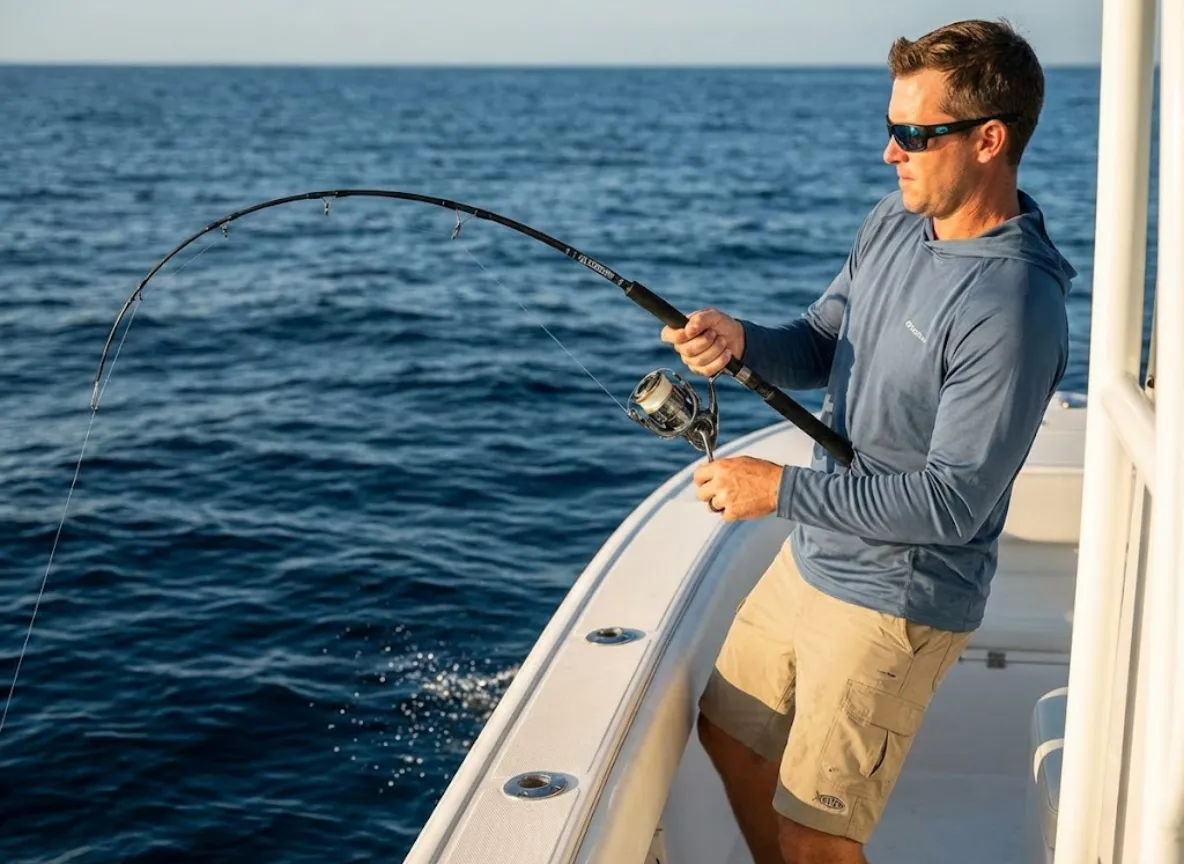
This is the number one lesson I share on every charter: keep rod tip low. A 45-degree angle engages the powerful butt section of your rod instead of just flexing the tip. You get more rod lever mechanics working in your favor, less fatigue, and identical pressure on the fish.
The Lever Mechanics of Your Rod
Your fishing rod functions as a class three lever. The fulcrum sits at your reel, your effort goes in at the grip, and the load (that big fish) pulls at the opposite end. When you understand this, you stop wasting energy.
The butt section provides leverage. The tip section provides shock absorption. High sticking—holding the rod near vertical—loads only the weak tip and risks rolling the tip to the point of rod breakage. Modern rod blanks are engineered to transfer maximum power through the lower 60% of the blank. Trust that engineering.
Energy Conservation: The Angler’s Hidden Advantage
Extended fights with trophy fish can last 30 to 60 minutes or longer. That’s when technique beats raw strength every time. If you’re lifting with your arms and back, you’ll gas out before the fish does.
The fix? Use body weight instead of muscle. The squat-and-pull motion engages your legs—the largest, most fatigue-resistant muscles in your body. Your arms handle the reel work while your legs handle the heavy lifting. Guides who fish every day use this approach because they know the fight isn’t a sprint.
Pro tip: Think of the fight as a marathon, not a wrestling match. Stay loose, breathe steadily, and let your equipment do what it was designed to do.
Phase 1: The Hookset and Initial Run
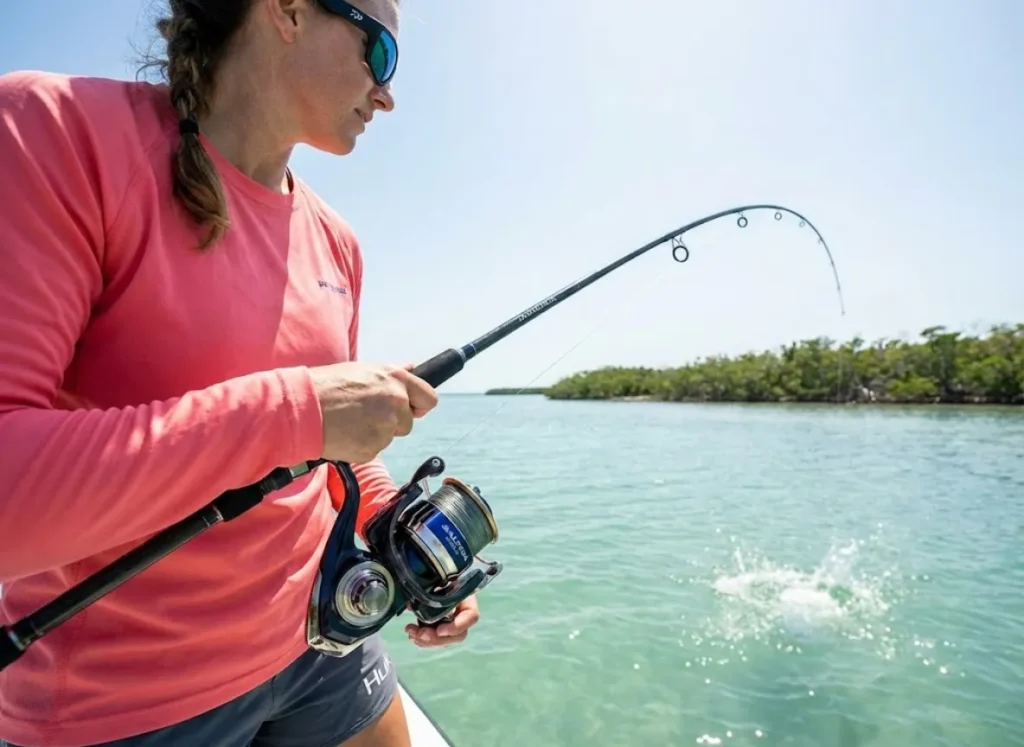
The first 30 seconds determine whether you’re telling a story about the one that got away or posting trophy photos. Most fish are lost during the initial run—and the culprit is almost always drag set too tight.
Setting Strike Drag Before the Fight
Before you even make a cast, set your strike drag at one-third of your line’s rated breaking strength. For 15-pound test, that’s 5 pounds of drag. This isn’t arbitrary—it’s how professionals approach every serious fight.
Use a handheld scale to calibrate your drag precisely. Guesswork leads to broken lines and pulled hooks. When you’re calibrating your drag with a scale, you’re removing the biggest variable from the equation.
The 1/3 setting creates enough give for that explosive first run without immediate pullouts or knot failures. Lever drag reels let you adjust from strike to full with a flick of your thumb. Star drags require more pre-planning, so know your system.
Managing the First Explosive Run
Big fish often run 50 to 100 yards in the first burst. Let them go against calibrated drag—fighting the run only risks breaking off. Point your rod tip at the fish during the run to minimize friction through the guides.
Keep your rod angle consistent at 45 degrees. Avoid jerking or sudden movements. If the fish runs toward structure, start side pressure immediately to redirect its trajectory before it wraps you around a rock or piling.
Slack line is the enemy. Maintain constant tension even when you’re not gaining line. The moment tension drops, that hook has room to work free.
Pro tip: The fish that suddenly goes quiet is about to do something dramatic. Stay alert—the pause before the next run is when many anglers let their guard down.
Reading the Fish: Signs the Run Is Ending
Runs typically slow as the fish’s fast-twitch muscle fibers fatigue. Watch for speed changes. Head shakes often signal the fish is testing the connection.
When the initial run stalls, transition immediately to pressure application. Don’t give the fish time to rest. A green fish that recovers energy is a green fish that will make another run—and maybe one you can’t stop.
Phase 2: Pressure Application and the Mid-Fight Grind
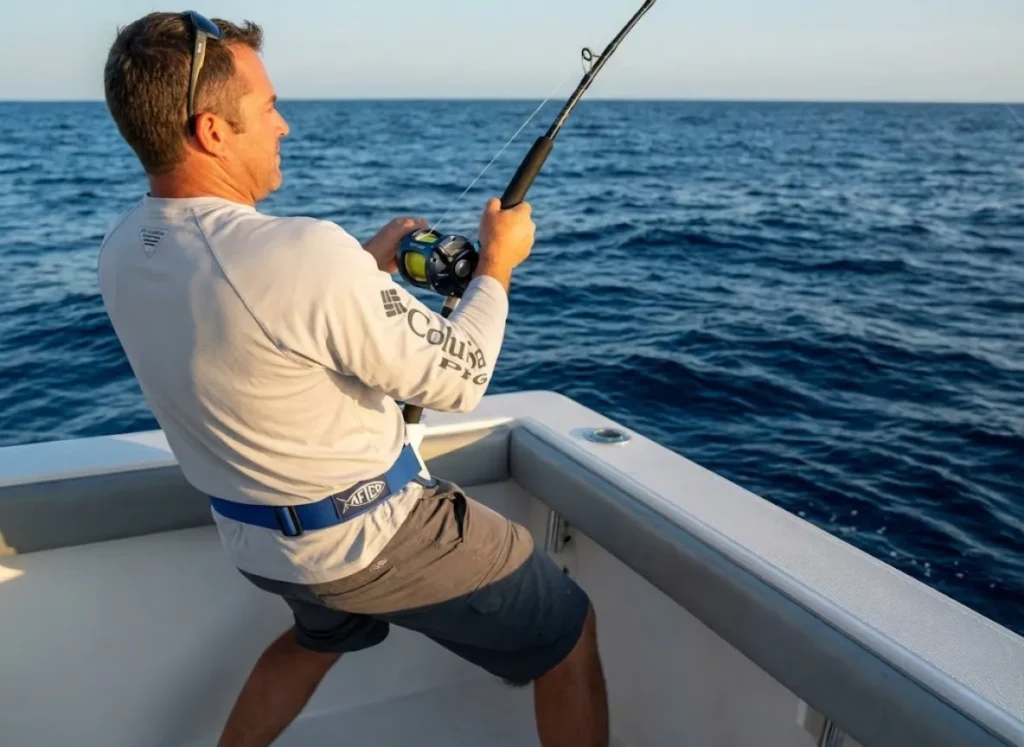
This phase constitutes 70% of most extended fights. The techniques you use here—pump and reel and side pressure application—determine whether that fish reaches the net or throws the hook.
The Pump and Reel Method: Mechanics That Work
Lift your rod tip approximately two feet using leg drive, then drop while cranking one to two handle turns. This rhythmic motion gains line without exhausting your arm muscles.
Never pump past two-thirds of the arc toward vertical. Past that point, you gain no line and load only the weak tip section. Short, quick pumps beat long dramatic strokes for efficiency. You’ll see experienced anglers barely moving their rod tip compared to beginners doing full-body pumps—and the pros are gaining more line.
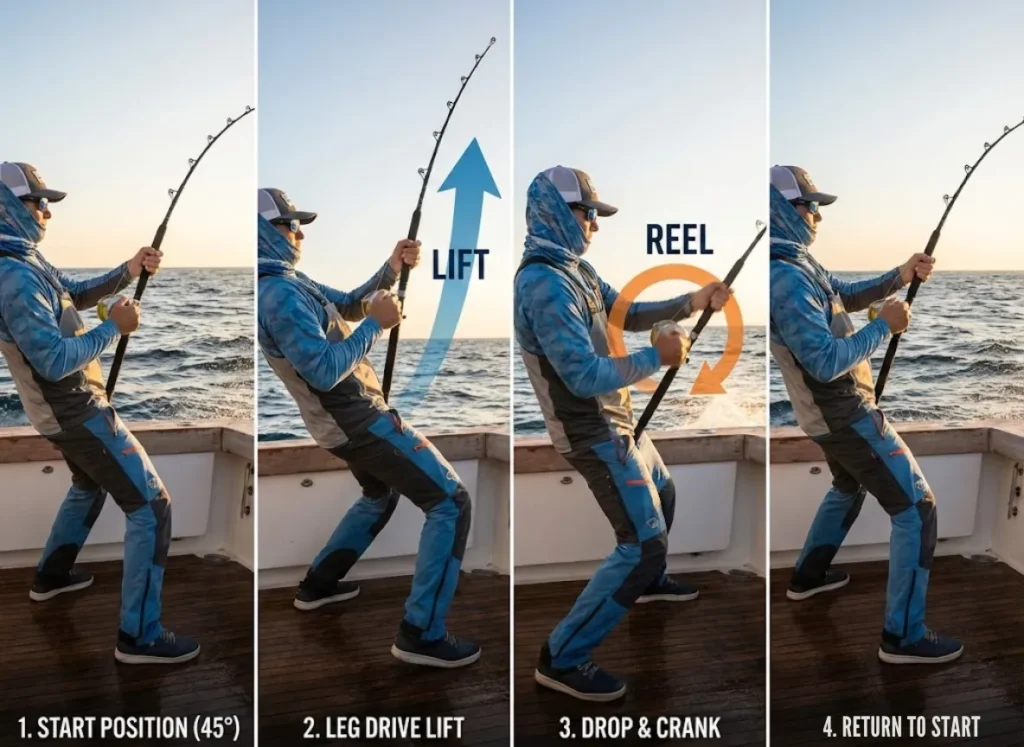
Keep tension constant during the drop. This is when slack creates escape opportunities. The old advice is perfect: pull up and reel down. Make it a rhythm. Make it automatic.
Side Pressure: The Technique Most Anglers Miss
Side pressure might be the most overlooked technique in fish fighting. Instead of pulling up, you hold your rod low and pull horizontally—keeping the fish in the middle or lower third of the water column.
Why does this work? Fish can only swim where their head is pointed, and side pressure allows steering and “folding” the fish. When you pull vertically, you lift the fish toward the surface where panic sets in. Surface jumps create tension spikes, and most fish are lost during those aerial explosions.
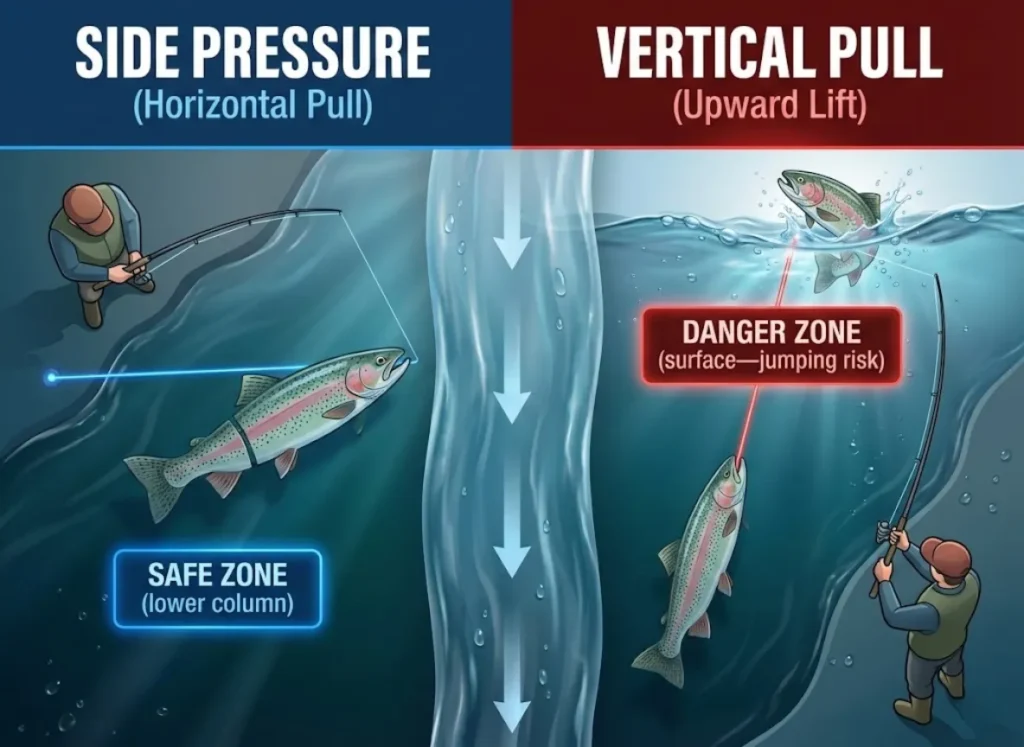
There’s also biology at play. Trout and other gamefish must face current for their gills to work. Pulling them sideways exploits this—you’re not just fighting muscle, you’re working against their breathing. Alternate between left and right side pressure to change angles and prevent the fish from establishing a straight-line run.
Adjusting Drag During the Fight
As the fish tires, incrementally increase drag toward the maximum drag settings of three-quarters of line strength. You can also use hand drag techniques—palming the spool rim—for instant additional pressure when you need it.
Never exceed three-quarters of line test. Beyond that, knot failure risk climbs fast. Watch for line chafe near the fish; if you see fraying, back off the drag immediately. Monitor your drag system heat management during extended fights to prevent drag fade.
When the Fish Fights Back: Response Protocols
Fish don’t just surrender. Here’s how to respond when they make their moves:
If the fish runs again, drop rod tip, point at the fish, and let drag do the work. If the fish jumps, “bow to the fish”—lower your rod tip to reduce tension and prevent the splashdown pullout. If it dives under the boat, dip your rod tip underwater to avoid gunwale chafing.
Turn the fish’s head whenever possible. A fish can only go where its nose points. Steer with side pressure and you control the fight.
Phase 3: The Endgame and Final Approach
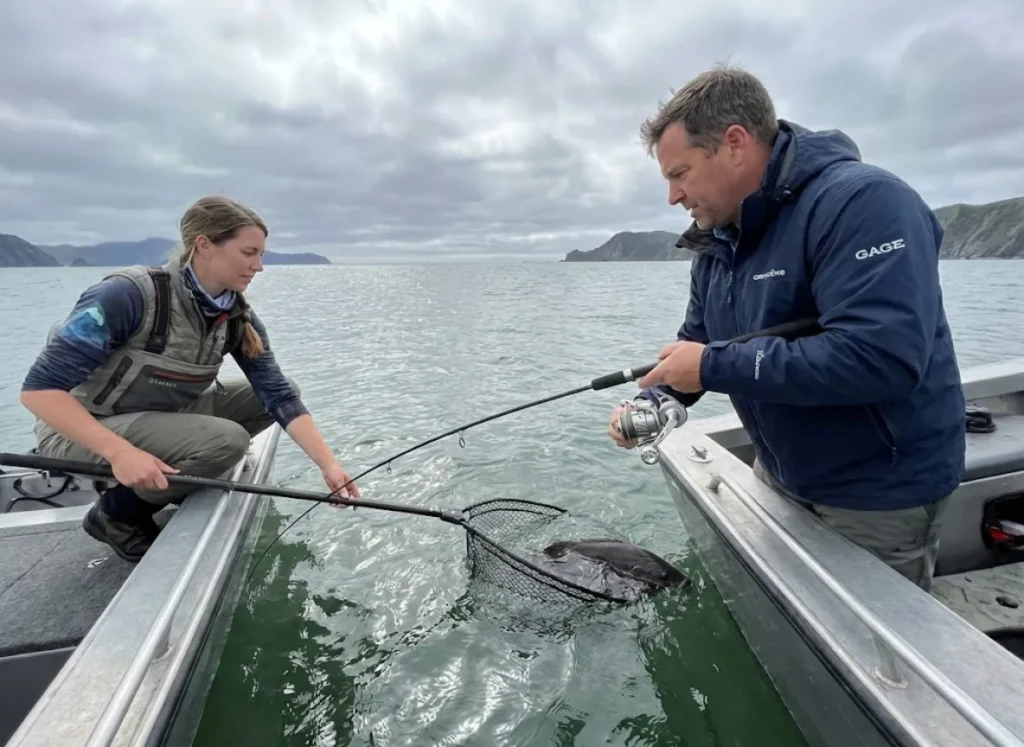
The transition from mid-fight to landing position is where overconfidence kills. More fish are lost at the boat than during the entire prolonged fight combined. Patience here isn’t optional.
Recognizing Endgame Signals
A fish showing its belly—rolling to one side—signals exhaustion and a landing opportunity. Color changes, particularly fish appearing paler, indicate metabolic fatigue. Shorter runs with longer recovery pauses mean you’re close.
But don’t rush. A green fish brought to the net will explode with surprising power. If you’re not absolutely certain the fish is done, give it one more minute. That patience pays dividends.
Species-Specific Endgame Behaviors
Different species behave differently when they’re beaten. Bluefin tuna enter tight circling patterns near the boat—maintain your angle to gradually tighten those circles. Tarpon often unleash a final “death shake” at the net; keep side pressure to prevent head throws.
Pike and musky are notorious for one last surge toward structure when they see the boat or net. Snook and bass often attempt under-boat runs when they spot movement above. Knowing what to expect from your target species prevents last-second heartbreak with hard-fighting fish.
Boat Positioning for the Final Approach
In windy conditions and boat control scenarios, use your trolling motor to position upwind of the fish. Keep the fish on the downwind side to prevent it from running under the hull.
Back the boat slowly toward the fish rather than pulling the fish to a stationary boat. Assign net duties before the endgame—fumbling assignments when the fish is green at the gunwale loses more fish than bad tackle.
Phase 4: The Landing
You’ve survived the hookset, the initial run, the mid-fight grind, and the tense endgame approach. Now comes the moment of truth.
Net vs. Grip vs. Gaff: Making the Right Call
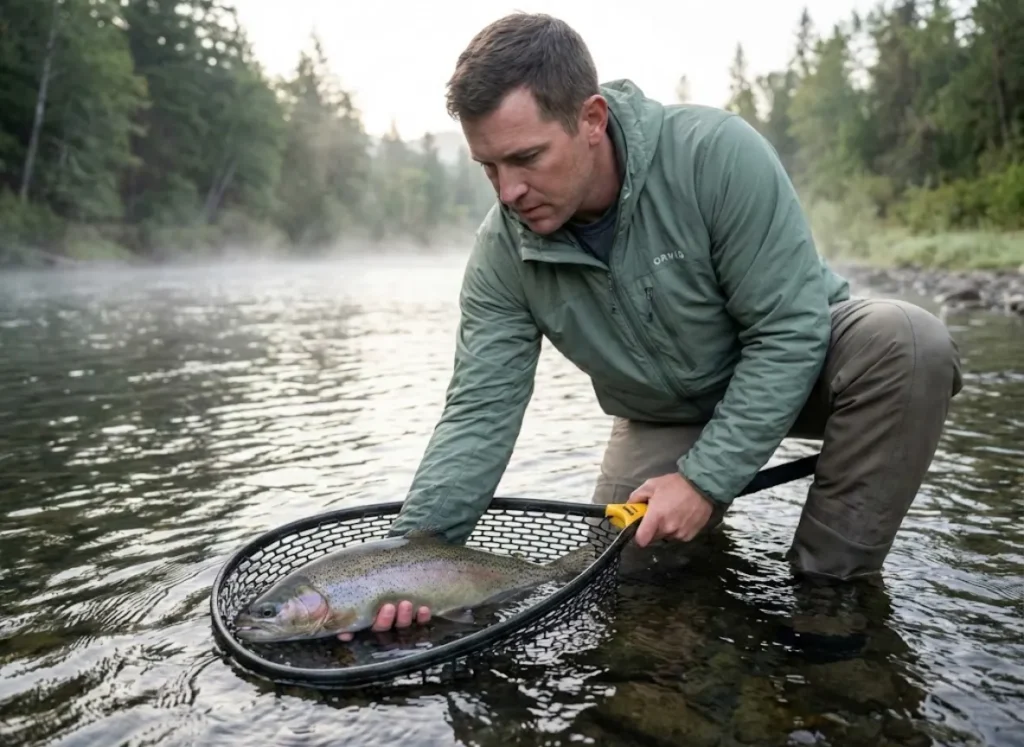
For catch-and-release scenarios, rubber mesh nets cause the least slime coat damage. Choosing the right net makes a measurable difference in fish survival rates after release.
Lip grips work for bass and similar species but can damage the jaw of larger fish held vertically. Gaffs are retention-only tools—never gaff a fish you intend to release. When netting, always lead the fish head-first to prevent thrashing backward out of the net.
Timing the Net: When to Commit
Wait until the fish is on its side showing minimal resistance before making your move. Never chase a green fish with the net—it triggers escape behavior and ensures a surge you probably can’t control.
Position the net underwater before leading the fish toward it. One smooth motion, head-first, then lift. If the fish surges at the last second, abort and return to mid-fight pressure. Never lunge—you’ll lose more fish that way than to any equipment failure.
Pro tip: Keep the net motionless underwater. Movement spooks even exhausted fish. Lead the fish to the net; don’t swing the net at the fish.
Immediate Post-Landing Protocol
Keep the fish in water as much as possible. Air exposure should stay under 30 seconds for fish you’re releasing. Wet your hands before handling to protect the slime coat—that layer is the fish’s first defense against infection.
Support the fish horizontally. Never hold large fish vertically by the jaw alone—the weight causes internal damage. For proper fish handling for survival and catch-and-release best practices, the extra thirty seconds you spend handling correctly translates directly to conservation outcomes.
If the fight was extended beyond 15 minutes, the fish may need revival before release. Hold it facing into current until it swims away under its own power.
Fighting Equipment: Gear That Makes the Difference
You can fight a big fish without specialized equipment, but the right gear turns a grueling battle into a manageable one.
When You Need a Fighting Belt
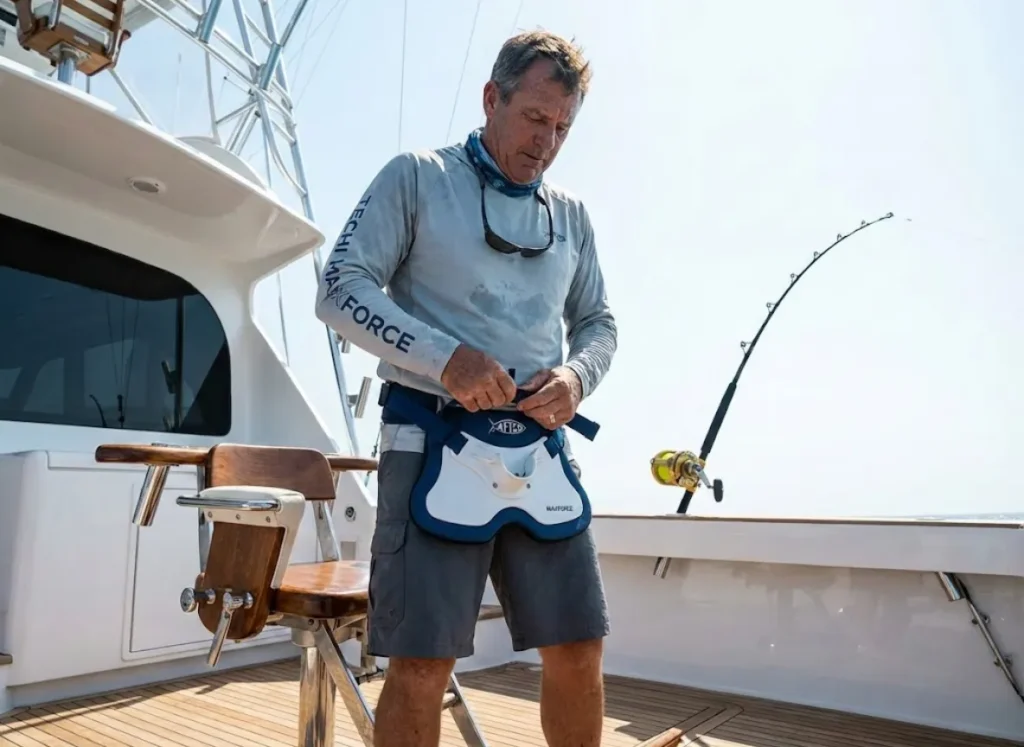
Fighting belts become essential when targeting fish over 30 pounds or fighting for extended periods. The belt distributes rod butt pressure across your waist and hips instead of grinding a single point into your thigh.
Without a belt, prolonged fights create “bone bruises” that can sideline anglers for days. AFTCO’s Vallarta XL and Socorro models represent the industry standard. The simple rule: bigger belt pads are better. More surface area means less pressure per square inch against your body.
Harness Systems for Big Game
When fights exceed 20 to 30 minutes—common with tuna, marlin, and other pelagic fish—a fighting harness becomes necessary. Harness systems engage your legs and core, letting you “squat and pull” with the body’s largest muscles.
Harness clips connect to reel lugs, so ensure compatibility before purchasing. Stand-up fighting with a harness is the standard approach for serious big game fishing work. Practice the connection on land before attempting it on a moving boat with an active fish—fumbling clips while a fish is running is a recipe for disaster.
Spinning Gear Adaptations
Spinning reels can be adapted for extended fights with strap systems like AFTCO’s Spin Strap. The spinning reel’s hanging position below the rod changes fighting dynamics, so use a two-handed grip—one hand on the reel seat, one on the foregrip.
Remember that spinning drag systems typically handle heat less effectively than conventional reels. Monitor for drag fade during long battles and adjust expectations accordingly. For consistent rod and reel balance, proper matching reduces arm fatigue significantly over multi-hour sessions.
Conclusion
Fighting big fish technique comes down to physics, not just muscle. The techniques that win—proper drag settings, low rod angles, side pressure, and the rhythmic pump and reel method—can be learned and practiced. The five-phase framework turns chaos into control.
Set your strike drag at one-third of line strength. Use side pressure to keep fish low where they can’t jump. Employ your legs for lifting and reserve your arms for reel work. Don’t let the fish rest, but don’t rush the landing either.
Next time you feel that weight at the end of your line, you’ll have a system. The fish doesn’t know the phases—but you do. That knowledge is the difference between the one that got away and the one in your net.
FAQ
How much drag should I set for big fish?
Set your strike drag at one-third of your line’s rated breaking strength—5 pounds for 15-pound test. Maximum drag during the fight should not exceed three-quarters of line test. Use a handheld scale to calibrate precisely.
What is side pressure in fishing?
Side pressure is a technique where you hold your rod low and pull horizontally rather than upward. This keeps fish in the middle or lower water column, prevents surface jumping, and exploits the fish’s need to face current for gill function.
How long does it take to tire out a big fish?
Fight duration depends on species, size, water temperature, and technique. A 30-pound gamefish may take 15 to 45 minutes with proper technique. Cold water extends fight time because fish fatigue more slowly. Never rush the landing.
What should I do when a fish runs toward me?
Reel as fast as possible while maintaining rod pressure. If you can’t keep up, strip line with your free hand while cranking. Slack line is the leading cause of lost fish during direction changes.
Should I keep my rod tip high when fighting a fish?
No. Scale tests prove that drag pressure remains constant regardless of rod angle. High angles only tire the angler while loading the weak tip section. A 45-degree angle engages the powerful butt section for more effective fighting with less angler fatigue.
Risk Disclaimer: Fishing, boating, and all related outdoor activities involve inherent risks that
can lead to injury. The information provided on Master Fishing Mag is for educational and informational purposes
only. While we strive for accuracy, the information, techniques, and advice on gear and safety are not a substitute
for your own best judgment, local knowledge, and adherence to official regulations. Fishing regulations, including
seasons, size limits, and species restrictions, change frequently and vary by location. Always consult the latest
official regulations from your local fish and wildlife agency before heading out. Proper handling of hooks, knives,
and other sharp equipment is essential for safety. Furthermore, be aware of local fish consumption advisories. By
using this website, you agree that you are solely responsible for your own safety and for complying with all
applicable laws. Any reliance you place on our content is strictly at your own risk. Master Fishing Mag and its
authors will not be held liable for any injury, damage, or loss sustained in connection with the use of the
information herein.
Affiliate Disclosure: We are a participant in the Amazon Services LLC Associates Program, an
affiliate advertising program designed to provide a means for us to earn advertising fees by advertising and linking
to Amazon.com. As an Amazon Associate, we earn from qualifying purchases. We also participate in other affiliate
programs and may receive a commission on products purchased through our links, at no extra cost to you. Additional
terms are found in the terms of service.