
In this article
You marked the spine, pulled the spacing chart, wrapped clean thread, and turned the rod faithfully on its motor for four hours. Three weeks later the finish is still soft under your thumb, and nothing you did at the bench was wrong. The room was.
That failure fills rod-building threads year-round, and it’s almost never a technique problem, which is exactly why the step-by-step guides never see it coming. Here’s the whole build, from bare blank to cured finish, plus the two things nobody else tells you: whether this project is worth your weekend, and what to do when it goes sideways after the epoxy sets.
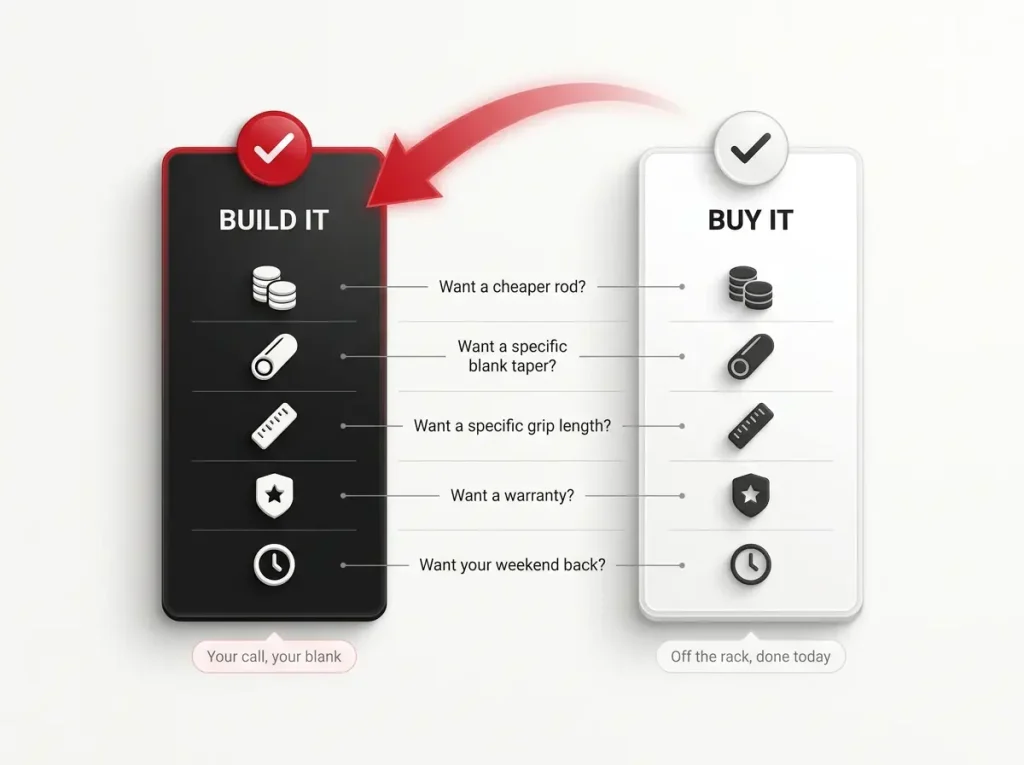
What Building Your Own Rod Actually Costs You
Nobody in this hobby wants to tell you not to do it. So here it is, before you spend a dime: for a lot of anglers, this math doesn’t work, and you should know that now rather than on hour six of a Saturday.
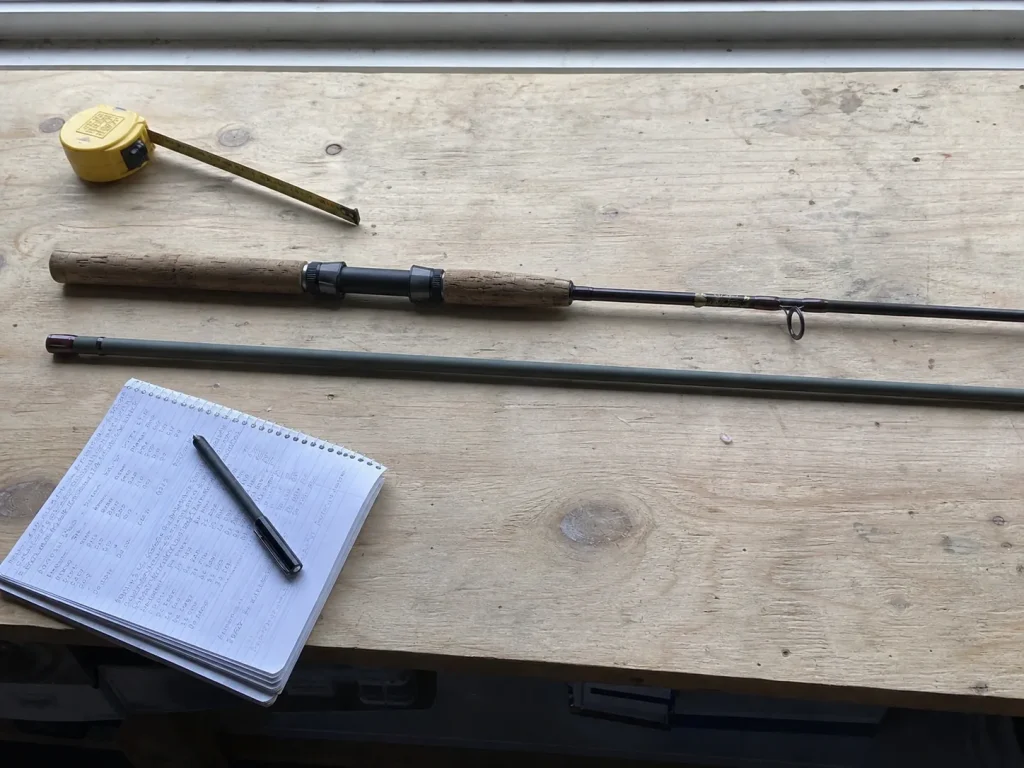
Start with time, because that’s the cost people ignore. A first build runs roughly 6 to 8 hours of hands-on work spread across two or three sessions. Not an evening.
The epoxy cure runs on its own clock in between, and there is no way to compress it. Whatever else you’re doing this weekend, the rod owns a piece of it.
Now the money, honestly. Building it yourself saves somewhere around half to two-thirds of what a professional builder charges for comparable work, and that’s a real saving. But it only holds if your own hours cost you nothing. Price your time at anything above zero and the gap closes fast.
The rod building kit tiers matter more than the headline number. A bare-bones first kit lands about where a mid-tier factory combo does. A premium kit costs more than a name-brand factory rod outright, before you’ve touched a tool.
So the honest split looks like this. If you want a rod cheaper than a factory rod, the bare-bones kit wins and it isn’t close. If you want a rod better than a factory rod, the premium kit plus your weekend is the actual price of entry, and a solid factory rod off the rack will do the job for less.
There’s one more line in the ledger that never gets mentioned: the warranty you give up. Break a factory blank and there’s a program behind it. Break yours and you bought a blank.
So why does anyone build? Ask around and every builder thread lands in the same place, and it isn’t the money. You build because you want that blank, that grip length, that guide train, on a rod nobody else owns.
That’s a real reason. It’s just not a financial one, and the guides that sell you kits keep those two things blurred on purpose.
The Tools and Supplies You Actually Need
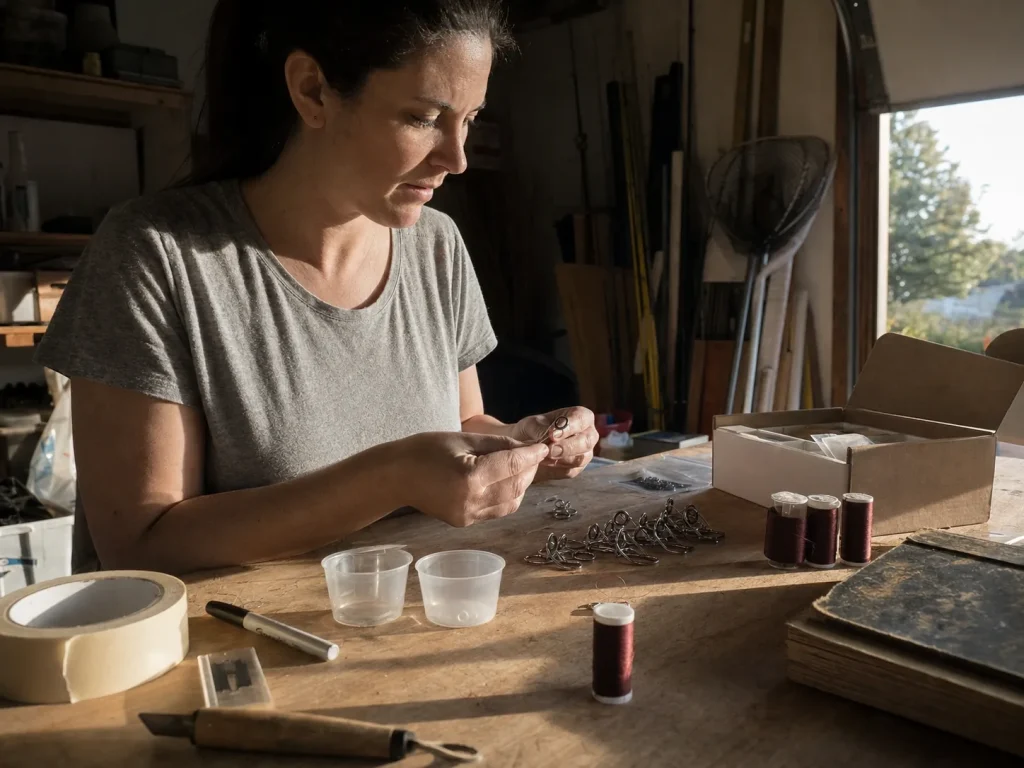
You don’t need a shop. You need a kitchen table, a short list of real things, and one purchase that surprises everybody.
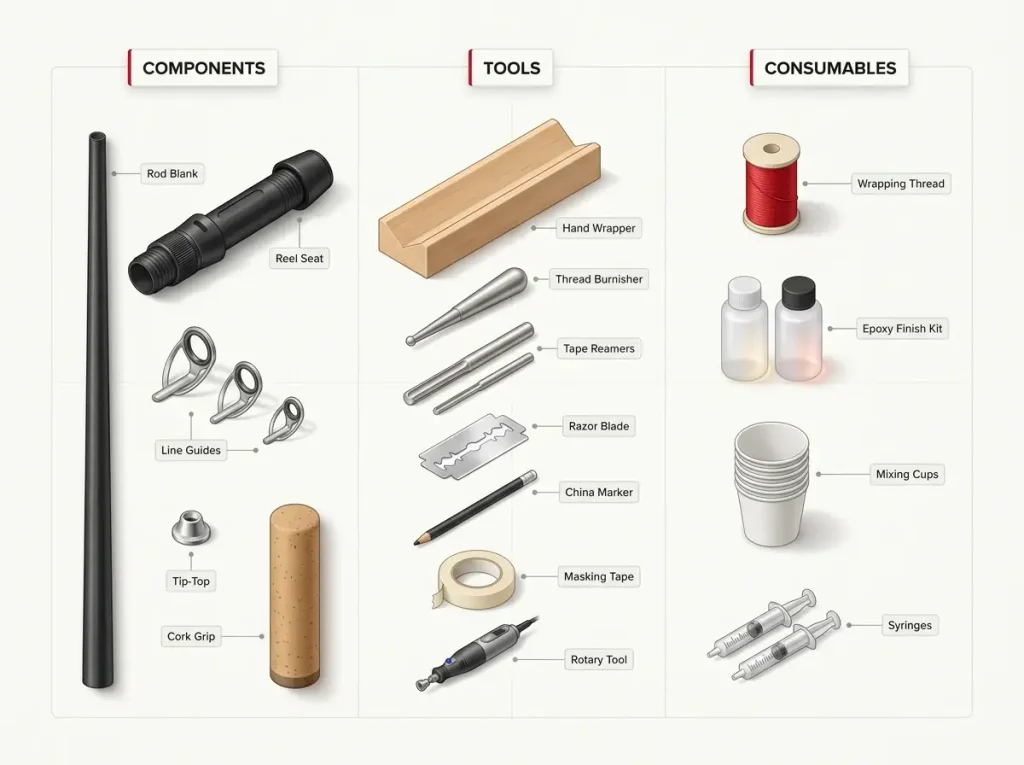
The Components
Five parts become a rod. The rod blank is the tapered tube that does all the work. The reel seat holds the reel.
The line guides carry the line down the blank. The tip-top caps the tip. The grip is what your hand lives on.
That’s it. Everything else on the bench is there to attach those five things to each other.
The Tools
The list is shorter than the hobby’s reputation suggests: a hand wrapper (or two heavy books and a coffee cup, which is what most first builds actually use), a thread burnisher, tape reamers, a single-edge razor blade, a china marker, masking tape, mixing cups, and a rotary tool for the rough reaming work. A round rasp and some patience does the same job as the rotary tool, just slower.
Half of that list is already in most junk drawers. The other half is why the all-in-one starter path exists. The Custom Rod Building Starter Supply Kit FSB-2 bundles the blank, guides, grip components, thread, finish, and tools into one box, and its real job is ending the “which six parts even go together” paralysis that stalls most first builds before they start.
The One Purchase People Skip
The rod dryer. Beginners read “cure 24 hours” and file the motor under optional. It isn’t, and the epoxy section below explains exactly why. Budget for it now.
Builders do rig homemade rod lathes out of a slow motor and scrap wood instead of buying a dryer, and they genuinely work. Just know what you’re signing up for: it’s the setup people swear at around 11pm, when the rod slips in a shop-rag chuck and lays a drip line down four hours of clean thread.
Safety Non-Negotiables Before You Open the Epoxy
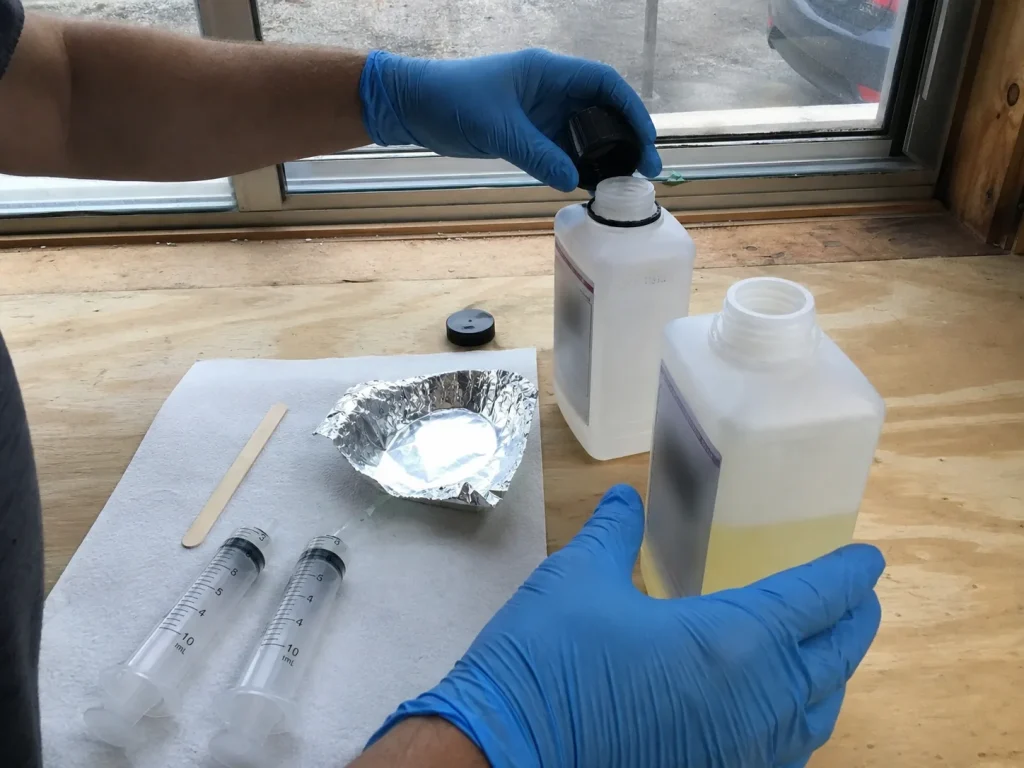
The risks here are boring and small. That’s exactly why people skip them and end up with a chemical rash three builds later.
Start with the counterintuitive one: gloves matter more than a respirator. According to OSHA’s technical guidance on epoxy resin exposure and required ventilation, epoxy’s respiratory hazard at room temperature is genuinely low, and skin contact is the bigger real exposure route. Nobody expects that ranking. California’s occupational health bulletin on epoxy resin systems says the same thing about dermal exposure, and adds the part that should change your habits. Epoxy is a potent skin sensitizer, and sensitization can set in after a surprisingly short exposure. Once it does, every later contact provokes a stronger reaction than the last.
That’s backwards from how most people assume it works. The risk isn’t waiting for you on your fifth rod, patient and cumulative. It’s on this one.
Here’s the exception that flips the whole ranking, and it matters more than it sounds. Spraying the finish, or heating the room to rush the cure, volatilizes the resin and the fume risk climbs. So the tempting shortcut is also the one that makes ventilation matter.
Crack a window anyway. It costs nothing.
The rest is short. Hot-melt glue for the tip-top is genuinely hot, and it’s the most common minor burn in this entire project. Trim thread with the razor cutting away from the blank, and replace the blade more often than feels reasonable, because a dragging dull blade is what slips. Denatured alcohol and an alcohol burner are solvents sitting next to an open flame, so treat that corner of the bench with the respect it’s earned.
The one that gets everybody is invisible. Oil and silicone contaminate finish epoxy, and hand lotion, WD-40 residue, or a silicone spray used anywhere near the bench will fisheye your finish coat.
You’ll stare at those craters for an hour trying to figure out what you did wrong at the wrap. You didn’t. You touched the blank.
Choosing Your Blank and Components
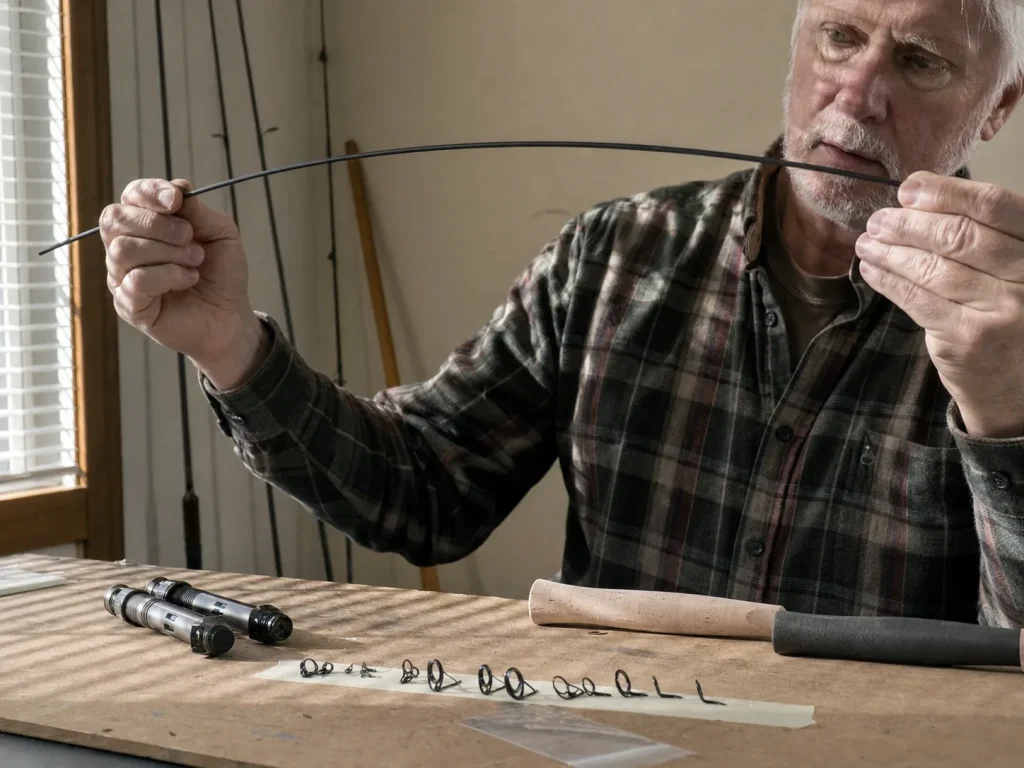
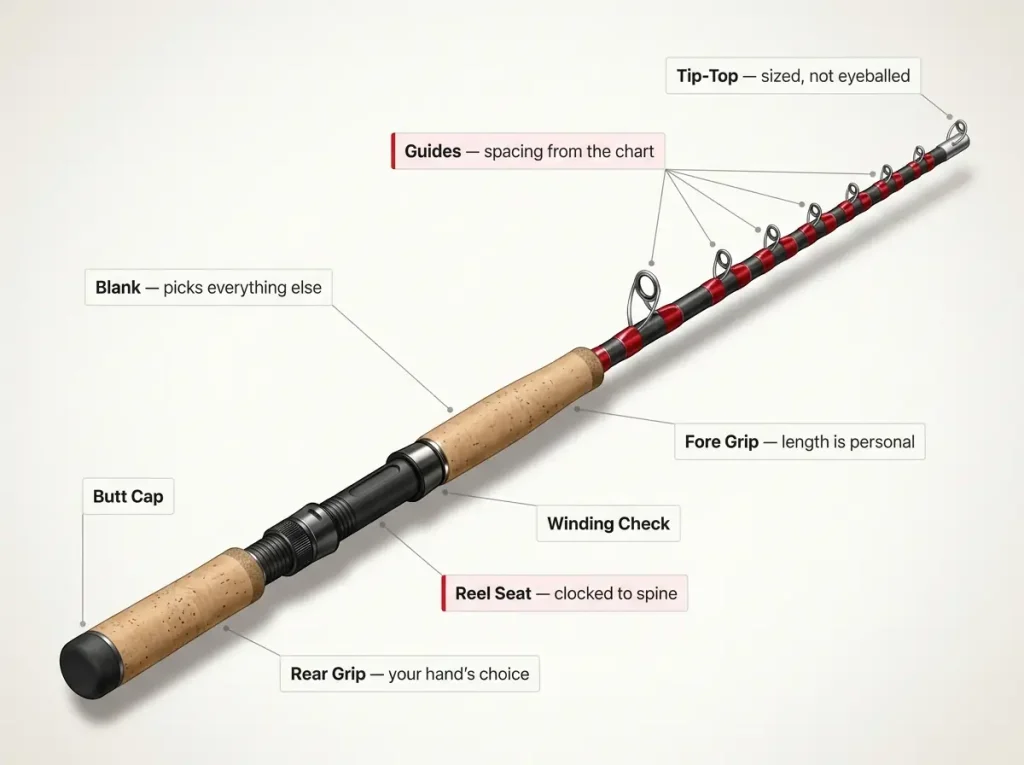
This is where the custom part of a custom rod actually happens. Everything after this is assembly. Get it wrong here and a flawless build hands you a rod you don’t enjoy fishing.
The Blank Decides Everything
The blank is the rod. The rest is hardware you bolt to it, so spend your attention here proportionally. That means how to pick a fishing rod without overpaying is the same skill you need at the blank rack, just without the paint.
Rod blank material comes first (graphite blank, fiberglass blank, or composite blank), then action, power rating, line rating, lure rating, length, and one-piece versus two-piece. Two of those get confused constantly, and action and power are two different things worth separating before you spend money: power is how much force it takes to bend the blank, action is where along the blank that bend happens. A fast action blank bends near the tip and loads quickly. A moderate action blank bends deeper toward the middle and forgives a rushed hookset.
Match the ratings to the technique you actually fish, not to the fish you dream about. And be careful with modulus: the IM6, IM7, and IM8 numbers on a blank sell a lot of rods, and most anglers cannot feel the difference they’re paying for.
Guides, Frames, and Inserts
Stainless steel frames, zirconia inserts or ceramic, and a guide count that follows the blank rather than the price tag. Cheap guides on a good blank is a fixable mistake. Too few guides is not, because the line will bite into the blank between them under load. The differences between insert materials are real but smaller than most catalogs imply.
Reel Seat, Grip, and Tip-Top
Cork, EVA grip foam, or Hypalon grip rubber. Grip material is genuinely personal, and cork versus EVA foam settled by how you actually fish beats any spec sheet on the subject. Split grip or full grip is the same kind of call.
Grip length is one of the real reasons to build. A factory rod gives you the grip the factory chose. You get to put the reel seat exactly where your forearm wants it, which is a thing you cannot buy.
Then the measurement everyone fumbles: tip-top sizing is measured, not eyeballed. Too small and it won’t seat. Too large and it sits loose enough to spin off on a hookset, usually the first good one.
The rookie move here is buying the blank last, after falling in love with a grip or a guide set on a forum. Every experienced builder says the same thing: start at the blank and let it pick the rest. Components are cheap to change your mind about. A blank you chose to match a grip is a rod you’ll fish once.
Finding and Marking the Spine
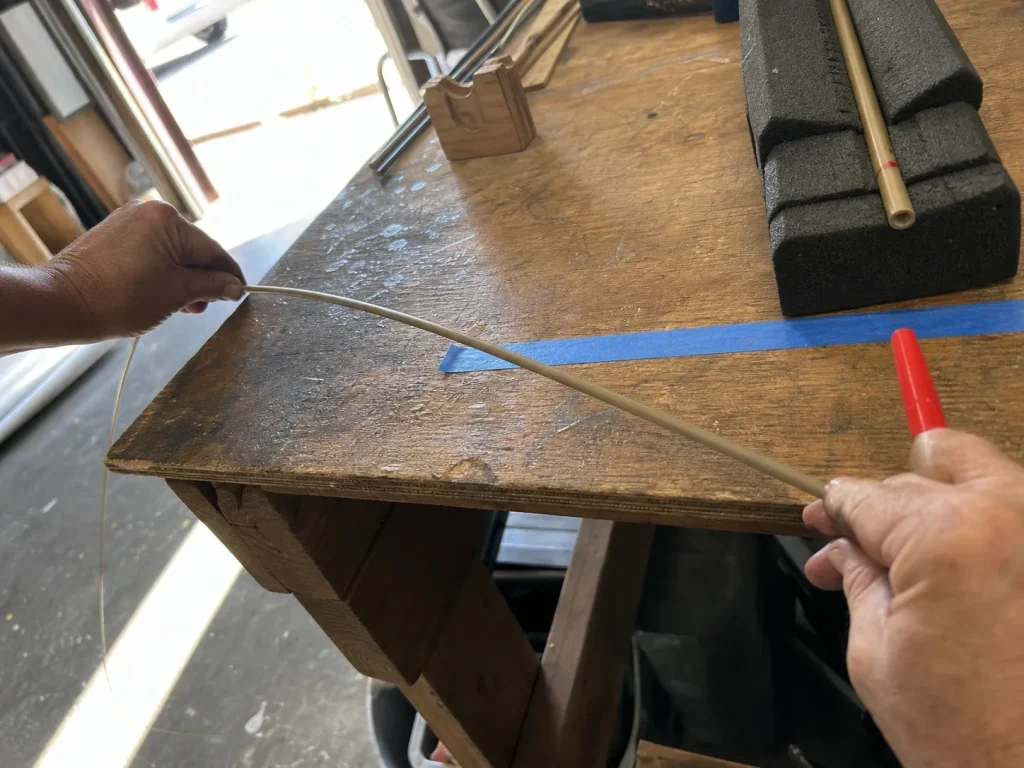
Two minutes of work that beginners either skip entirely or agonize over for an afternoon. Both reactions are wrong, and the honest answer sits in between.
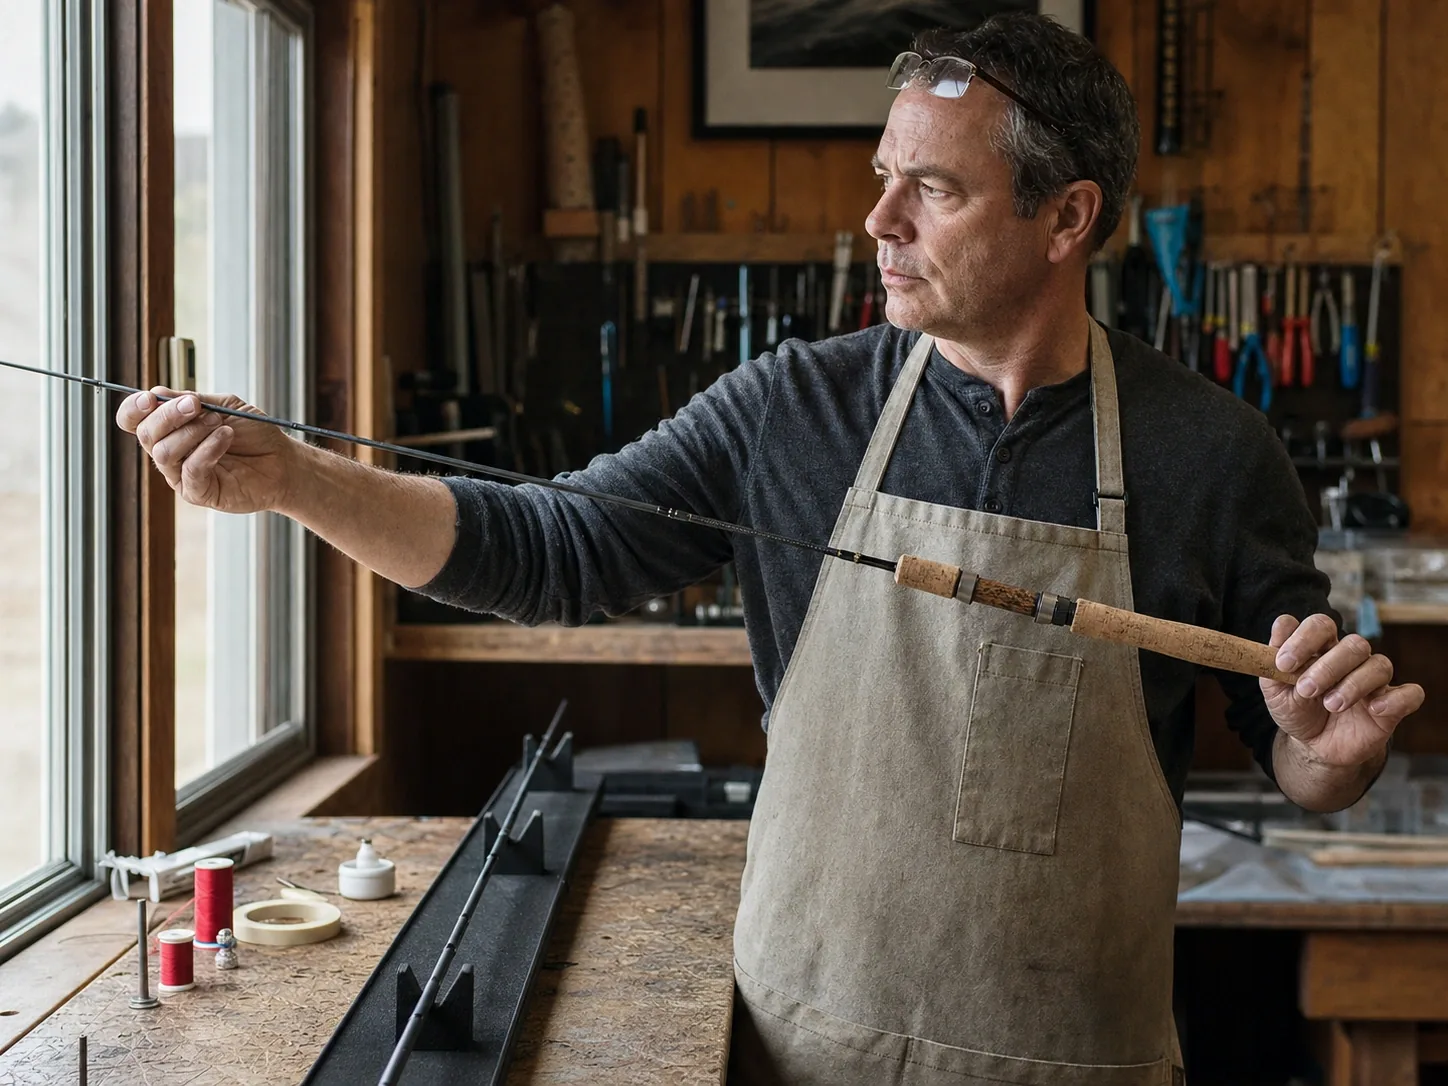
A blank is rolled, not extruded. That rolling leaves it slightly stiffer in one plane, and that plane is the spine. Bend the blank and it wants to hop into one orientation, the way a bent playing card wants to lie flat.
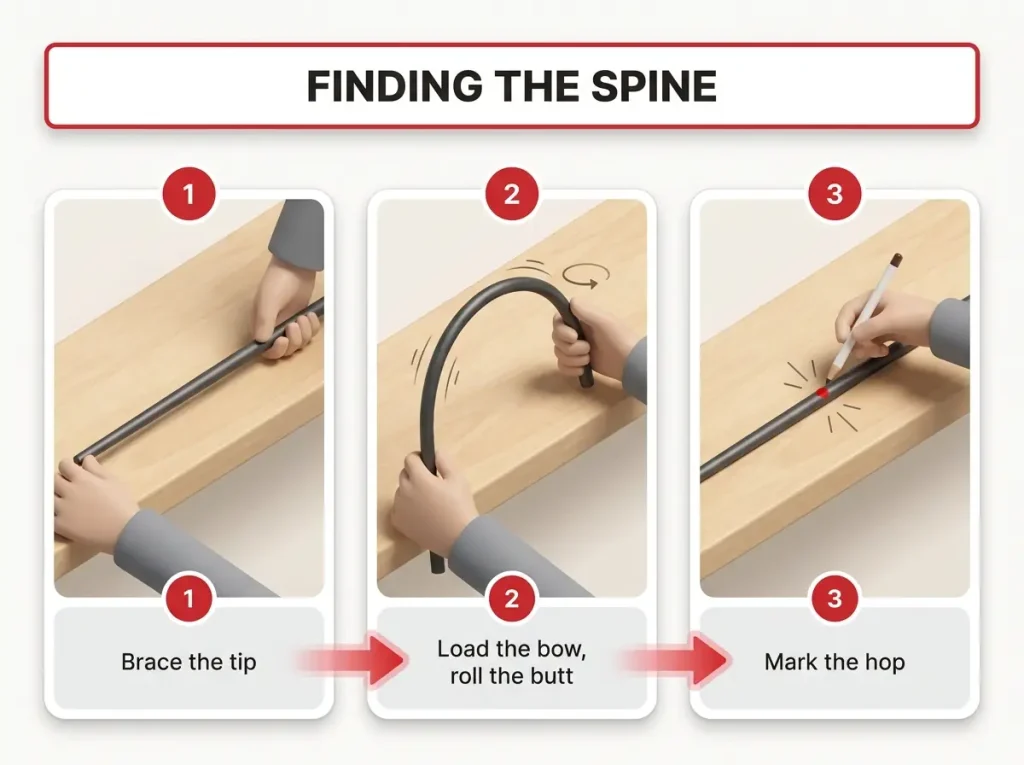
Finding it is hands-on. Brace the tip against the bench or your palm, load the blank into a deep bow, then roll the butt slowly between your fingers. You will feel the hop before you see it.
When it settles, mark it with the china marker. That’s the whole method.
Then the honest countercase, because you deserve it: the factory rod already in your closet is very likely off-spine, and it fishes fine. That doesn’t make the step pointless. It makes it cheap insurance you’re paying for with two minutes instead of money. If you want the deep version, the full spine-finding walkthrough and the honest verdict on whether it matters covers the mechanics properly.
Here’s the part that stings, and the reason this step earns its two minutes. An off-spine guide train doesn’t announce itself on the bench. It shows up when the rod is loaded under a fish, and by then the finish has been cured for a week.
Installing the Grip and Reel Seat
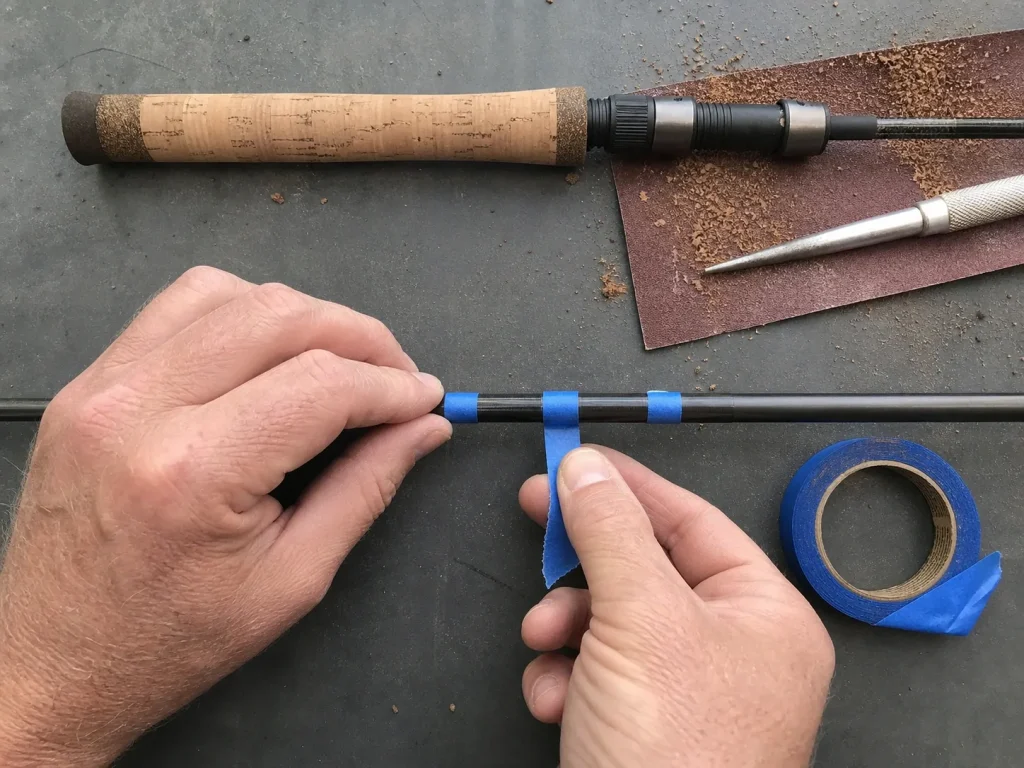
First step where you commit. Epoxy here doesn’t come back off, and the blank is tapered, which is the part nobody warns you about: your grip’s bore is one diameter and your blank is not.
Reaming for the Taper
The bore has to be opened to match the taper, using tape reamers, a rotary tool, or a round rasp. Ream slow and dry-fit constantly, because you cannot un-ream. A bore that ends up a hair too big becomes a reel seat that spins loose under a hookset a season later, and you won’t connect the two events when it happens.
A Baosity Fishing Rod Handle Kit with Reel Seat ships the composite cork grip and its matching reel seat as a fitted pair, which sidesteps the other version of this headache: sourcing two parts separately and hoping the diameters agree.
Shimming for a True Friction Fit
Tape shims are not a cheat. Building up bands of masking tape into arbors along the blank is the standard method for a centered, permanent friction fit on a taper. Without them the part rides low on one side and sets crooked, and you’ll see it forever.
Committing the Epoxy
Spread epoxy on the blank and inside the bore, then twist the part as you slide it home. A dry patch inside the grip is the void that later becomes a spin. Coverage beats speed here every time.
Clock the reel seat to your spine mark before the epoxy grabs. There is no “after.” And keep in mind that where the reel seat sits changes how the finished rod balances, so this placement decision is doing more work than it looks like.
Everyone rushes this step because it looks like the easy one. The parts slide on fine. The problem shows up months later, on a fish.
Guide Spacing, Alignment, and Wrapping
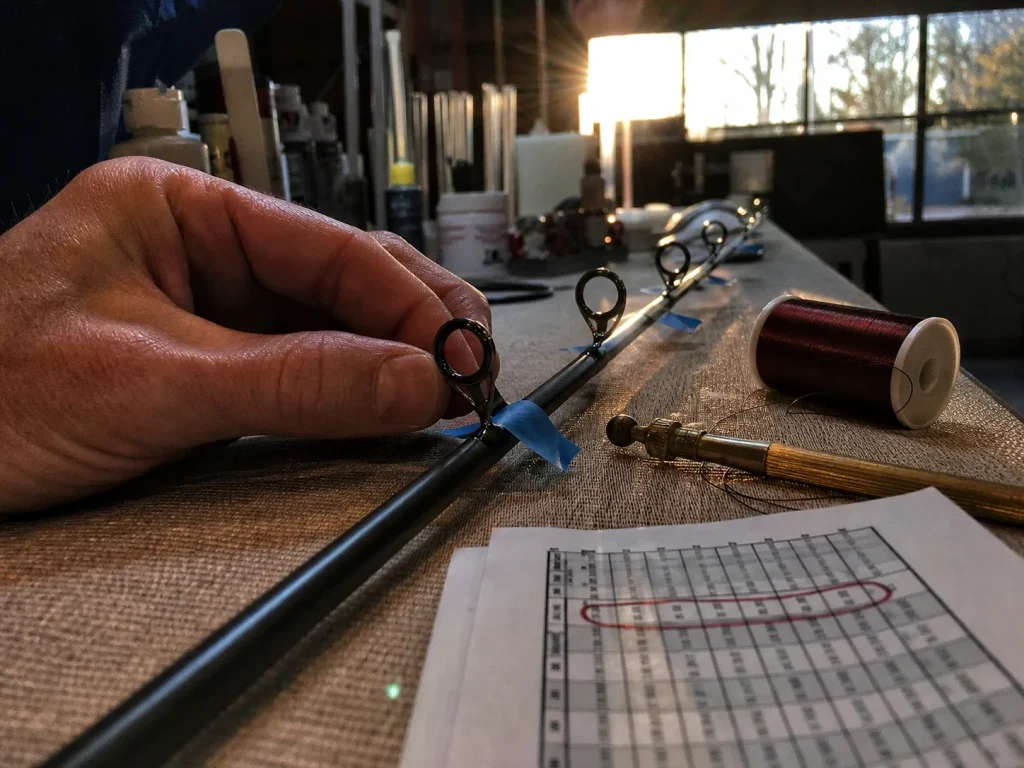
This is the step that looks hard and isn’t. Wrapping thread is a rhythm you’ll have inside ten minutes. Guide spacing is the one that punishes guessing, and almost nobody warns you they’re in that order.
Spacing Is Where Guessing Costs You
Blank manufacturers publish guide spacing charts for a reason. Pull yours. Then static-load the taped layout, bending the blank under a weight to see whether the line follows the curve smoothly or bridges between guides.
The number to hold onto: leave 3 to 4 thread turns of clearance past the guide foot’s upright before your locking wrap begins. Eyeballing “close enough” here is exactly how a guide reads crooked only after the thread is already set.
Taping and Aligning the Guide Train
Tape the guides on, then sight down the blank from the butt cap the way you’d sight down a pool cue. That’s the alignment check. It’s free right now and expensive in forty minutes, so do it twice.
The Wrap Itself
Thread tension is about consistency, not force. A wrap that’s tight in the middle and loose at the ends telegraphs straight through the finish coat.
Burnish the thread packed before you close the wrap, using the thread burnisher to push the wraps tight against each other. Gaps you can see now are gaps the epoxy will magnify into a lens later. Finish with the loop-and-pull: lay a loop of scrap thread under your last few wraps, pass the tag end through it, and pull it back underneath.
One thing worth settling while the thread is still out: if you want a hook keeper on this rod, it wraps onto the blank in exactly this step. Add one later and you’re cutting into finished work.
Applying and Curing the Finish Coat
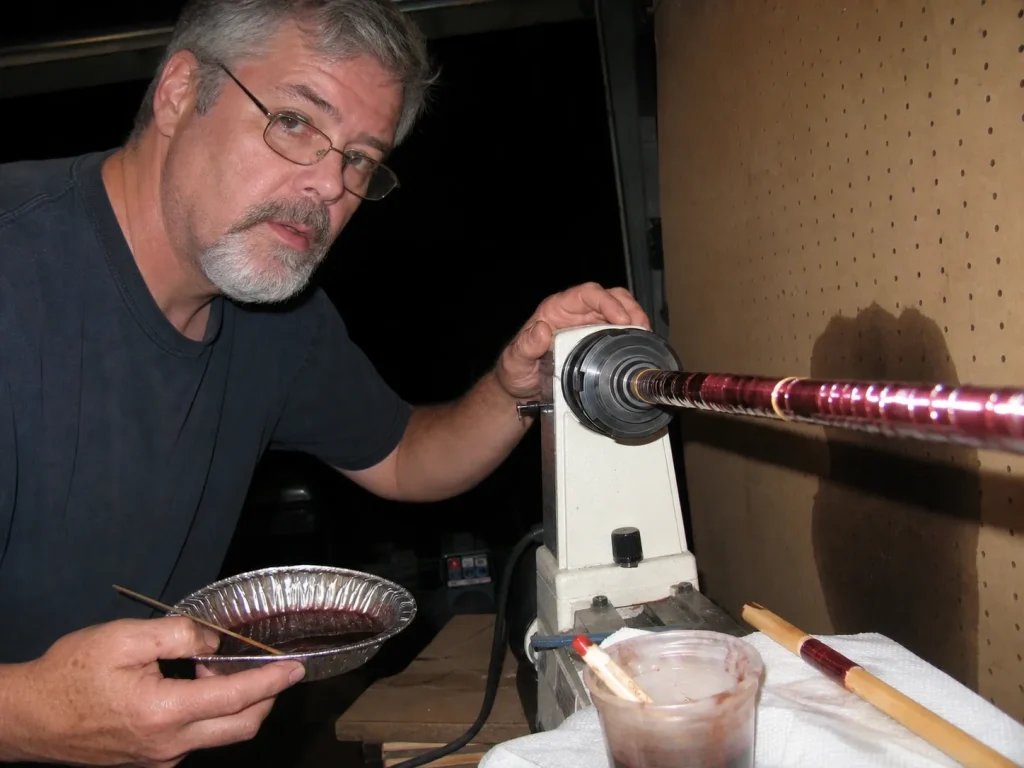
The step where careful people still fail. And the number one rookie move happens in the first sixty seconds, before a drop ever touches the rod.
Mixing Slow, Reversed, and Poured Out
Two-part rod finish goes 50/50 by volume. Use syringes, not eyeballs. Then stir it slowly, reversing direction every few turns.
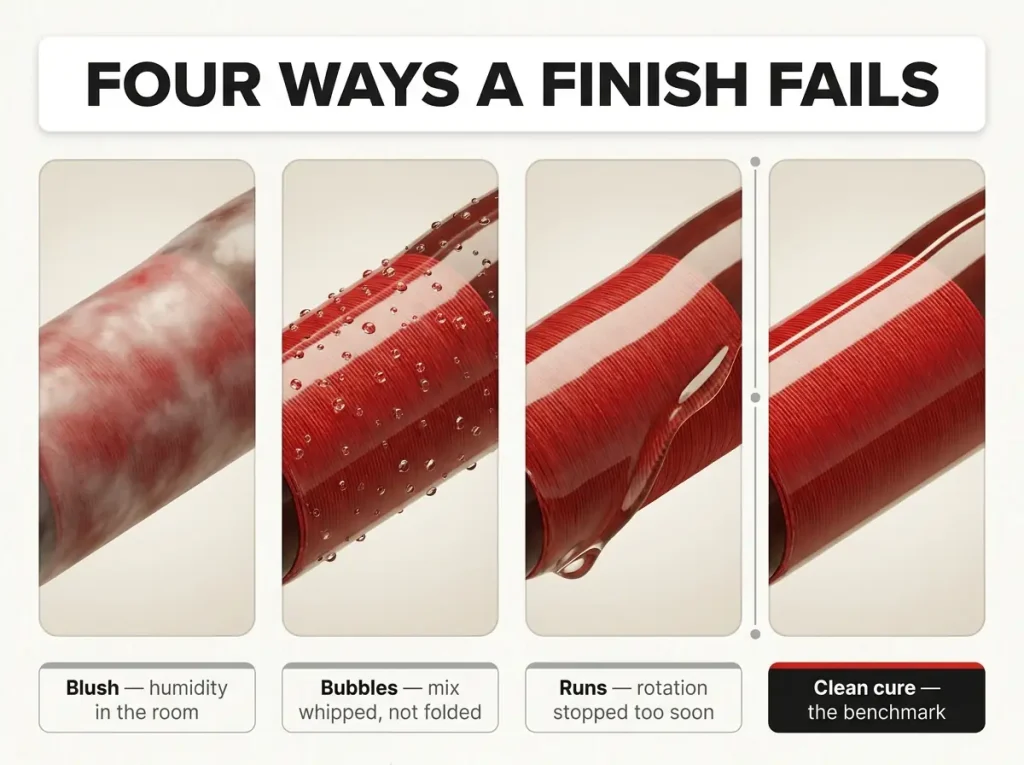
That reversal is the whole trick. Whipping the mix like scrambled eggs beats air straight into the resin, and those bubbles cure into your wrap permanently. Reversing folds bubbles out instead of whipping more in.
Then pour the mixed epoxy into a flat foil dish instead of leaving it in the tall mixing cup. The cup holds heat and traps bubbles, which shortens your working time exactly when you need it most. A Flex Coat HB Rod Wrap Finish is the mainstream two-part finish for this job, and it behaves the same way every other one does: reward slow hands, punish fast ones.
Laying the Coat
Two thin coats beat one thick coat, every time. Let the first soak into the thread for five minutes or more before wiping the excess, then lay the second. That two-coat habit is what produces the glass-smooth look people assume comes from skill. One thick coat produces a lens.
Work the finish into the thread rather than flooding it. You’re filling gaps, not painting.
Why the Motor Isn’t Optional
Something has to turn the rod slowly and constantly, roughly 9 to 45 RPM, for the first hours of cure. Gravity is pulling your finish to the low side the entire time, and skipping rotation is the single most common reason a finish looks amateur. The community just calls the result runs.
A CRB Gen 2 Variable Speed Rod Dryer handles it with an adjustable chuck, which is the boring, reliable version of the homemade-lathe workaround. Either way, something turns, or gravity wins.
The habit that costs nothing and saves whole builds: mix a test batch and cure it on a scrap wood dowel before any finish touches your blank. Same ratio, same room, same night. If the dowel is tacky in the morning, you just learned it on a piece of scrap instead of on four hours of thread work.
How Temperature and Humidity Decide Your Finish
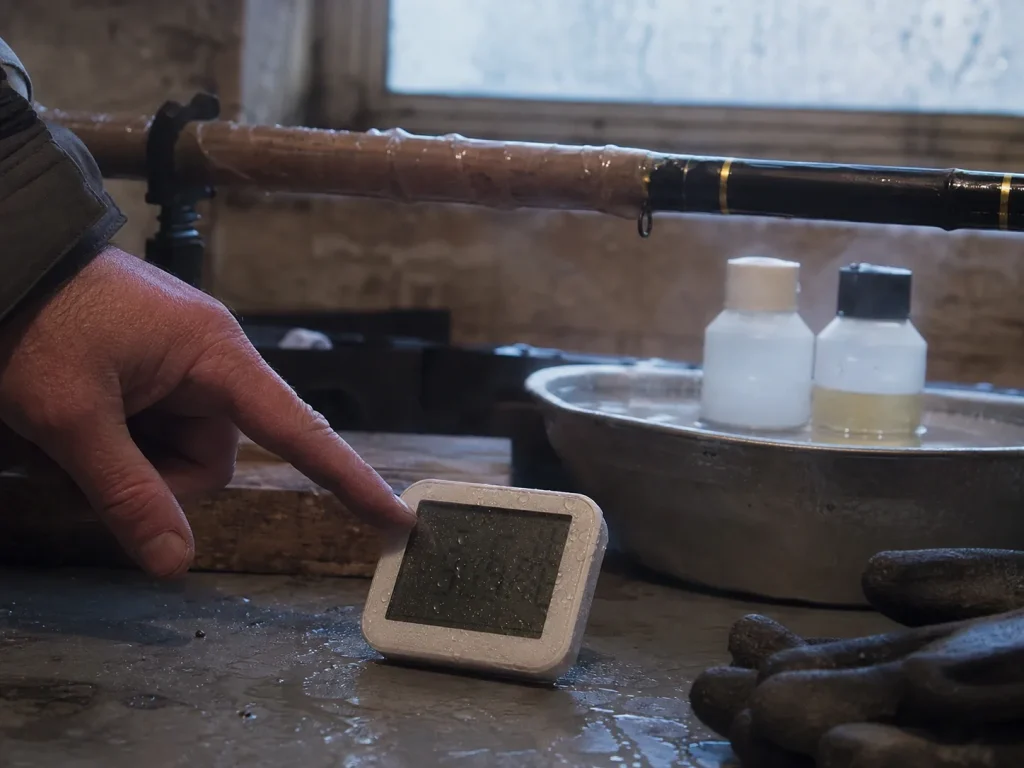
Here’s the reframe this whole article is built on. Your technique was fine. Your garage was 55 degrees.
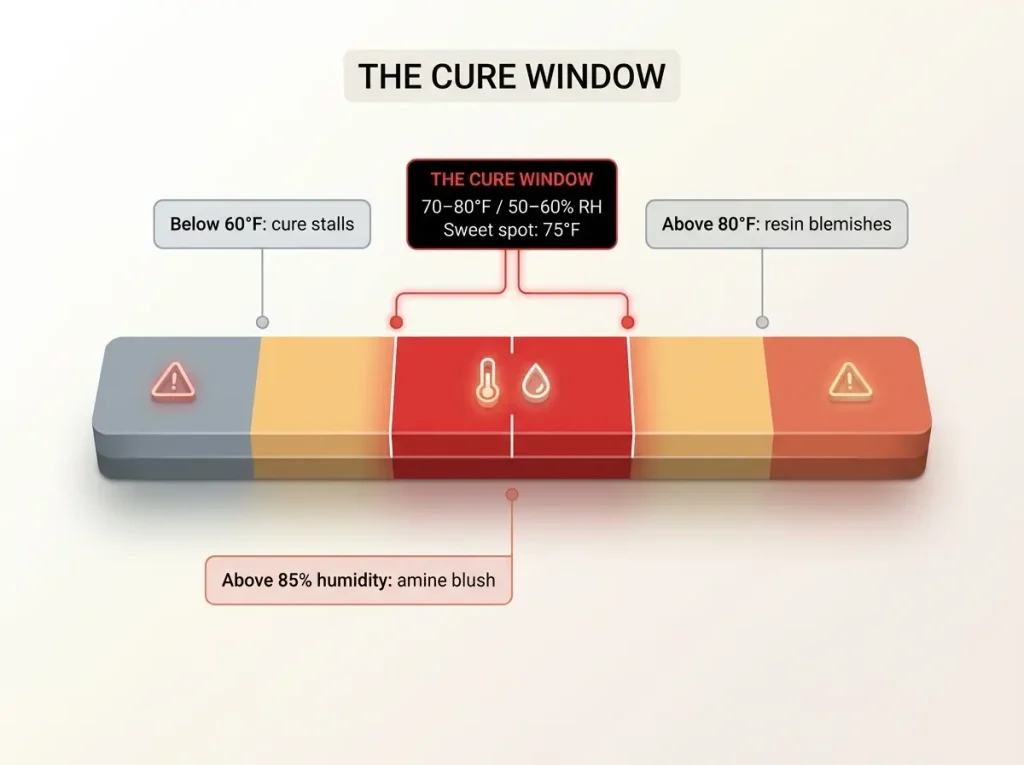
Every competitor guide replaces this section with four words: “cure for 24 hours.” So here are the numbers they leave out. Epoxy wants roughly 70 to 80°F, with about 75°F as the sweet spot, and 50 to 60% relative humidity. That’s the window. Outside it, careful work fails anyway.
Below about 60°F the cure slows dramatically and can stall outright. A cold basement floor in January produces a finish that never fully hardens, no matter how faithfully you rotated it. Above about 80°F the resin can overheat and blemish. Both extremes ruin the same finish in opposite directions, which is precisely why “just crank the heater” backfires.
Then humidity, which is the sneaky one. Above roughly 85% you get amine blush: a greasy, cloudy film that forms even though the epoxy technically hardened underneath it. The resin did its job. The room ruined the surface anyway.
Builders just call it blush, and the fact that it has a nickname should tell you how often it happens.
Here’s how that plays out in practice, and it’s the story that shows up in build threads every winter. Someone lays their first finish coat on a basement floor in January. They mix the ratio with syringes. They rotate the rod faithfully on schedule for hours.
The finish still comes out cloudy, because the room never broke 60 degrees all night, and no amount of care at the bench was ever going to change that.
The uncomfortable part is that both variables are working on you at once, and they don’t fail loudly. A cold room doesn’t announce a stalled cure. Muggy air doesn’t announce blush. You find out days later, looking at a wrap that should be glass and isn’t.
So control what you can, in this order. Pick the room before you pick the day, because a heated indoor space beats an unheated garage in every season. Then pick the hour, since a garage that’s comfortable at 3pm can be back under 60 by the time your finish is still soft at midnight, and the epoxy cure time stretches for hours after you walk away. If the numbers won’t cooperate this week, wait for a week when they will.
The takeaway is uncomfortable and worth sitting with: the fix is the room, not the resin. Control ambient conditions first. Correcting your technique on a build that failed for temperature reasons just buys you a second failed build with better thread work.
Cold-day move: warm the sealed resin and hardener bottles in a hot-water bath before mixing, rather than space-heating the room around a finished rod. It thins the resin so it flows and self-levels instead of dragging. And remember the safety section, because heating the room to rush a cure is the same move that makes epoxy fumes matter. That shortcut charges you twice.
What to Do When the First Build Goes Wrong
Every other guide stops at “cure 24 hours and go fishing,” as though nobody’s first rod ever came out cloudy. Yours might. Most of it is fixable, and that’s the actual news.
The Finish Is Cloudy, Tacky, or Soft
Two very different failures look similar at a glance, and telling them apart decides your entire repair.
Press your thumbnail into the bad spot. If the surface film scrapes and there’s hard finish underneath, that’s blush, caused by humidity in the room during cure. Scuff it with a fine abrasive pad, fix the room, and re-coat.
If it’s soft all the way through, the resin-to-hardener ratio was off and the finish never chemically cured. That one has to be stripped and redone. There’s no rescuing it.
That single test tells you which repair you’re facing, and it takes three seconds. Notice that the blush fix has nothing to do with your wrapping. Re-learning the wrap fixes nothing when the room was the problem.
A Guide Reads Crooked
One crooked guide is one wrap cut and re-done. That’s it. It is not a ruined rod, and it is absolutely not worth stripping the whole train over.
Cut the finish and thread on that guide alone with a fresh blade, working away from the blank, then re-wrap and re-coat just that foot. The repair will be invisible from three feet, which is every distance that matters. An OJYDOIIIY Fishing Rod Repair Kit carries the thread, clips, and small-batch epoxy sized for exactly this kind of one-guide fix, without buying a full bottle you’ll use once.
A Reel Seat That Spins, or a Blank That Feels Dead
A reel seat that spins came from a dry patch in the bore, not from bad epoxy. Same fix, more coverage, and this time twist as you seat it.
A blank that feels “dead” is usually finish buildup running onto the blank between the guides, deadening its recovery. The answer is less finish, not more. Before you strip anything, though, check the blank itself before you blame the finish, because a hairline crack feels exactly like a dead blank and no amount of refinishing will fix it.
The anecdote every builder eventually owns: eyeballing the ratio “because it’s close enough,” then finding the finish still tacky three weeks later and stripping the whole coat. Nobody eyeballs the ratio twice.
Conclusion
Three things to carry to the bench.
The blank picks everything else. Spend your decision-making there and treat the rest as assembly, because a great wrap on the wrong blank is still the wrong rod.
Your room decides your finish. Technique cannot out-work a 55-degree garage, and nobody selling you a kit is going to mention it.
A first build that comes out wrong is almost always fixable. Cloudy, crooked, and spinning each have a real repair, and none of them mean starting over.
Before you buy anything, go set a thermometer and a cheap hygrometer on the bench where you’d actually build. Check them at the hour you’d actually be working. If the numbers don’t land in the window, you just saved yourself a weekend and you know exactly what to fix first. That’s a better first move than any tool on the list, and it’s free.
Frequently Asked Questions
01Is it cheaper to build your own fishing rod than to buy one?
A bare-bones rod building kit comes in under a comparable factory rod, and building it yourself runs roughly half to two-thirds of what a pro builder charges. That only holds if your own 6 to 8 hours cost you nothing.
02How long does it take to build a fishing rod?
About 6 to 8 hours of hands-on work, spread across two or three sessions. It isn’t an evening project. The epoxy cure runs on its own clock between sessions and there’s no way to compress it.
03What is the spine of a fishing rod and does it actually matter?
The spine is the stiff plane in a rolled blank. Bend it and it hops into one orientation. It’s worth the two minutes to mark it, though the factory rod in your closet is probably off-spine and fishes fine.
04Why is my rod finish still tacky or cloudy days after curing?
Cloudy and greasy on top of a hard finish is amine blush from humidity in the room during cure. Soft all the way through means the mix ratio was off. The first scuffs and re-coats; the second has to be stripped.
05Can you build a rod without a rotating dryer?
Yes. Builders rig a slow motor to scrap wood and call it a lathe. But something must turn the rod for the first hours of cure or gravity pulls the finish into a drip line. Hand-turning for four hours is a plan you’ll abandon by hour two.
Risk Disclaimer: Fishing, boating, and all related outdoor activities involve inherent risks that
can lead to injury. The information provided on Master Fishing Mag is for educational and informational purposes
only. While we strive for accuracy, the information, techniques, and advice on gear and safety are not a substitute
for your own best judgment, local knowledge, and adherence to official regulations. Fishing regulations, including
seasons, size limits, and species restrictions, change frequently and vary by location. Always consult the latest
official regulations from your local fish and wildlife agency before heading out. Proper handling of hooks, knives,
and other sharp equipment is essential for safety. Furthermore, be aware of local fish consumption advisories. By
using this website, you agree that you are solely responsible for your own safety and for complying with all
applicable laws. Any reliance you place on our content is strictly at your own risk. Master Fishing Mag and its
authors will not be held liable for any injury, damage, or loss sustained in connection with the use of the
information herein.
Affiliate Disclosure: We are a participant in the Amazon Services LLC Associates Program, an
affiliate advertising program designed to provide a means for us to earn advertising fees by advertising and linking
to Amazon.com. As an Amazon Associate, we earn from qualifying purchases. We also participate in other affiliate
programs and may receive a commission on products purchased through our links, at no extra cost to you. Additional
terms are found in the terms of service.