
In this article
A pair of pliers that seizes shut at the spring after two saltwater trips is a more common story on fishing forums than any spec sheet will admit. Picture it: a fish is boat-side, the hook is buried past the barb, and the one tool that’s supposed to make the release quick and clean won’t open. That’s the gap this guide fills. Most articles hand you a checklist of essential fishing tools and stop there, but the real question isn’t which tools to buy, it’s why the cheap ones fail and where your money actually matters. Think of this as the tool-by-tool companion to our complete fishing tools and accessories guide.
Fishing Pliers and Why They Rust Shut
Every guide lists pliers as tool number one, and they’re right to. What none of them tell you is where pliers actually die. It isn’t the jaws. It’s the spring hinge, and it happens quietly.
What Pliers Actually Do on the Water
Fishing pliers are the closest thing to a real multi-tool in the boat. They pull hooks out of a bony jaw, crimp split shot onto a leader, cut line in a pinch, and pry open split rings to swap a treble without shredding your thumbnail. Buy one good pair and you’ve replaced three single-purpose gadgets. That’s why this is the tool to spend on, not the one to save on.
Why the Spring Hinge Is the First Thing to Die
Here’s the part nobody explains. Stainless steel isn’t rust-proof, it’s rust-resistant. That corrosion resistance comes from a thin passive layer of chromium oxide on the surface, and saltwater chlorides eat right at it. Cheaper pliers built from low-grade 420 stainless give it up fast. The pivot point is where they fail first, because trapped saltwater sits in that tight, low-oxygen gap and breaks the passive layer down from the inside. That grinding, sticky feel right before a pair seizes has a name: crevice corrosion. Once it starts, you’re on borrowed time. If you want the full breakdown of steel grades and coatings, our guide to fishing pliers that won’t rust shut goes deeper on the metallurgy.
Matching Plier Material to Where You Fish
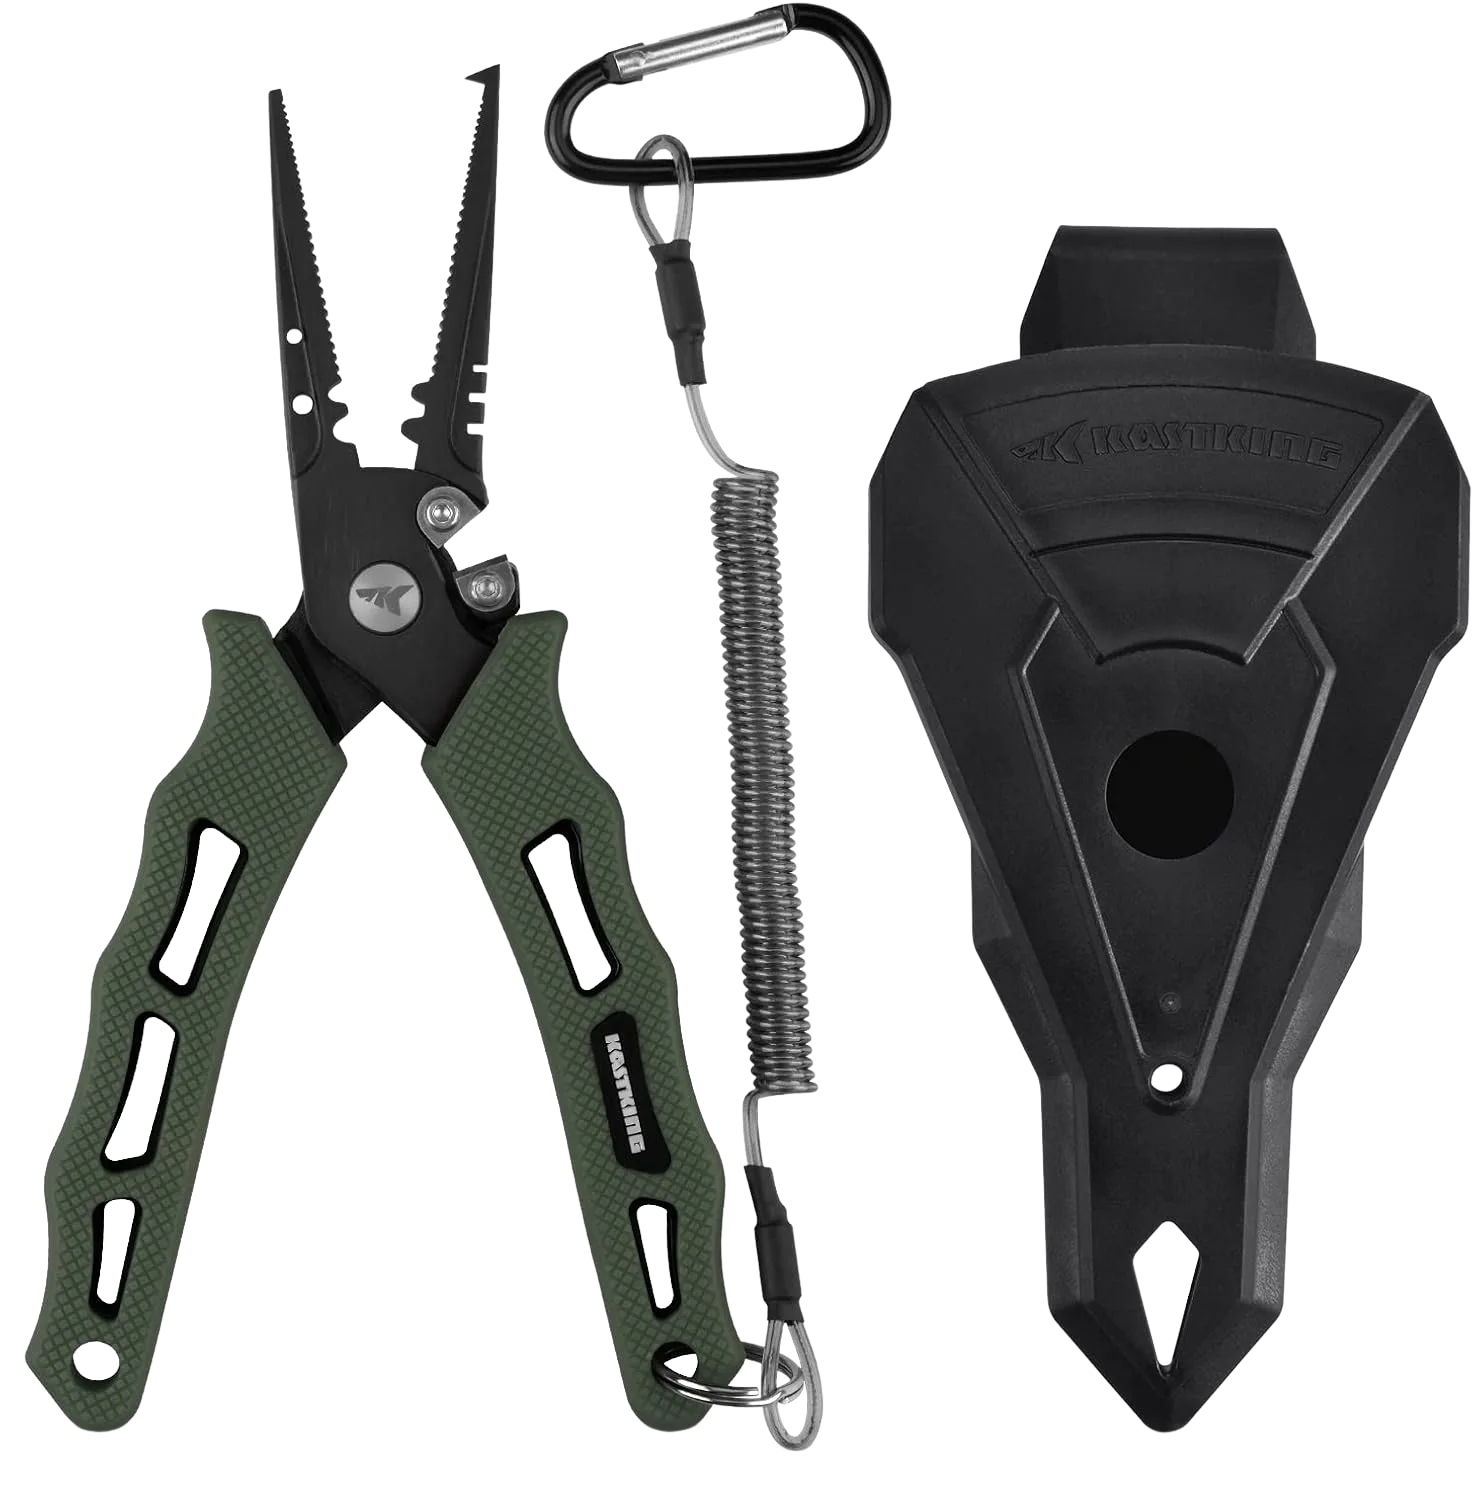
Where you fish decides what you should carry. If you’re strictly on freshwater ponds and rivers, an aluminum pair like the Piscifun Fishing Pliers does everything you need and comes with a sheath and lanyard so you don’t drop it over the side. Fish saltwater a few times a year and the coated KastKing above is the honest middle ground. But if you’re on the salt every weekend, the Van Staal Titanium Pliers sidestep the whole crevice-corrosion problem, because titanium doesn’t play the same rusting game. They cost real money. They also outlast three cheap pairs you’d otherwise replace.
The habit beats the price tag. A budget pair that gets a freshwater rinse, a thorough dry, and a drop of oil worked into the hinge will outlive an expensive pair thrown wet into a tackle bag. Keep a small bottle of reel oil in the bag and hit the pivot after every trip.
Line Cutters That Actually Cut Braid
The first time you try to snip braid with kitchen scissors, you get a frayed, fuzzy end that won’t thread a hook eye. That’s not you doing it wrong. That’s the wrong tool.
Why Braid Chews Up Regular Scissors
Braided line is woven from slick synthetic fibers, coated to slice through water with almost no stretch. Those same fibers are brutal on a blade. They wear down a standard scissor or knife edge fast, and once the edge dulls even slightly, it stops cutting braid and starts squeezing it, so the line frays instead of parting clean. A dedicated braid scissor uses micro-serrated, hardened edges that grab those slick fibers and shear them. Fair warning: even good braid scissors are a consumable. Cut braid all season and you’ll eventually need to resharpen or replace them.
Serrated vs Straight Edges for Different Lines
Monofilament and fluoro cut fine with a plain sharp edge or a set of line nippers. Braid is the one that demands serration, ideally a hardened or tungsten carbide edge that shrugs off the fiber wear. If most of your reels are spooled with braid, a purpose-built cutter earns its keep the first frustrating re-tie it saves you.
Keeping a Cutter Within Reach
The best cutter is the one already in your hand when a fish is thrashing. A retractable tether solves the “hunting through the bag with wet hands” problem that costs you fish and fingers.
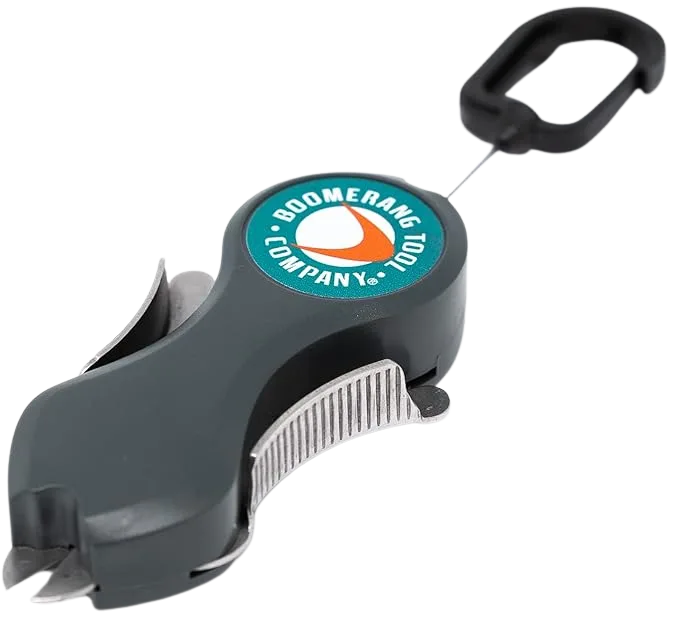
If a tether isn’t your style, compact micro scissors like the CUDA 3″ Micro Scissors, with titanium-bonded blades, drop into a vest pocket and still handle braid without the retractable hardware. They’re the budget path to a clean cut.
Hook Removers That Speed Up the Release
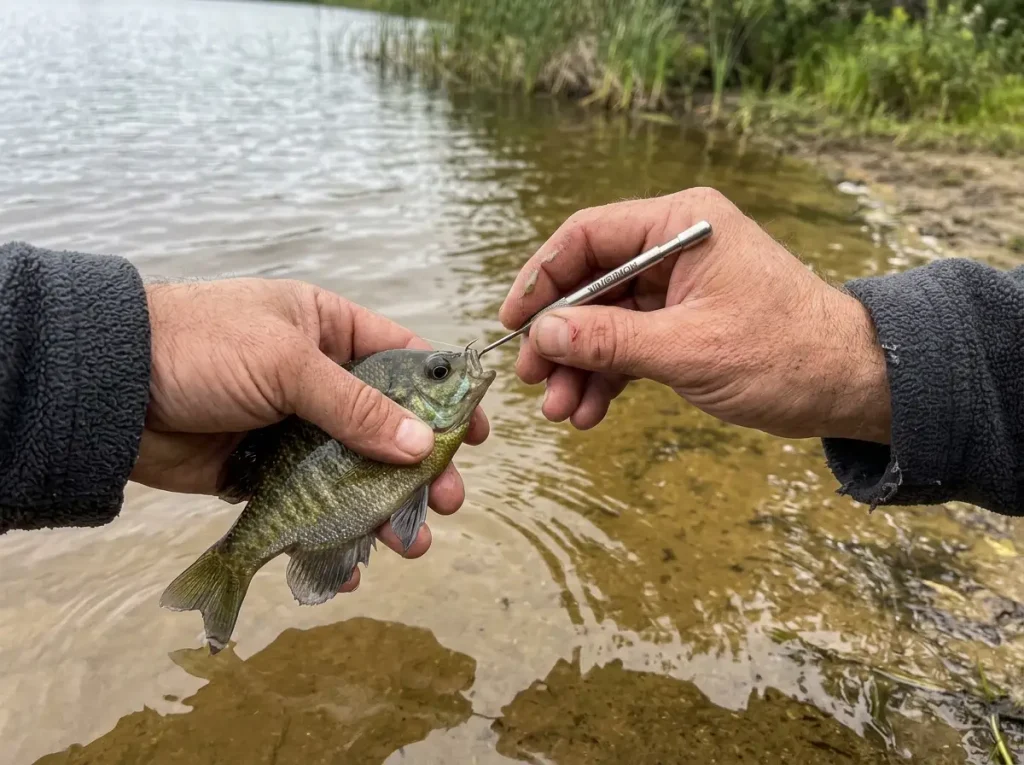
A plier works for a hook set in the corner of the jaw. It doesn’t work for one swallowed deep, and every extra second you spend digging is a second the fish is out of the water and stressed.
When a Plier Can’t Reach
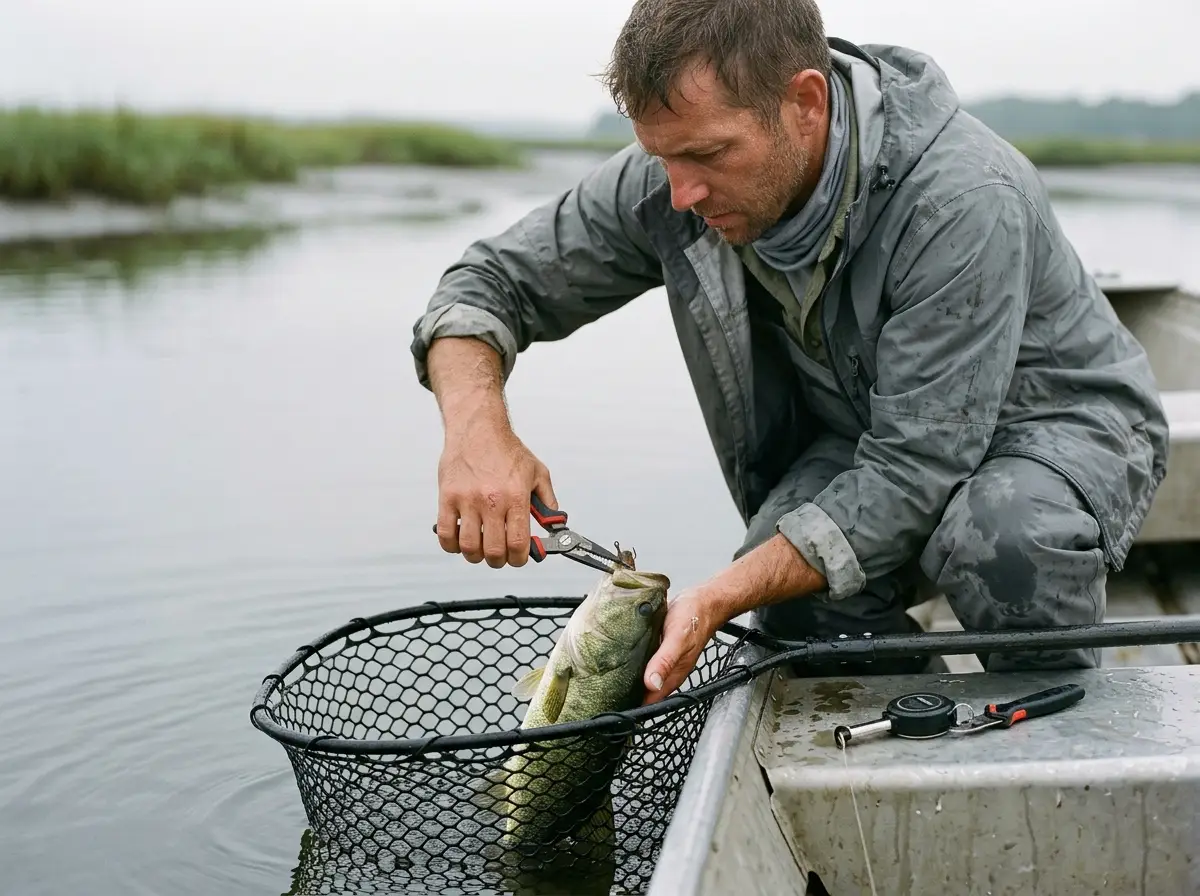
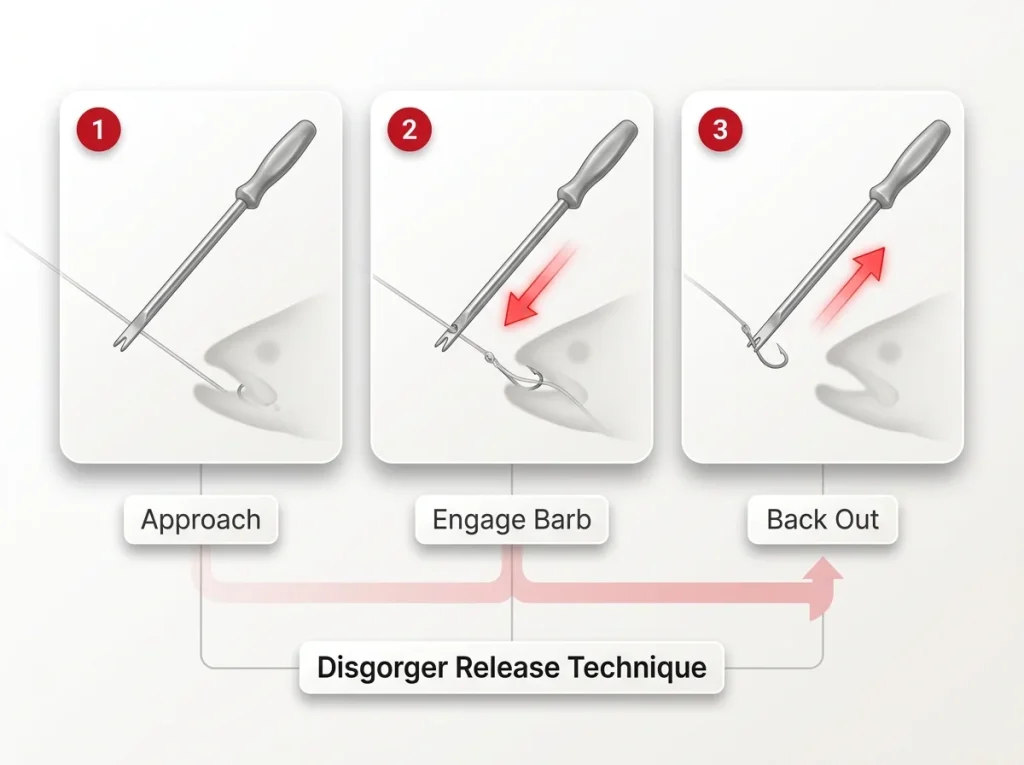
A dedicated disgorger slides down the line and backs a deep hook out from an angle your pliers can’t reach. Magnetic-tip sets and multi-piece kits like the YIMISIMON Hook Remover set cover different hook sizes and swallow depths, which matters when you’re switching between panfish and something with real teeth.
Handling Time and Why It Matters
This ties straight into fish survival. The faster the hook comes out, the sooner the fish is back in the water breathing. A remover that gets you there in a few seconds isn’t a luxury, it’s the difference between a released fish that swims off and one that floats.
Gut-Hooked Fish, Cut, Don’t Dig
Here’s the call most beginners get wrong. When a fish is gut-hooked and you intend to release it, cutting the line close to the hook usually gives it a far better shot than digging around trying to retrieve your terminal tackle. A remover helps, but knowing when to stop is the real skill. The same judgment applies when a hook finds you instead of the fish, and our walkthrough on getting a hook out of skin safely is worth reading before you need it.
Hook Sharpeners and the Thumbnail Test
That fish that “got off” on the hook set? There’s a good chance it wasn’t your timing. It was a dull point.
The Thumbnail Test in Five Seconds
Drag the hook point across a smooth thumbnail at a shallow angle. A sharp point catches and digs in slightly. A dull one skates across without grabbing. That’s the whole test, and it takes five seconds. Anglers call a properly sharp point sticky or tacky for exactly this reason. Run the test on the drive to the ramp, not after a fish has already broken your heart.
Lab testing shows a properly sharpened hook needs roughly 40% less force to bury itself than a factory point. That’s a real bump in hookup rate for a tool that fits in a shirt pocket. Test every hook before the trip, not just the one that already let a fish go.
How to Sharpen Without Ruining the Point
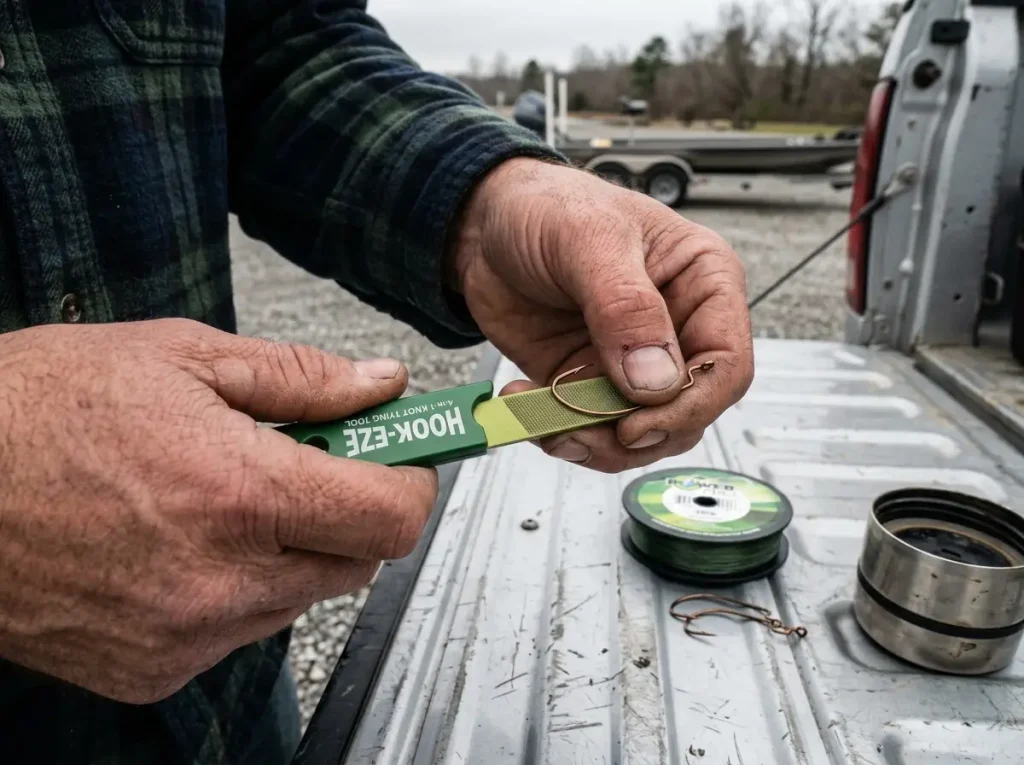
Technique matters more than effort here. Three or four short strokes per side at a 30 to 45 degree angle, point moving forward only, never dragged backward across the file or hook hone. That’s it. The HOOK-EZE 4-in-1 tool folds a sharpener, a line cutter, hook-safety covers, and a knot-tying guide into one gadget, which is a smart pick for a crowded tackle box where every tool has to earn its slot.
When to Just Replace the Hook
Sharpening has a limit. Over-file a point trying to “really get it sharp” and you thin the metal past the point of strength, so it bends or snaps on a hard hook set. The fix becomes the failure. If a point is rusted, opened, or you’ve filed it to a needle, tie on a fresh hook and move on. The HOOK-EZE tool helps you retie fast when you do.
Tackle Boxes That Survive the Elements
If pliers are where you spend, storage is where you save. Organization doesn’t need to be expensive. It does need to keep water out.
Modular Trays vs One Big Box
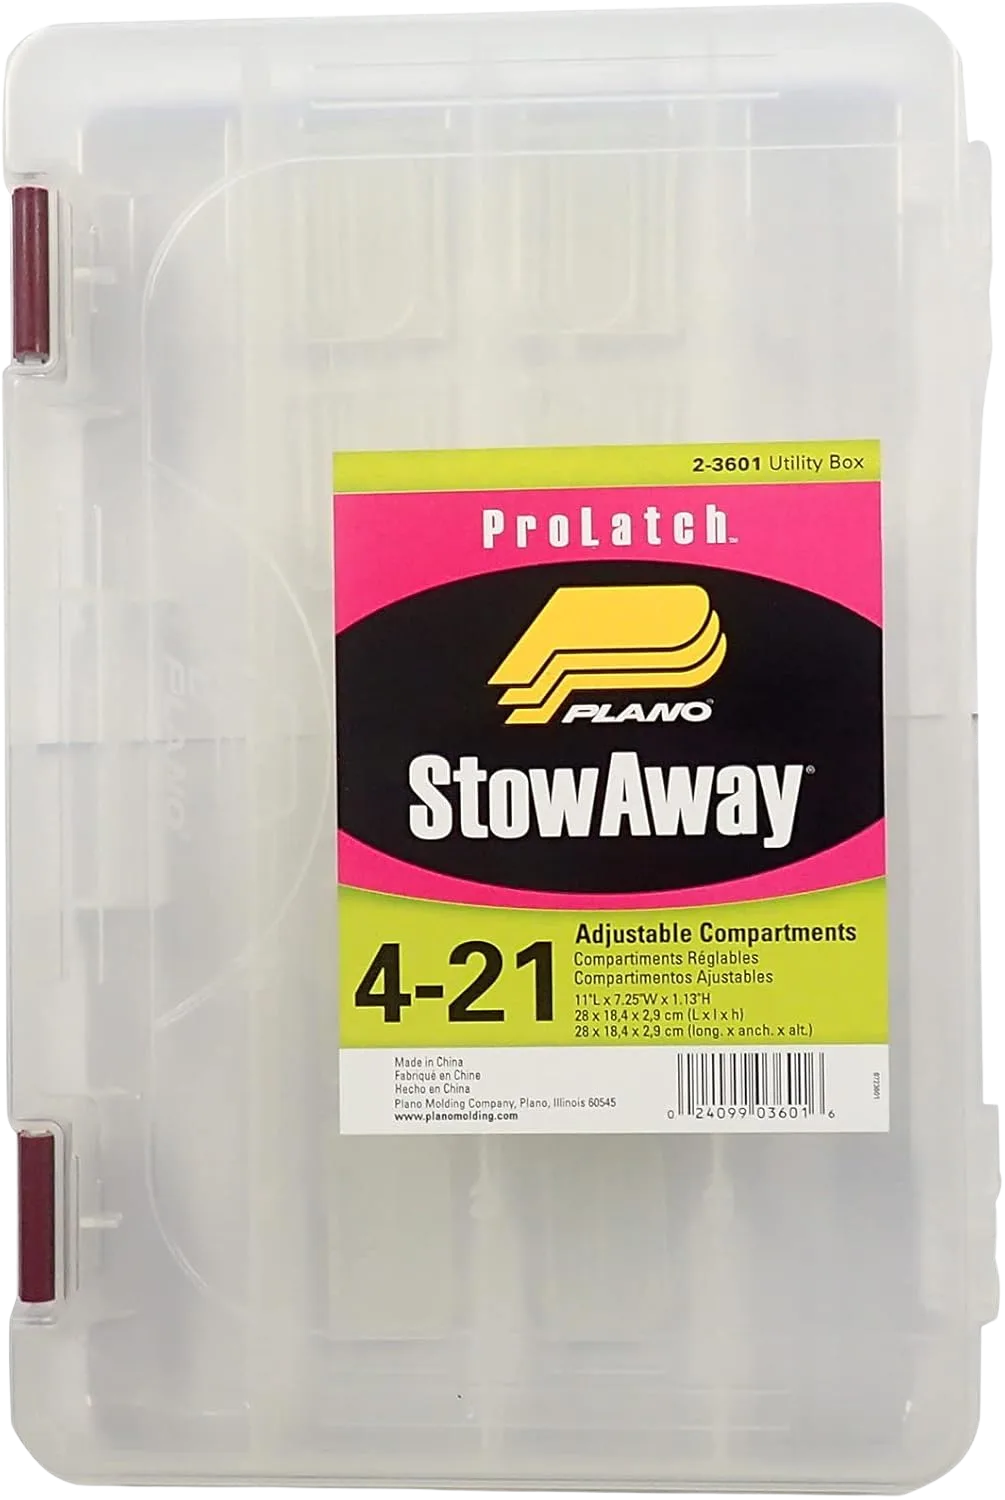
A modular stowaway system lets you grab only the trays you need for the day instead of hauling your whole collection to the water. The Plano 3600 ProLatch StowAway is the standard for a reason: cheap, tough, and sized to fit almost every bag and boat hatch made.
Latches, Seals, and Keeping Water Out
Size gets all the attention, but the latch is what fails you. A box that pops open in a wet hatch spills terminal tackle and lets moisture rust your hooks overnight. When you outgrow a single tray, a multi-tray hip-roof box like the Plano Magnum Hip Roof 6-Tray steps you up in capacity without turning into a disorganized pile. Our full tackle box rust and water tests get into which seals actually hold.
A Dry Home for Rust-Prone Tools
Dedicate one small waterproof tube or box to the things that rust: spare hooks, split rings, your sharpener. Toss in a silica packet or keep a lightly oiled rag with them. It’s the cheapest insurance in the boat.
Landing Nets That Protect Your Catch
A net isn’t just for landing fish. It’s the single most underrated conservation tool you own, and the mesh you pick decides whether a released fish lives.
Rubber vs Nylon Mesh and the Slime Coat
Fish wear a protective slime coat that guards against infection. Knotted nylon mesh strips that coat and abrades fins and scales every time it touches a fish. Knotless rubber mesh doesn’t. It also doesn’t tangle your hooks the way nylon does, so unhooking is faster and handling time drops. NOAA specifically recommends a knotless rubber net with large mesh for exactly this reason.
Frame, Hoop Size, and Storage
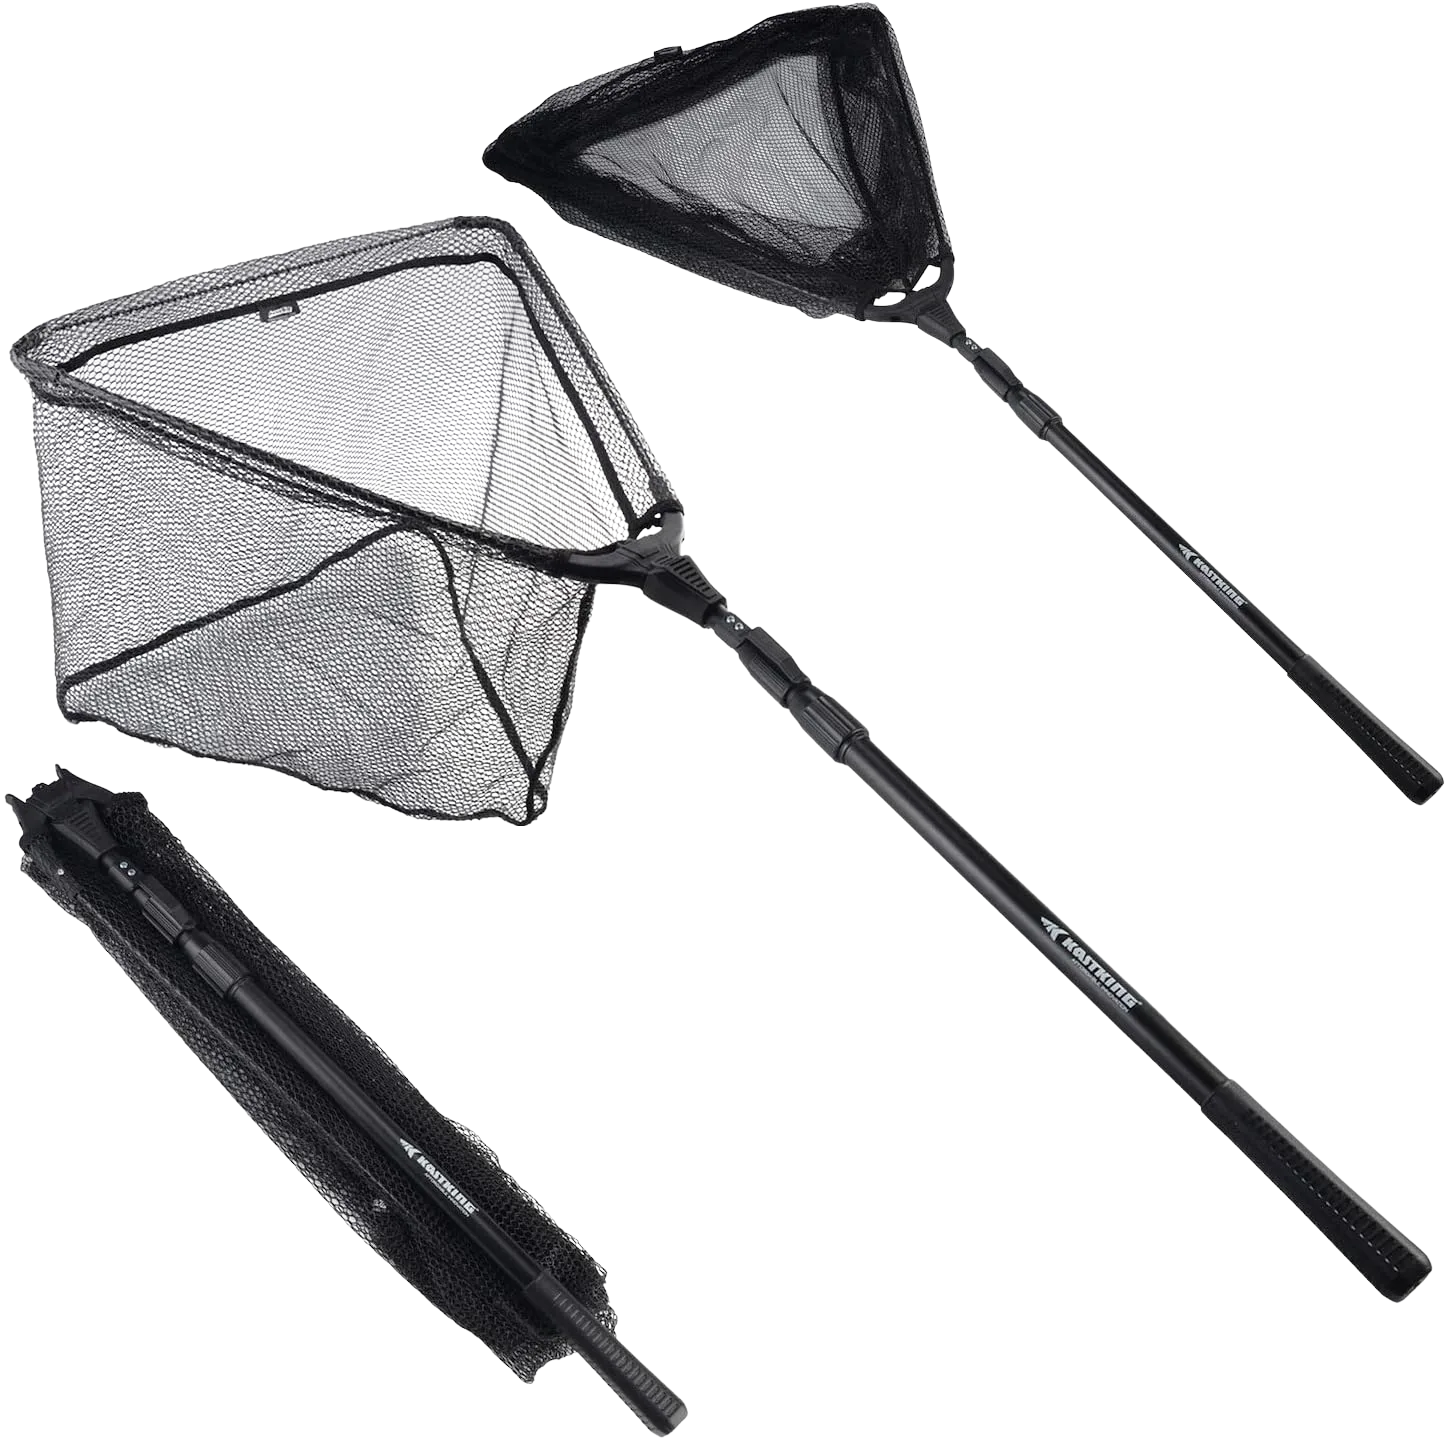
Match the hoop to your target fish and your platform. A folding frame stows in a kayak or a tight boat; a longer handle helps from a high bank. A budget rubber-mesh option like the SF Rubber-Mesh Net proves the point that mesh material matters more than price. You don’t have to spend up to fish responsibly. For a full breakdown, see which fishing net best protects your catch.
Netting Technique That Buys Survival Time
Net the fish head-first, then leave it in the water inside the net while you get your grip and remover ready. The net becomes a holding pen, and the fish stays wet the whole time.
Keep the fish in the net in the water, not on the deck. A fish flopping on a hot boat deck loses slime and takes hits it never recovers from. The net alongside the boat is the safest place for it while you sort out the hook.
Scales and Measuring Tools for Legal Limits
A tape and a scale aren’t about bragging rights first. They’re about not accidentally keeping a fish you’re not allowed to.
Measuring for Legal Size Limits
Most fisheries run size and slot limits under state fishing regulations, and keeping an out-of-slot fish is a citation waiting to happen. A flexible measuring tape or a board settles it in two seconds. Clip the tape somewhere you can reach it fast, because a keep-or-release call shouldn’t require digging.
Digital vs Spring Scales
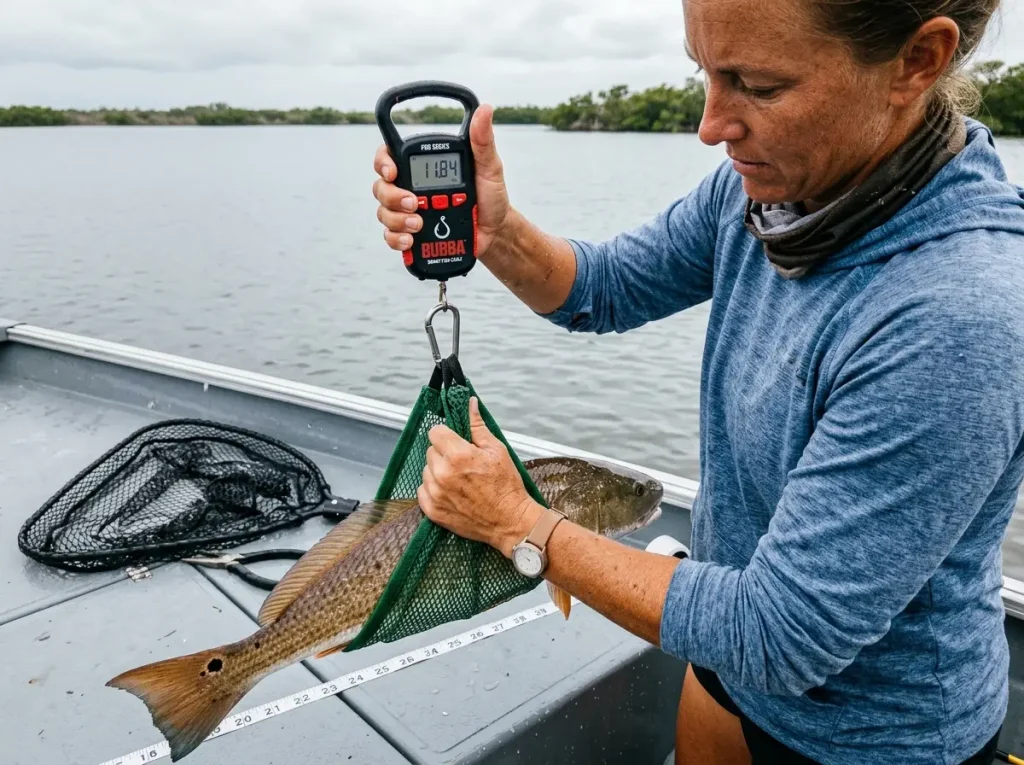
A digital scale adds real accuracy for slot limits and for tracking a fishery over time. The Bubba Pro Series Smart Scale adds catch-logging on top, which turns a weigh-in into data you can actually use across a season. A scale also doubles as a reference for anglers who set their drag by weight. If the scale category is where your attention is, our roundup of digital fish scales that grip and weigh compares the field.
Weighing Without Hurting the Fish
Weigh a fish you plan to release in a wet net or sling, not dangling by the jaw or gills. A heavy fish held vertical by the mouth can suffer internal damage you’ll never see. Support the weight, get the number, get it back.
Fish Handling and Catch and Release Survival
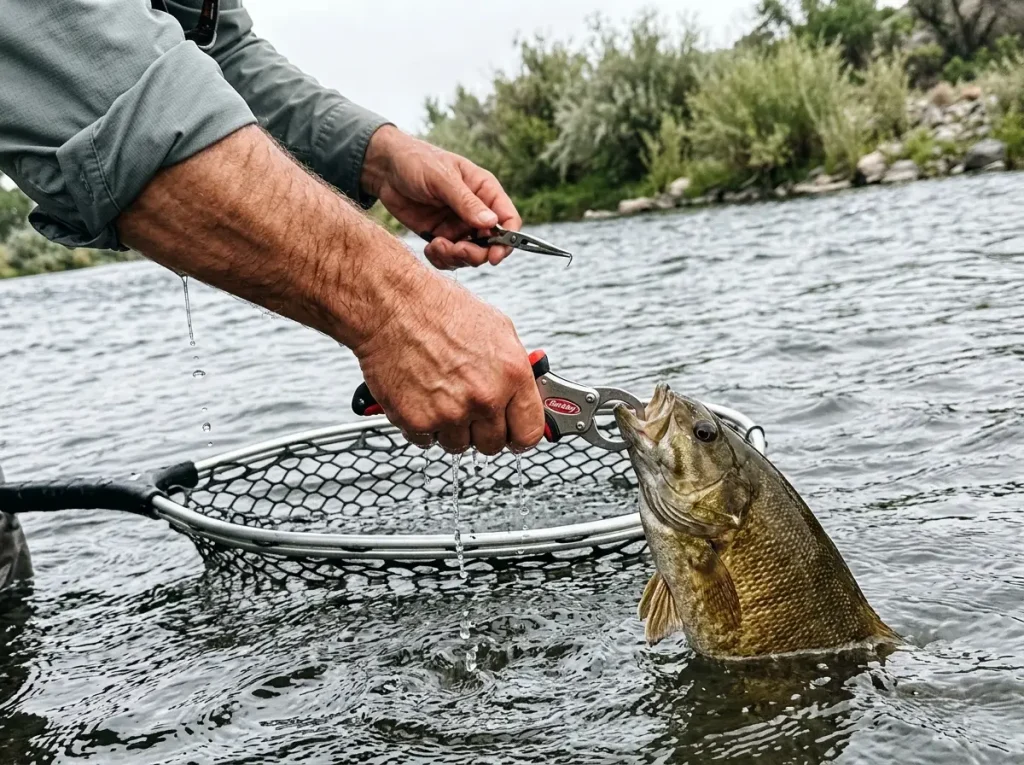
Catch-and-release doesn’t automatically mean the fish is fine. What you do in the first minute decides that, and half of it comes down to the tools in your hand.
What the Numbers Say About Release Survival
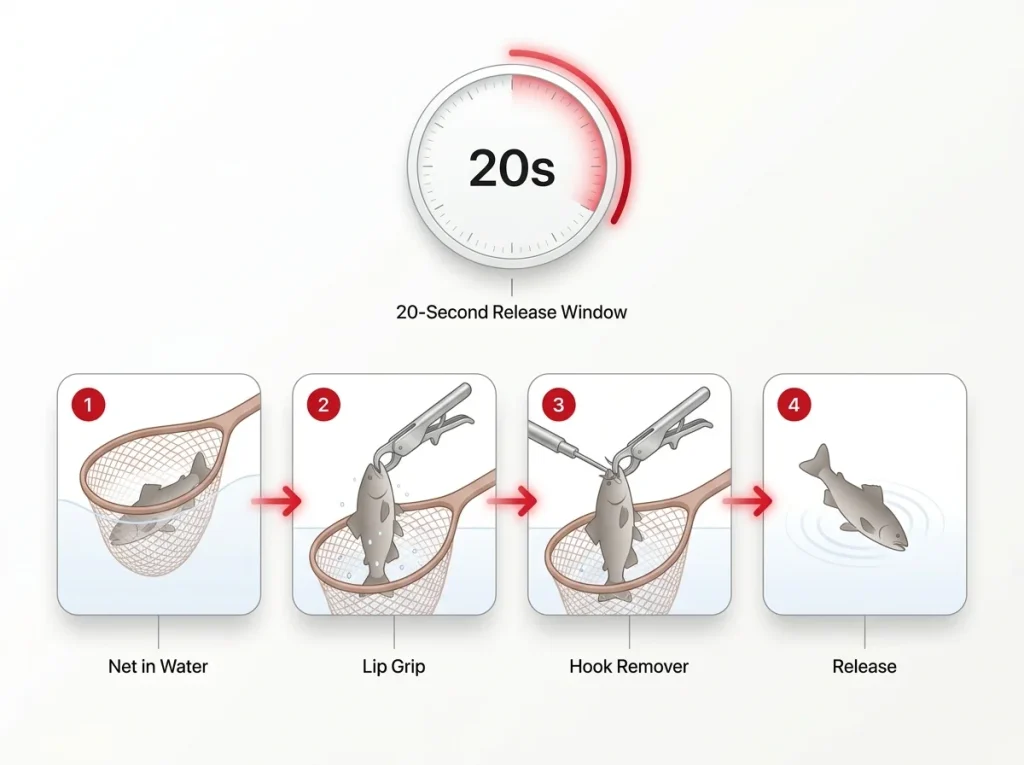
The numbers are sobering. According to NOAA’s catch-and-release best practices, roughly 43% of released fish die from related complications on average, most within 72 hours, though survival ranges anywhere from 40% to well over 90% depending entirely on handling. Handling is the variable you control.
The Handling Sequence That Keeps Fish Alive
Every tool in this guide comes together here. Net the fish and leave it in the water, clamp a lip grip like the Berkley Big Game Lip Grip to control it without a hand squeezing the fish, back the hook out with your remover, take one quick measurement, and release. Keep air exposure short. NOAA’s guidance on keeping air exposure under 20 seconds is tighter than most anglers think, that’s roughly one photo, not a photo session.
Fight Fast, Not Gentle
This one is counterintuitive. Babying a fish on light drag for ten extra minutes to “be gentle” is usually worse for it than landing it firmly and fast. A drawn-out fight floods the fish with lactic acid and exhausts it past recovery. Get it in, get it handled, get it back.
Have every handling tool staged before the fish is boat-side, not after. Grip clipped where you can grab it, remover within reach, tape ready. Fumbling for gear while the clock runs is what turns a healthy release into a mortality.
The Knife and First Aid Kit Nobody Packs Until They Need Them
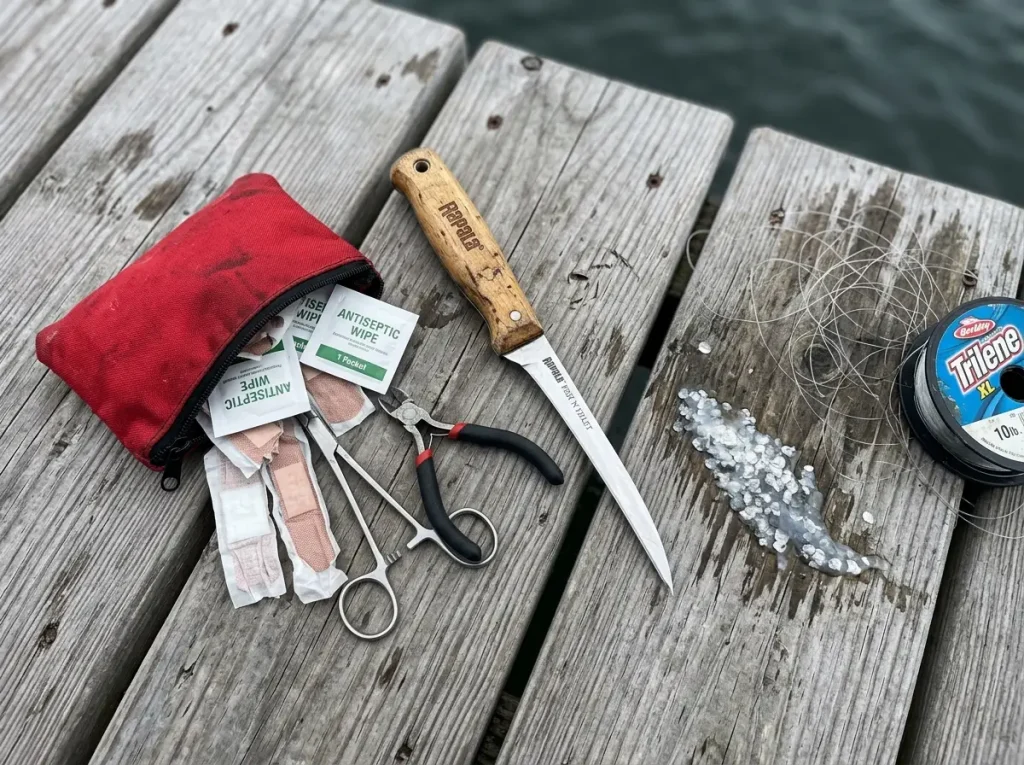
These are the two tools nobody thinks about until a hook is past the barb in a thumb or a fish needs cleaning streamside. Both are cheap. Both save the day they’re needed.
Choosing a Fishing or Fillet Knife
A good knife handles line, bait prep, and cleaning your catch. A fixed blade with some flex is the standard for filleting; a folder covers general cutting. Corrosion care is the same rinse-and-dry rule as your pliers, because a rusted blade is a dull, unsafe blade. Our guide to choosing a fillet knife walks through steel types and blade flex if cleaning your own fish is the goal.
The Small First Aid Kit That Belongs in Every Bag
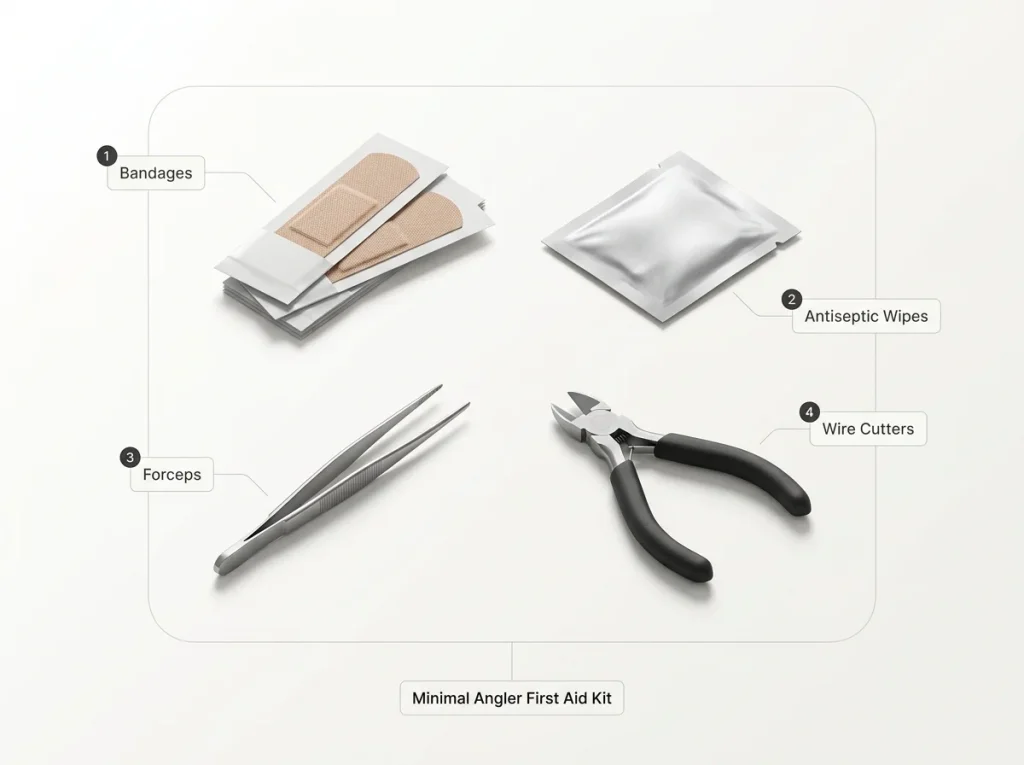
The real fishing injuries are hook punctures, knife nicks, and slips on wet rock. A small waterproof kit with fabric bandages, antiseptic wipes, and a pair of tweezers or forceps covers almost all of it. The most common mistake is skipping it “because it’s just a day trip.” Hook-in-skin is the single most common fishing injury, and it always happens on the trip you didn’t pack for. For a full build, see how to assemble a waterproof first aid kit built for anglers.
Storing Both So They’re There When You Need Them
Keep the knife sheathed and the kit in its own dry pouch. Bury either at the bottom of a wet bag and it’ll rust or go missing right when the moment comes.
Freshwater vs Saltwater and Where to Spend Your Money
Nobody gives you the honest spend-versus-save talk, so here it is. Not every tool needs saltwater-grade metal, and knowing which ones do saves you real money.
Which Tools Actually Need Saltwater-Grade Metal
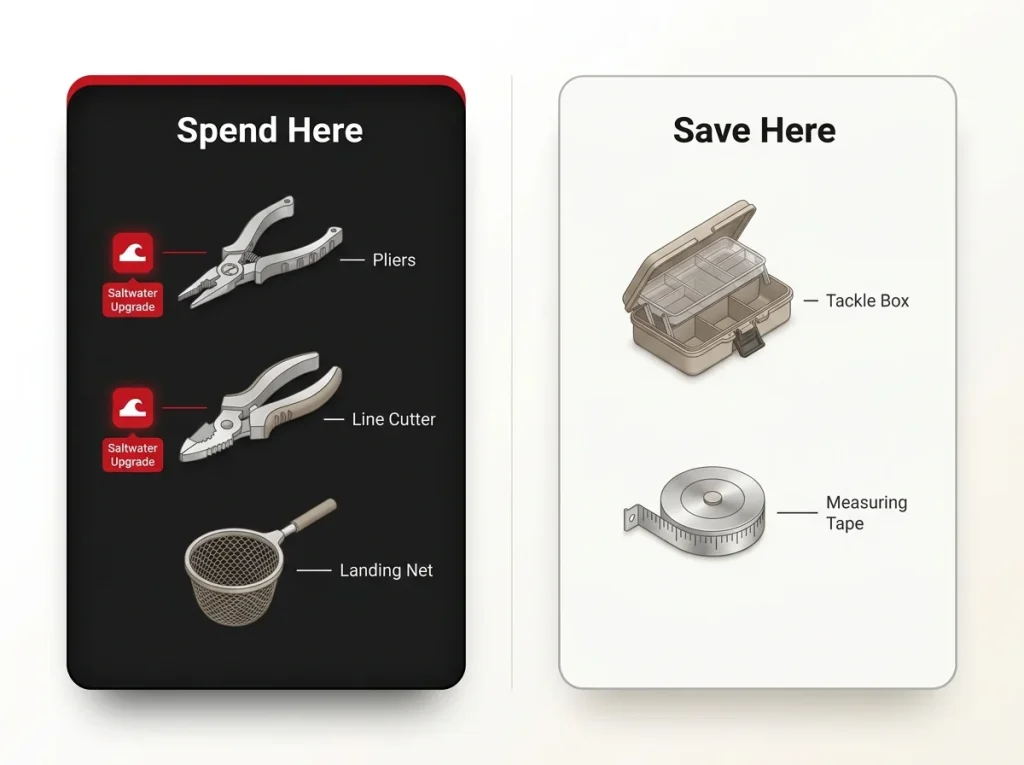
Match the metal to the water. The tools that get submerged and handled wet over and over, your pliers, cutters, hooks, and snips, are the ones that need saltwater-rated stainless or titanium. The tools that mostly stay dry, your tackle box and net frame, matter far less for corrosion. Spend your upgrade money where the salt actually attacks.
The Rinse, Dry, Oil Routine
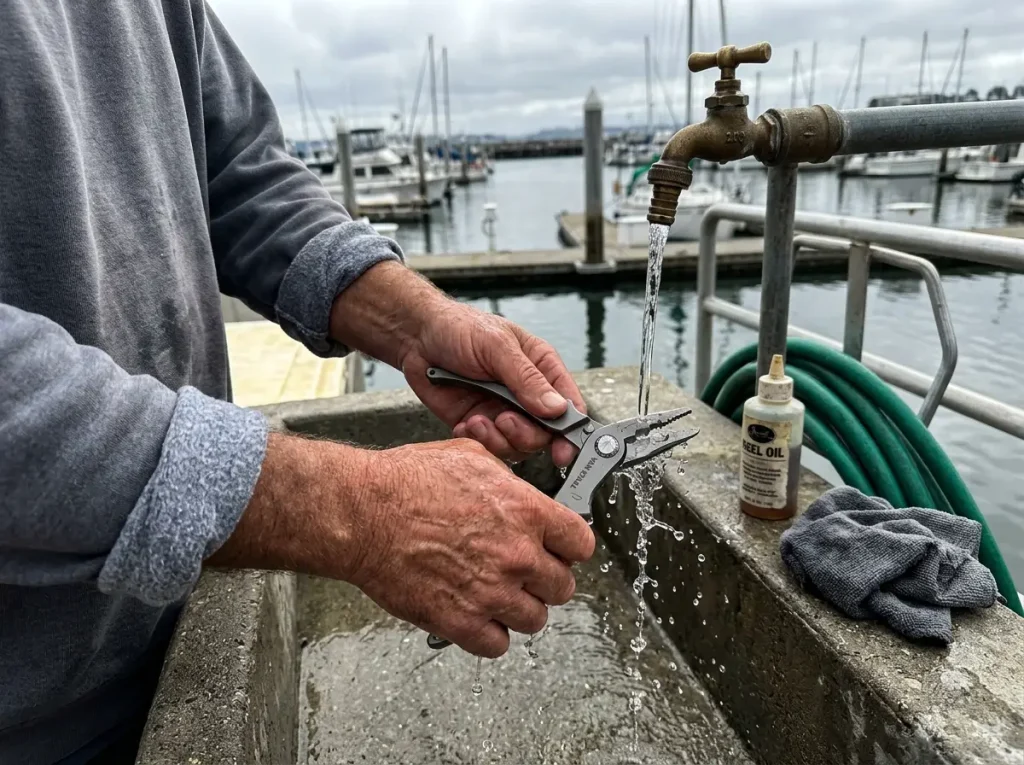
This one habit prevents most tool failures in this whole guide. Give metal tools a light freshwater rinse after every saltwater trip, not a hard hose blast, because high pressure drives salt deeper into the joints instead of flushing it out. Dry them fully, then work a drop of oil into any pivot. Five minutes at the dock buys you seasons.
Where to Spend and Where to Save
Spend on the tools whose failure costs you a fish or a finger: pliers and a good rubber net. Save on the tools that just organize and measure: tackle box and a basic tape. And remember the throughline of this entire guide, care beats cost. A rinsed-and-oiled budget tool outlasts a neglected premium one every time. Match the metal to your water, keep the routine, and your kit outlives the guy who spent twice as much and rinsed nothing.
Bringing the Kit Together
Three things carry this whole list. The hinge is where pliers die, so buy for corrosion and rinse them after every trip. The right cutter, remover, and rubber net aren’t just conveniences, they’re what keeps a released fish alive. And spend on what fails you while saving on what doesn’t, because a cared-for cheap tool beats a neglected expensive one.
Before your next trip, run the thumbnail test on your hooks and give your pliers a rinse and a drop of oil. Two five-minute habits, and you’ve already outfished the guy with twice your gear and half your maintenance.
Frequently Asked Questions
01What tools do I need to start fishing?
The core kit is fishing pliers, a line cutter, a hook remover, a hook sharpener, a tackle box, a rubber landing net, and a scale with a tape. Add a knife and a small first aid kit and you’re covered. Everything else is a specialty add-on.
02What is the most important fishing tool?
Fishing pliers. They remove hooks, crimp split shot, cut line, and handle split rings, so one good pair does more jobs than any other single tool. That’s exactly why they’re worth spending on.
03How do I keep fishing tools from rusting?
Rinse them in fresh water after every trip, dry them fully, and put a drop of oil on pivot points like plier hinges. Skip the hard hose blast, since high pressure forces salt deeper into joints. A light rinse flushes it out instead.
04Do I really need fishing pliers?
Yes. For safe hook removal alone they’re a must, and they replace three or four single-purpose tools in one pair. A dedicated hook remover complements them for deep-set hooks.
05What should be in a basic tackle box?
Beyond terminal tackle, keep the tools that fix problems on the water: pliers, a line cutter, a hook sharpener, a hook remover, and a compact first aid kit. Give the rust-prone items their own dry compartment.
Risk Disclaimer: Fishing, boating, and all related outdoor activities involve inherent risks that
can lead to injury. The information provided on Master Fishing Mag is for educational and informational purposes
only. While we strive for accuracy, the information, techniques, and advice on gear and safety are not a substitute
for your own best judgment, local knowledge, and adherence to official regulations. Fishing regulations, including
seasons, size limits, and species restrictions, change frequently and vary by location. Always consult the latest
official regulations from your local fish and wildlife agency before heading out. Proper handling of hooks, knives,
and other sharp equipment is essential for safety. Furthermore, be aware of local fish consumption advisories. By
using this website, you agree that you are solely responsible for your own safety and for complying with all
applicable laws. Any reliance you place on our content is strictly at your own risk. Master Fishing Mag and its
authors will not be held liable for any injury, damage, or loss sustained in connection with the use of the
information herein.
Affiliate Disclosure: We are a participant in the Amazon Services LLC Associates Program, an
affiliate advertising program designed to provide a means for us to earn advertising fees by advertising and linking
to Amazon.com. As an Amazon Associate, we earn from qualifying purchases. We also participate in other affiliate
programs and may receive a commission on products purchased through our links, at no extra cost to you. Additional
terms are found in the terms of service.