
In this article
You spool up a fresh reel the night before a trip, feeling good about it, and on the third cast the line jumps off in loops and pigtails that wrap the rod tip like angry spaghetti. Or worse, it explodes into a bird’s nest on cast one. Almost every time, it traces back to two or three small mistakes that show up at every boat ramp, and the fix is the same whether you fish a spinning reel, a baitcaster, or a push-button spincast. Get the orientation right, set light tension, and stop before the spool is full, and the whole job takes about five minutes. This guide walks all three reel types so you can put line on a fishing reel the right way and roll it into the rest of your first fishing setup without a single tangle.
Get Your Reel Ready Before You Add a Single Wrap
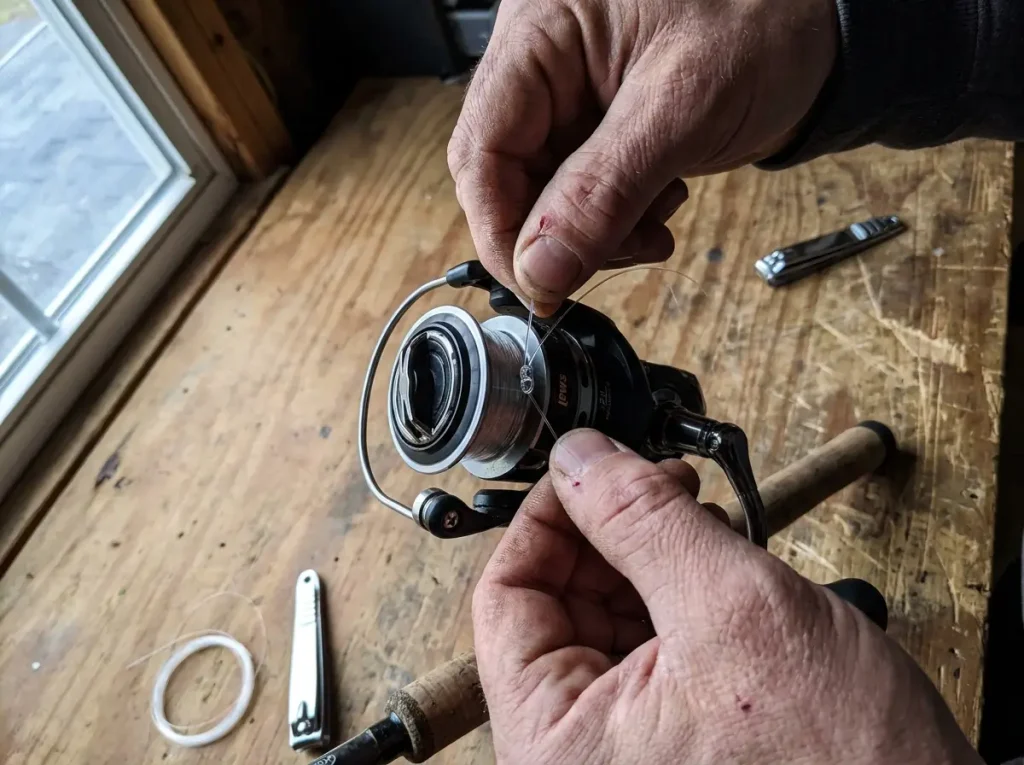
Most people grab the new spool and start cranking. The thirty seconds of setup before that crank is what decides whether the line lays flat or fights you the whole way.
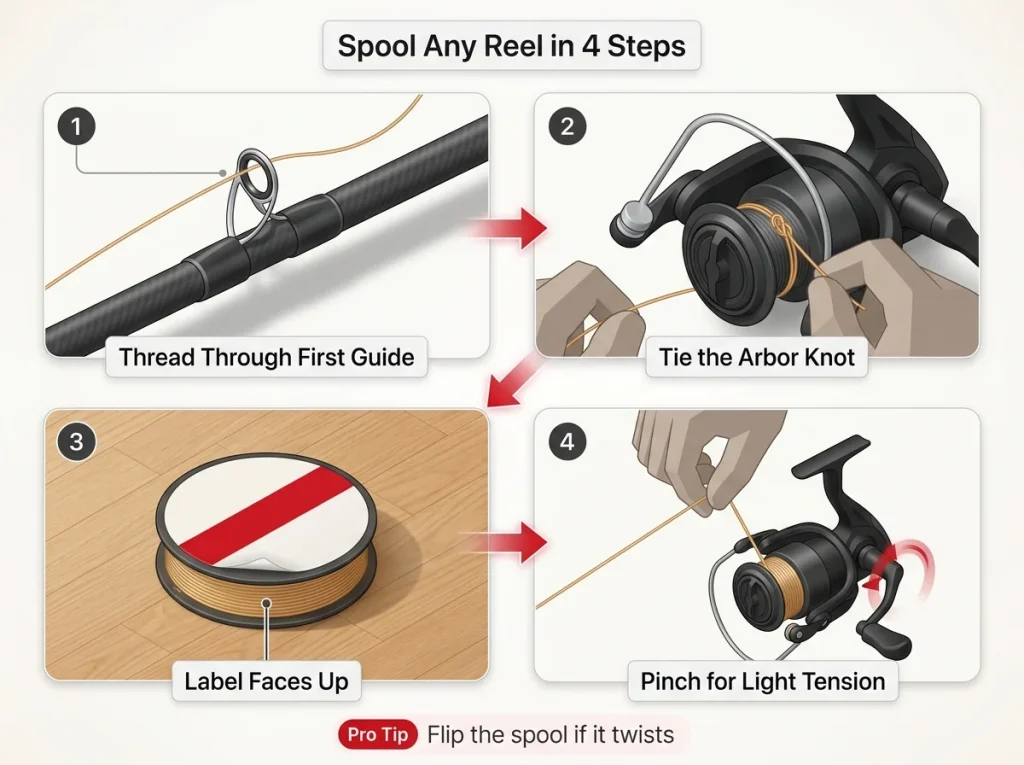
Start by running the new line through the first guide on your rod, the one closest to the reel, before you tie anything. Spooling with the rod assembled keeps the tension honest and feeds the line the same way it will travel when you cast. If you’re not sure which guide is which, the breakdown of the parts that make up your rod sorts out the names fast.
Thread the Line and Find the Arbor
The arbor is the bare center barrel of the reel spool, the part you tie to. On a spinning reel you reach it by opening the bail. On a baitcaster you pop the line through the level-wind and down to the spool. On a spincast you unscrew the nose cone to expose it. None of this is complicated once you know the names. Arbor, bail, filler spool, they all sound like jargon until you’ve handled them once.
The Arbor Knot (Works on Every Reel)
Here’s the part that saves you: one knot covers all three reel types. The arbor knot is just an overhand knot around the spool, a second overhand in the tag end, and a cinch. Pull it tight and the second knot jams against the first so it can’t slip. The Recreational Boating and Fishing Foundation’s spooling walkthrough shows the same sequence if you want to watch it once.
Open It Up the Right Way for Your Reel Type
One quick warning before you tie braid. If you knot braided line straight onto clean metal, it free-spins on the hookset and the whole spool turns in place while the fish swims off. Bare metal gives braid nothing to bite. We cover the fix in the line section below, so for now just know the arbor knot alone is not enough for braid.
How to Put Line on a Spinning Reel
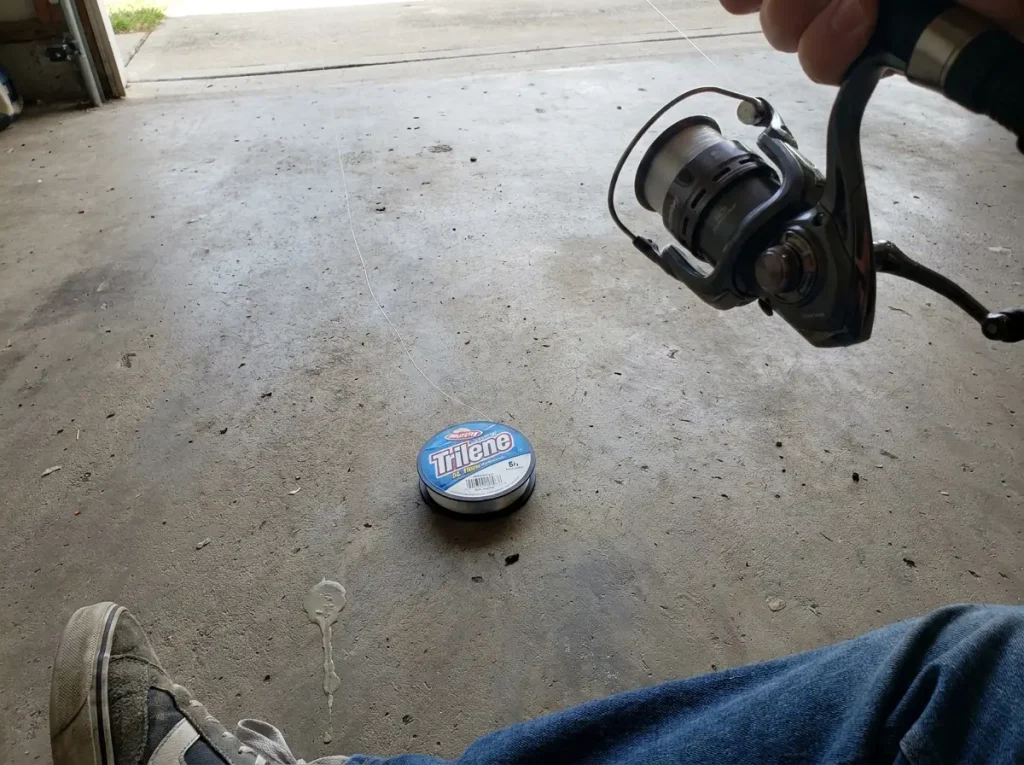
This is the reel nine out of ten beginners own, and it’s also the one most prone to line twist, so the filler-spool orientation matters more here than anywhere. If you’re still choosing a reel before you spool one, the rundown on picking your first reel type is worth a look first.
Step-by-Step Spinning Reel Spooling
Open the bail, tie the arbor knot, and close the bail. Pinch the line about 12 to 18 inches above the reel between your thumb and finger for light, even tension. Reel slowly, twenty or thirty turns, then stop and check. That’s the whole motion. Loose line goes on with gaps, and under load those gaps let the upper wraps dig into the lower ones and lock up mid-cast.
Which Way the Filler Spool Faces (Label Up)
This is the twist fix nobody checks. Lay the filler spool flat on the floor with the label facing up. That store spool the new line comes on goes by a few names, the supply spool, the feeder spool, the manufacturer spool, but it’s all the same thing. The line has to come off it the same rotational direction the bail lays it down, which is counterclockwise on a spinning reel. Stand the spool on its edge and feed it off the side, and you corkscrew twist into every single yard.
Drop the line slack after twenty turns. If it twists into a tight loop on its own, the filler spool is facing the wrong way. Flip it over and keep reeling, and the line goes on clean from there.
The 20-Turn Twist Check
Watch the gap between the filler spool and the reel as you crank. Clean line runs straight up. Twisting line starts to coil in that gap. Catching it at twenty turns means you flip the spool and lose nothing. Catching it after you’ve filled the reel means you strip it and start over.
How to Put Line on a Baitcaster
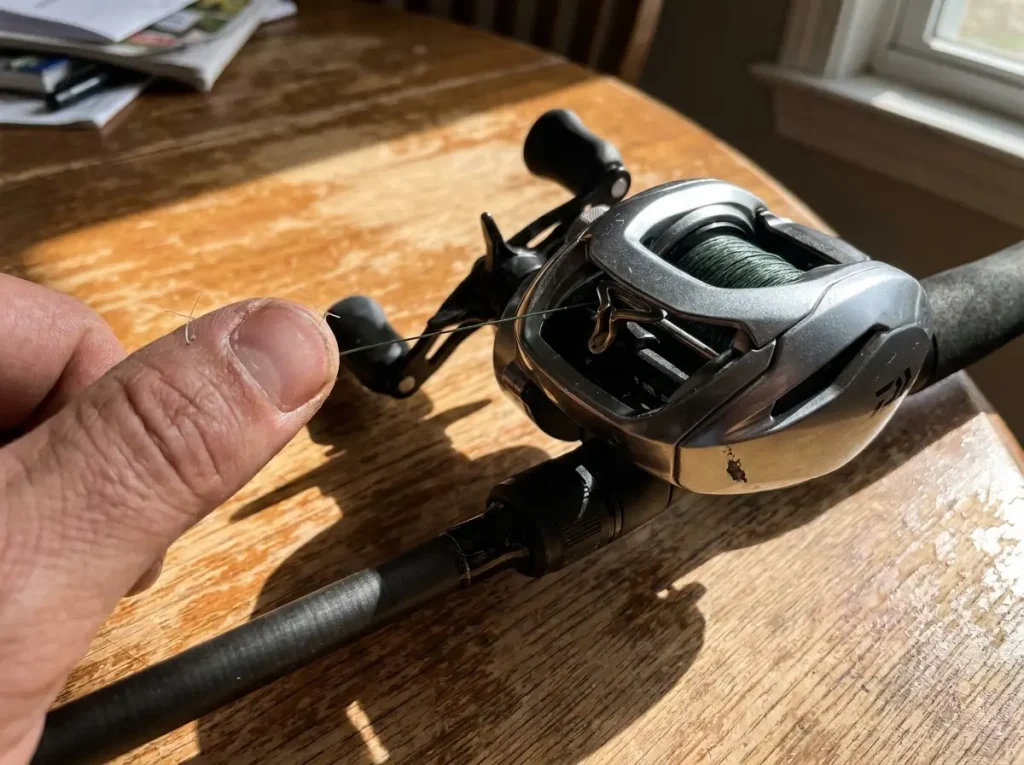
Good news first: a baitcaster twists line far less than a spinning reel, because the spool turns in line with the rod instead of feeding off the end. Bad news: it’s the easiest reel to overfill into a backlash.
Step-by-Step Baitcaster Spooling
Run the line through the level-wind guide, tie the arbor knot to the spool, and reel under light thumb pressure so the wraps lay even. The level-wind walks the line side to side for you, so your job is mostly steady tension. Because the line feeds more straight-on, the filler-spool orientation matters less here than on a spinning reel.
Why Overfilling Wrecks a Baitcaster First
Overfilling is the number one cause of backlashes for beginners and experts alike. A spool packed right to the lip throws extra coils on the cast that the level-wind can’t control, and you get a bird’s nest on cast one or two. Stop early. You can always add more. When a tangle does blow up on you, the trick to clearing a bird’s nest in under a minute saves the trip.
Tension and Level-Wind Tips
Even tension is everything on a baitcaster. Loose wraps bury under tight ones and lock the spool the first time a real fish pulls. Keep light pressure on the incoming line with your thumb the whole time. If your reel keeps backlashing even after you spool it clean, dialing in the spool tension knob is the next fix.
Run braid on a baitcaster too, and it still needs a grip layer. A single wrap of electrical tape around the bare arbor stops braid from spinning before you ever tie on.
How to Put Line on a Spincast (Push-Button) Reel
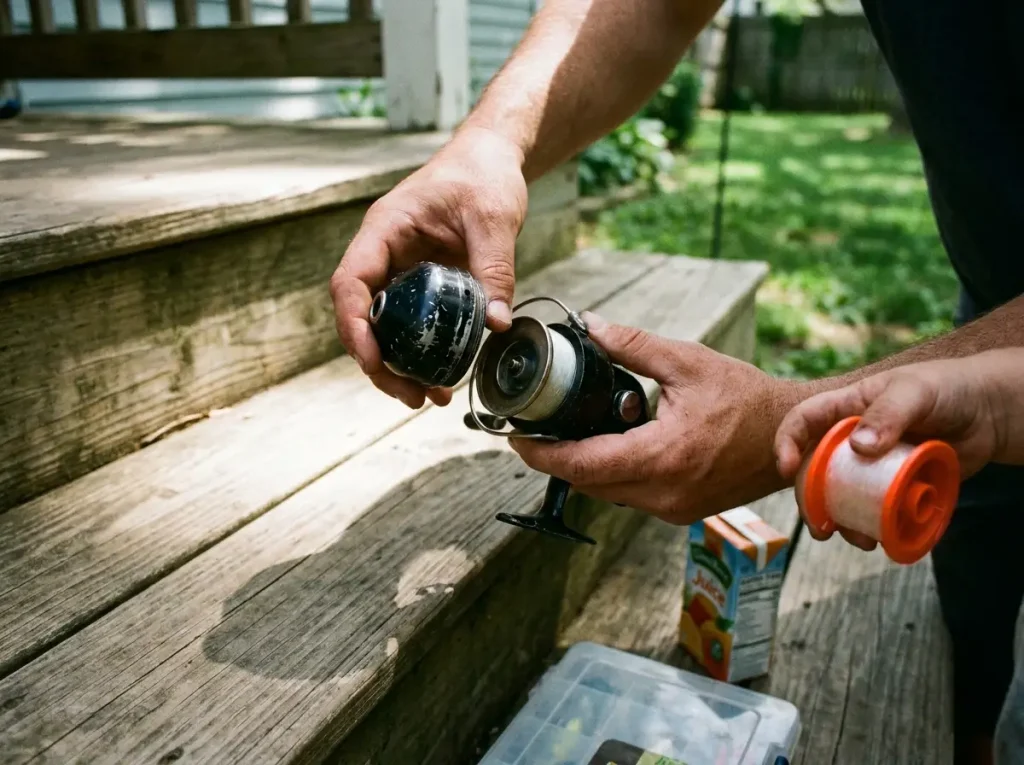
This is the reel most of us learned on as kids, and it’s the most forgiving to spool. The closed face hides the spool, so twist barely shows up at all.
Step-by-Step Spincast Spooling
Unscrew the nose cone to reach the spool, tie the arbor knot, and screw the cone back on. Thread the line through the hole in the cone first so you don’t trap it. Pinch for light tension, reel slowly, same as the others. The spincast reel is genuinely the simplest one to get right.
Why It Barely Twists
The closed face means the line doesn’t whip off the spool end the way it does on a spinning reel, so you get far less twist exposure. That’s exactly why these reels are the tangle-free choice for kids. If you’re setting up a young angler, the picks for tangle-free spincast combos pair the right reel with a forgiving rod.
The “You Can’t See the Spool” Fill Trick
The one catch with a spincast is that the cone hides the spool, so you can’t eyeball the fill level. Stop a hair earlier than you think you need to. Screw the cone back on, look through the line hole, and if you can’t see daylight around the spool, you’re full enough. Almost every other spooling guide ignores the push-button reel entirely, but plenty of first-timers own one, and the rules carry straight over.
Which Line to Spool — Mono, Fluoro, or Braid
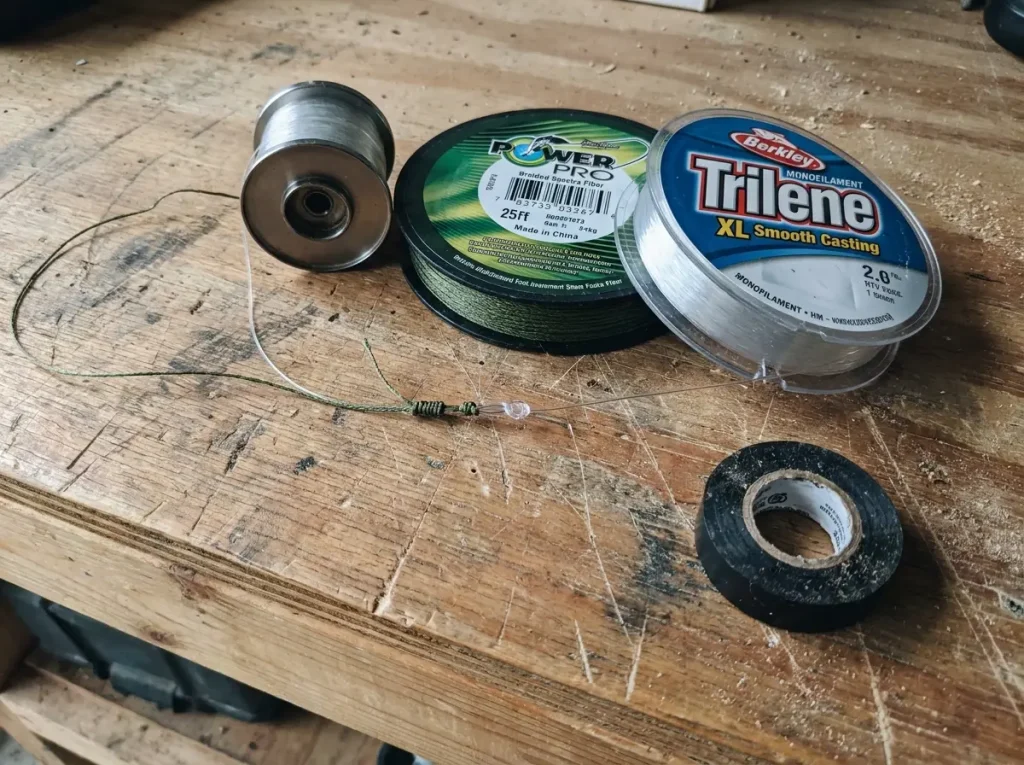
“Put line on” assumes you already know which line, and monofilament, fluorocarbon, and braid each behave differently going onto the spool. One of them has a trap that costs people their first fish. If you haven’t settled on a line yet, start with which line a beginner should use, then come back to spool it. This section is just about getting whichever line you pick onto the reel clean.
Mono — The Forgiving Starter (and Backing)
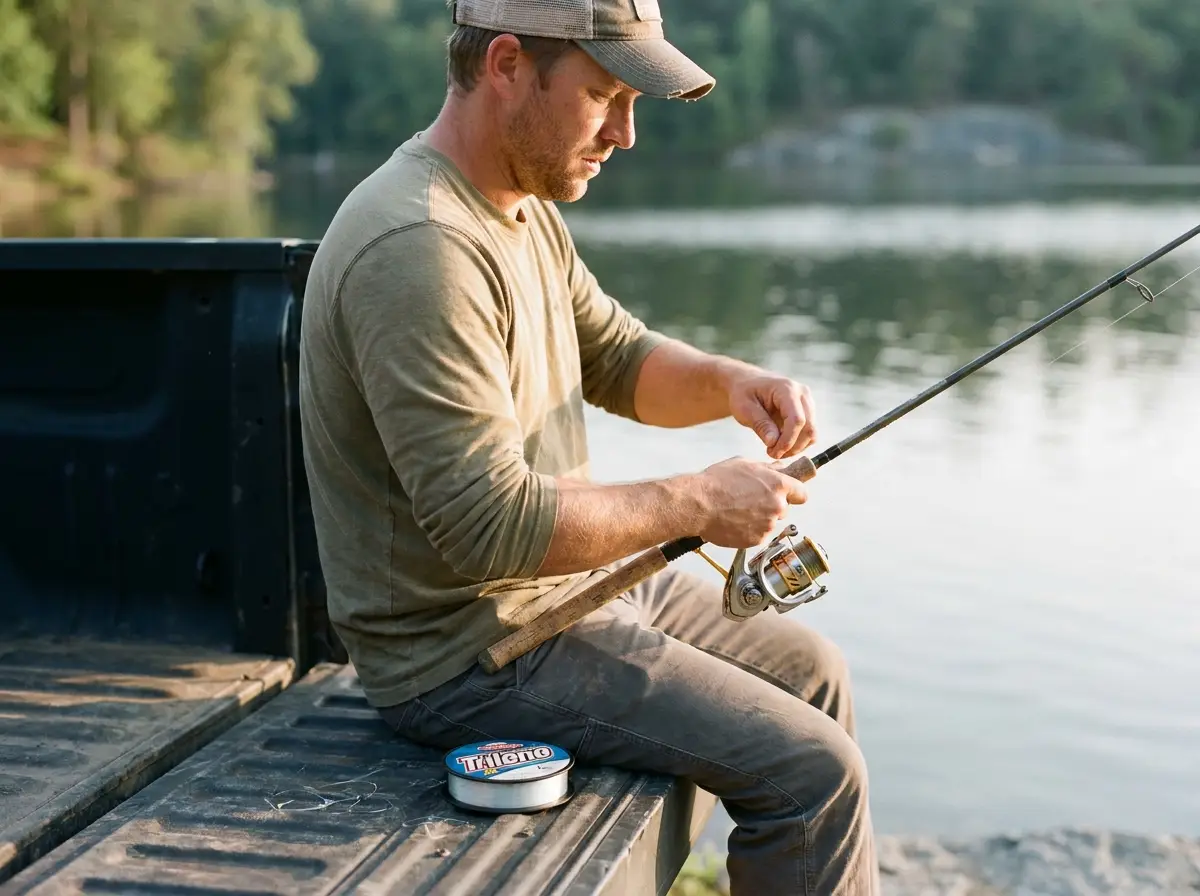
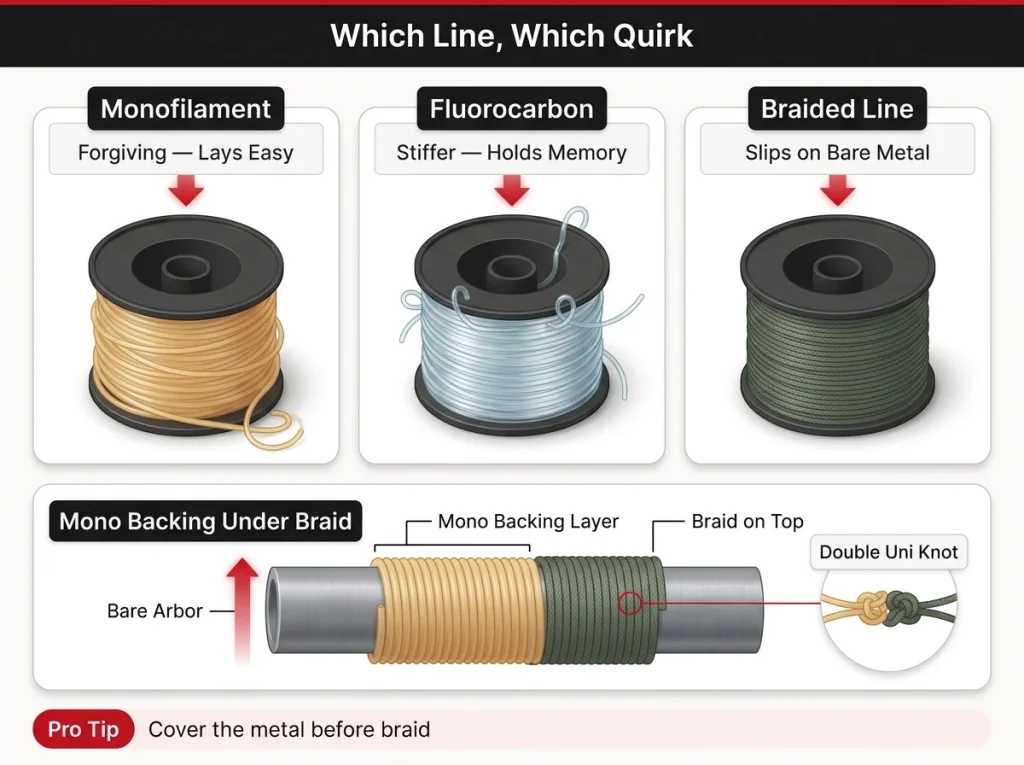
Mono is the line to learn on. It stretches, lays easy, and forgives a sloppy spool job better than anything else. It also doubles as cheap backing under braid, so one spool does two jobs. A bulk spool of Berkley Trilene XL monofilament in 8-pound test is the budget-friendly default most beginners start with and the same line you’ll wrap as backing later.
Fluoro — Spool It Tighter
Fluoro is stiffer and holds more memory, so it wants to spring off the spool in loose coils if you spool it lazy. Give it a touch more tension than mono and reel a little slower. A clear, low-stretch fluoro like Seaguar InvizX spools fine once you respect that stiffness, and it shines as a leader in clear water.
Braid — Why It Slips and How to Back It
Braid is the one that bites beginners. It’s slick and has zero stretch, so on a bare metal arbor it free-spins under load. You set the hook, the rod loads, and the whole line just turns on the spool while the fish leaves. That’s the hookset that goes nowhere, and it teaches mono backing forever.
The fix is simple. Wrap 8 to 10 pound mono around the arbor first, 20 to 25 yards of it, and join your braid to that mono with a double uni or Albright knot. No mono handy? One wrap of electrical tape around the bare arbor does the same job by covering the metal so braid can grip. Either way costs a few cents and works on any reel. A 30-pound braid like PowerPro Spectra holds rock-solid once it has that backing layer under it.
How Much Line to Put on a Reel
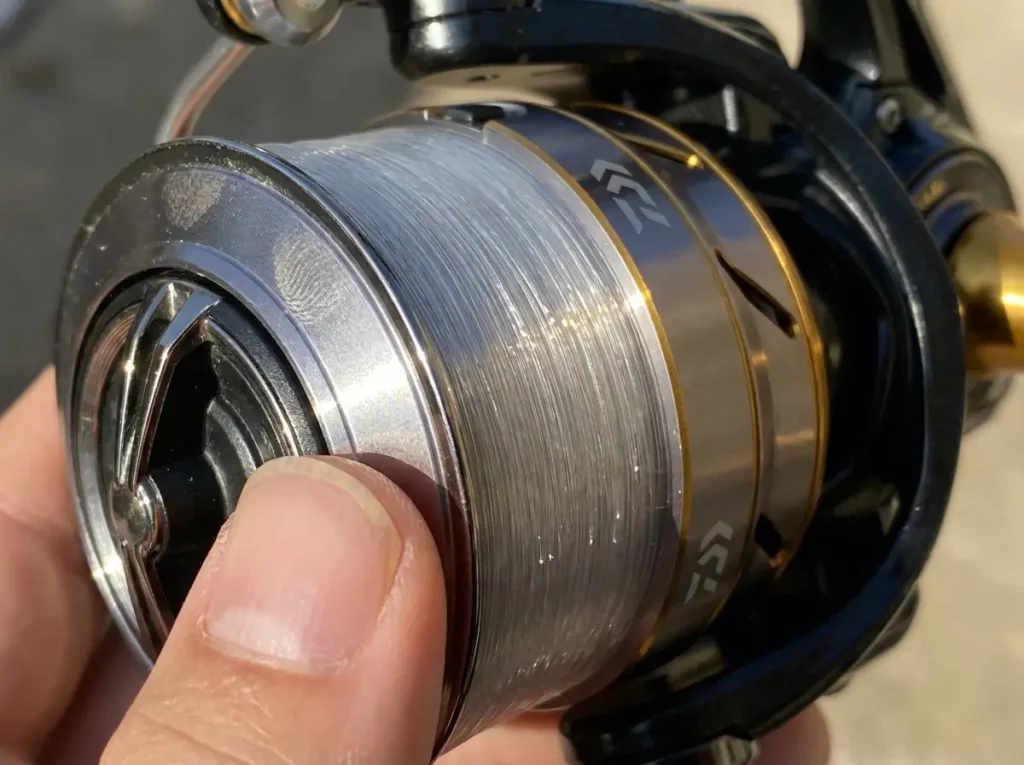
This is the one number that decides whether your first cast flies or explodes, and the instinct most people have, more line is better, is exactly backwards.
The 1/8-Inch Rule
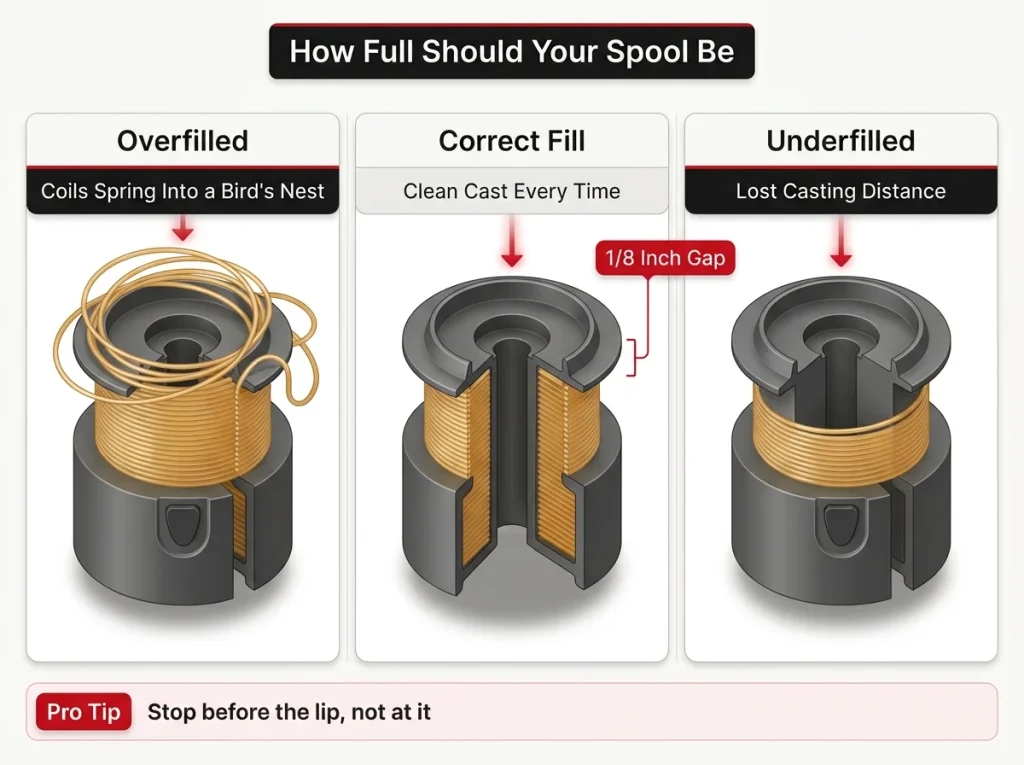
Fill the spool to within 1/8 inch of the lip. That gap is the difference between a clean cast and a tangle. The line needs a little room below the edge so it peels off smoothly instead of jumping off in coils.
Overfill vs Underfill (What Each Costs You)
Fill closer than 1/8 inch and the coils spring off the moment you cast, straight into a bird’s nest. Fill well under it and you lose casting distance and line capacity, which matters when a big fish runs. Proper fill is a real casting lever, not just tidiness, and it’s one of the simplest ways to squeeze more distance out of every cast.
You Don’t Need the Whole Spool
A 330-yard filler spool holds way more line than most reels need. You do not have to use all of it. Stop at the 1/8-inch line, cut it, and save the rest for your next respool. Topping the reel right to the lip “to get your money’s worth” is the classic first-cast bird’s nest waiting to happen.
How to Keep Your Line From Twisting
Twist is the quiet problem. It shows up as loops and pigtails off the rod tip three trips later, long after you’ve forgotten how the line went on. Here’s how to stop it for free and shed whatever sneaks through. If you want the full picture of why a spinning reel twists line in the first place, that breakdown goes deeper on the causes.
The Flip-and-Check (Catch Twist Live)
You already met this one. The instant you see line coil in the gap between the filler spool and the reel, flip the filler spool over and keep reeling. The twist unwinds itself as you go. It’s real-time twist detection, and it costs you nothing but a glance every twenty turns.
The Free Pencil Method (Skip the Store Tool)
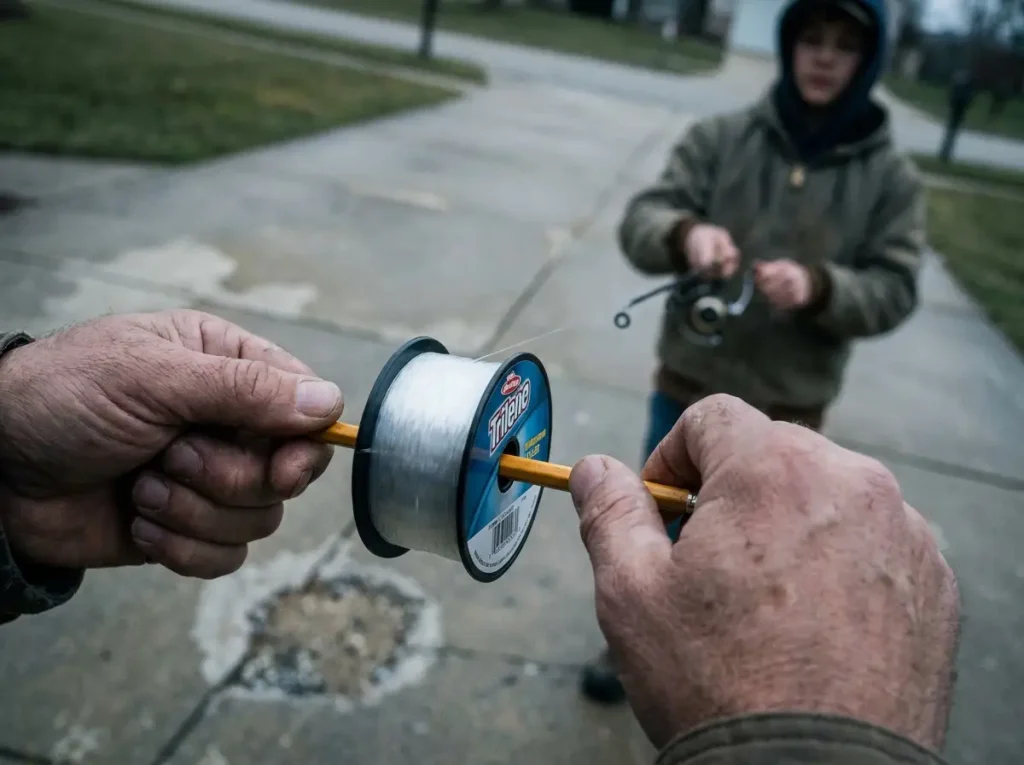
You don’t need a spooling gadget. Push a pencil through the center hole of the filler spool, hand the ends to a buddy, or pin it between your knees, and let the spool spin freely as you reel. The slight twist this introduces actually reverses itself on your first cast, so you end up at net zero. It does exactly what a store spooler does, which is a good reminder that knowing where to save on gear beats buying every gadget on the rack.
If you fish solo a lot and want a tool anyway, the Piscifun line spooler clamps the filler spool with tension so you don’t need a second pair of hands. It’s a convenience, not a requirement. The pencil works just as well.
When you pinch heavier line for tension, run it through a folded microfiber cloth or rag instead of bare fingers. Braid under load can slice a fingertip before you feel it.
Purge Twist on the Water
Here’s the trick almost nobody mentions. On your first trip with fresh line, before you tie on a lure, let out a long stretch of bare line behind a slow-moving boat or kayak and tow it for a few minutes. The drag shakes out any residual twist still in the line. A wipe of line conditioner like KVD Line and Lure Conditioner on fresh mono or fluoro does a similar job at home, relaxing the coils and the line memory that fights you on the cast.
Final Word
Spooling a reel is one of those jobs that feels fussy until you’ve done it twice, then it’s automatic. The same arbor knot, the same label-up orientation, and the same 1/8-inch fill work on every reel you’ll ever own. Cover the metal before you trust braid, and never top the spool all the way to the lip. And skip the spooler tool if you want to. A pencil and a buddy do the same thing for free.
Spool one reel the right way before your next trip and watch the bird’s nests disappear. When the line starts looking dull or coming up rough, that’s your cue for when it’s time to respool again.
Frequently Asked Questions
01Which way should the line come off the spool when filling a reel?
Lay the filler spool flat on the floor with the label facing up, so the line peels off the same direction the reel lays it down. Feeding it off the side, with the spool standing on edge, is the most common cause of line twist.
02How full should you fill a fishing reel with line?
Stop about 1/8 inch from the edge of the spool lip. Filling closer than that makes the coils spring off into a bird’s nest on your first cast. Filling well under it quietly costs you casting distance.
03Do you need mono backing under braided line?
On a bare metal spool, yes. Braid is slick and free-spins under load, so it needs a grip layer. Wrap 8 to 10 pound mono around the arbor, or one wrap of electrical tape, before joining your braid with a double uni knot.
04Can you put new line on over old line, or do you have to strip it first?
You can leave old line as backing if it’s still in decent shape and the spool isn’t already near full, then tie the new line to it. If the old line is worn, brittle, or the spool is full, strip it first and start clean.
Risk Disclaimer: Fishing, boating, and all related outdoor activities involve inherent risks that
can lead to injury. The information provided on Master Fishing Mag is for educational and informational purposes
only. While we strive for accuracy, the information, techniques, and advice on gear and safety are not a substitute
for your own best judgment, local knowledge, and adherence to official regulations. Fishing regulations, including
seasons, size limits, and species restrictions, change frequently and vary by location. Always consult the latest
official regulations from your local fish and wildlife agency before heading out. Proper handling of hooks, knives,
and other sharp equipment is essential for safety. Furthermore, be aware of local fish consumption advisories. By
using this website, you agree that you are solely responsible for your own safety and for complying with all
applicable laws. Any reliance you place on our content is strictly at your own risk. Master Fishing Mag and its
authors will not be held liable for any injury, damage, or loss sustained in connection with the use of the
information herein.
Affiliate Disclosure: We are a participant in the Amazon Services LLC Associates Program, an
affiliate advertising program designed to provide a means for us to earn advertising fees by advertising and linking
to Amazon.com. As an Amazon Associate, we earn from qualifying purchases. We also participate in other affiliate
programs and may receive a commission on products purchased through our links, at no extra cost to you. Additional
terms are found in the terms of service.